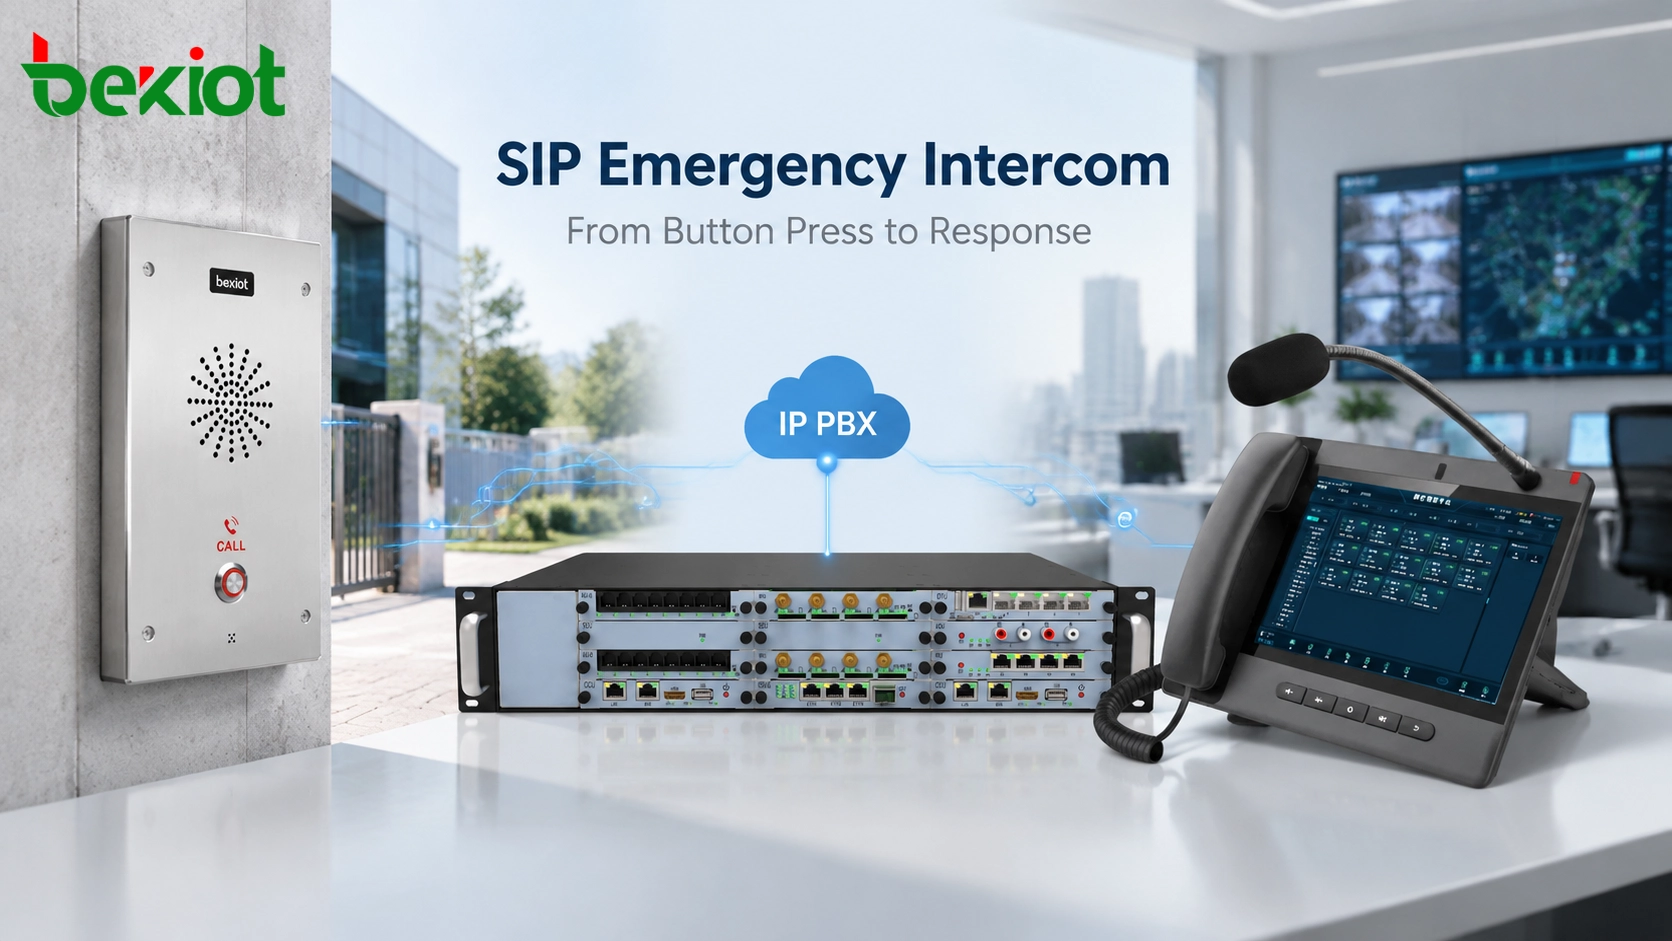
When a person presses an emergency button, the visible action happens within seconds. However, the communication process behind this simple operation involves multiple technical steps, including device activation, SIP signaling, call routing, response handling, and real-time voice communication.
A SIP emergency intercom creates a direct communication path between the person requesting assistance and the responsible response team. From the initial button press to the final conversation, multiple components must work together to ensure that the emergency request reaches the correct destination quickly and reliably.
Unlike traditional emergency call devices that may rely on dedicated telephone lines, SIP-based emergency intercoms use IP communication technology. They can integrate with IP PBX systems, dispatch consoles, security phones, and other network-based platforms to create a more flexible emergency response workflow.
Why Understanding SIP Emergency Intercom Call Flow Matters
Emergency communication systems are designed for situations where response speed and reliability are critical. A failed connection may not only be a technical issue but may also affect the ability of personnel to receive assistance.
Understanding the complete SIP emergency intercom workflow helps engineers during system design, installation, testing, and maintenance.
Common problems that can be identified through call flow analysis include:
Emergency button activation failure
SIP registration problems
Incorrect IP PBX routing rules
Response terminal connection failure
Audio communication problems after connection
By understanding every stage from the field device to the response center, engineers can build more reliable emergency communication systems.
Components Involved in a SIP Emergency Intercom Call
A SIP emergency intercom call is not completed by a single device. The communication process usually involves several components working together through an IP network.
The main components include:
SIP Emergency Intercom
The SIP emergency intercom is the communication endpoint installed at the location where assistance may be required. It usually includes an emergency button, microphone, speaker, and network interface.
When activated, the device generates a SIP call request based on its configured destination and communication rules.
Network Infrastructure
Ethernet switches, network connections, and IP infrastructure provide the communication path between the emergency intercom and the communication server.
Network design can affect emergency communication performance. Factors such as network availability, traffic priority, and power supply should be considered during deployment.
IP PBX or SIP Server
The IP PBX acts as the central call management component. It receives SIP requests, applies routing rules, and forwards the call to the appropriate response terminal.
Depending on the project design, the destination may be:
Security desk
Control room
Dispatch console
Authorized SIP phone
Response Terminal
The response side is responsible for receiving and handling the emergency request. It may be a dispatch console, security telephone, or another authorized communication device.
The response terminal allows operators to communicate with the person requesting assistance and coordinate the appropriate action.
A typical SIP emergency communication structure is:
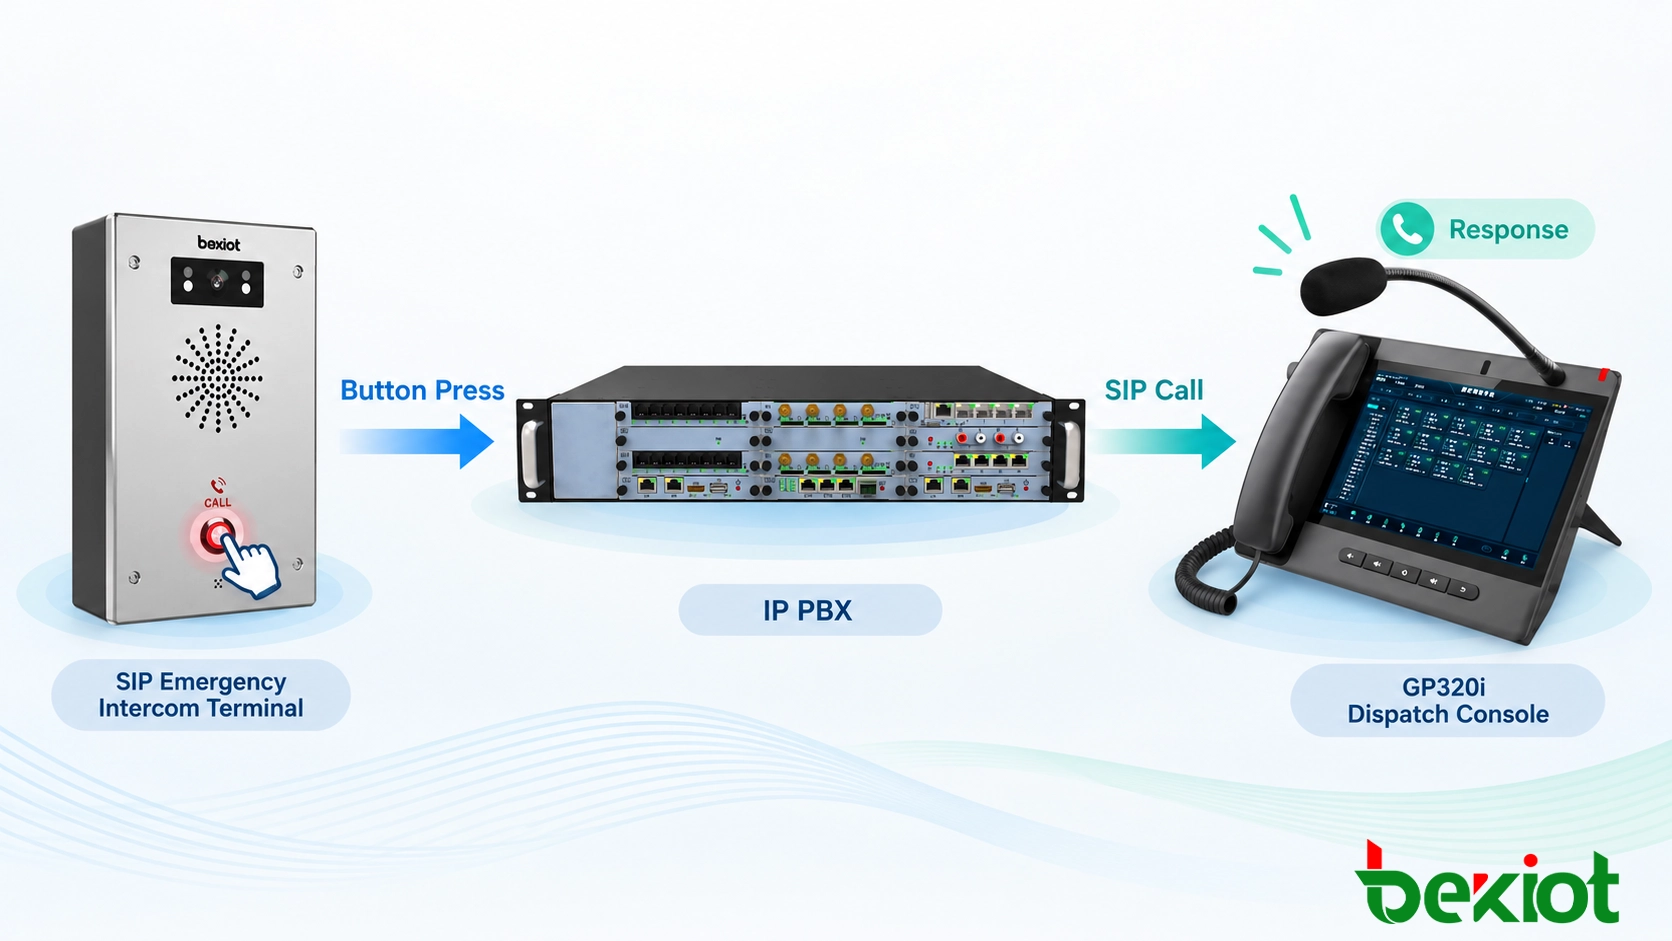
Emergency Intercom → Network → IP PBX / SIP Server → Dispatch Console → Response Operator
Step 1: Emergency Button Activation
The emergency communication process starts when a user activates the intercom. This action may come from a physical emergency button, SOS key, help point button, or external alarm input connected to the device.
Although the user only performs a simple action, the device must complete several internal processes before a call can be established.
After activation, the SIP emergency intercom typically performs the following actions:
Detects the button press or trigger signal
Checks the configured emergency destination
Generates a SIP call request
Sends the request through the IP network
The destination can be configured according to the application. For example, an emergency help point in a public area may call a security desk, while an industrial emergency telephone may connect directly to a control room.
The basic process is:
Emergency Button Pressed → Device Trigger → SIP Call Request Generated
Step 2: SIP Registration and Call Request
Before an emergency call can be made, the SIP emergency intercom normally needs to register with the SIP server or IP PBX. Registration allows the communication system to recognize the device and manage future call requests.
The registration relationship is typically:
SIP Emergency Intercom → SIP Server / IP PBX
During normal operation, the device periodically maintains its SIP registration status. This allows the system to know whether the emergency terminal is online and available.
When the emergency button is pressed, the device sends a SIP call request to the configured destination.
Step 3: Call Routing Through IP PBX
The IP PBX is responsible for deciding where the emergency call should be delivered. Instead of directly connecting the emergency terminal to a single phone, the communication server applies configured routing rules.
During emergency call routing, the IP PBX may handle:
Caller identification
Destination extension lookup
Emergency call priority handling
Call forwarding or escalation rules
A typical emergency call path is:
SIP Emergency Intercom → IP PBX → Security Desk → Dispatch Console or SIP Phone
SIP Signaling Process During an Emergency Call
SIP signaling controls how the emergency call is created, accepted, and terminated. Understanding the signaling sequence helps engineers troubleshoot communication problems.
A simplified SIP emergency call process includes:
REGISTER → INVITE → 100 Trying → 180 Ringing → 200 OK → ACK → RTP Audio → BYE
REGISTER: Device Availability
The emergency intercom registers with the SIP server to indicate that it is online and ready to receive communication services.
INVITE: Emergency Call Request
When the button is pressed, the device sends an INVITE message to request a communication session with the configured response destination.
Ringing and Call Acceptance
The receiving terminal alerts the operator. After the operator accepts the call, the system establishes the communication session.
RTP Audio Communication
Once the SIP session is established, RTP streams carry the actual voice communication between the emergency intercom and response terminal.
The complete workflow can be summarized as:
Button Press → SIP Signaling → IP PBX Routing → Call Acceptance → RTP Voice Communication
Related Product: SIP Intercom
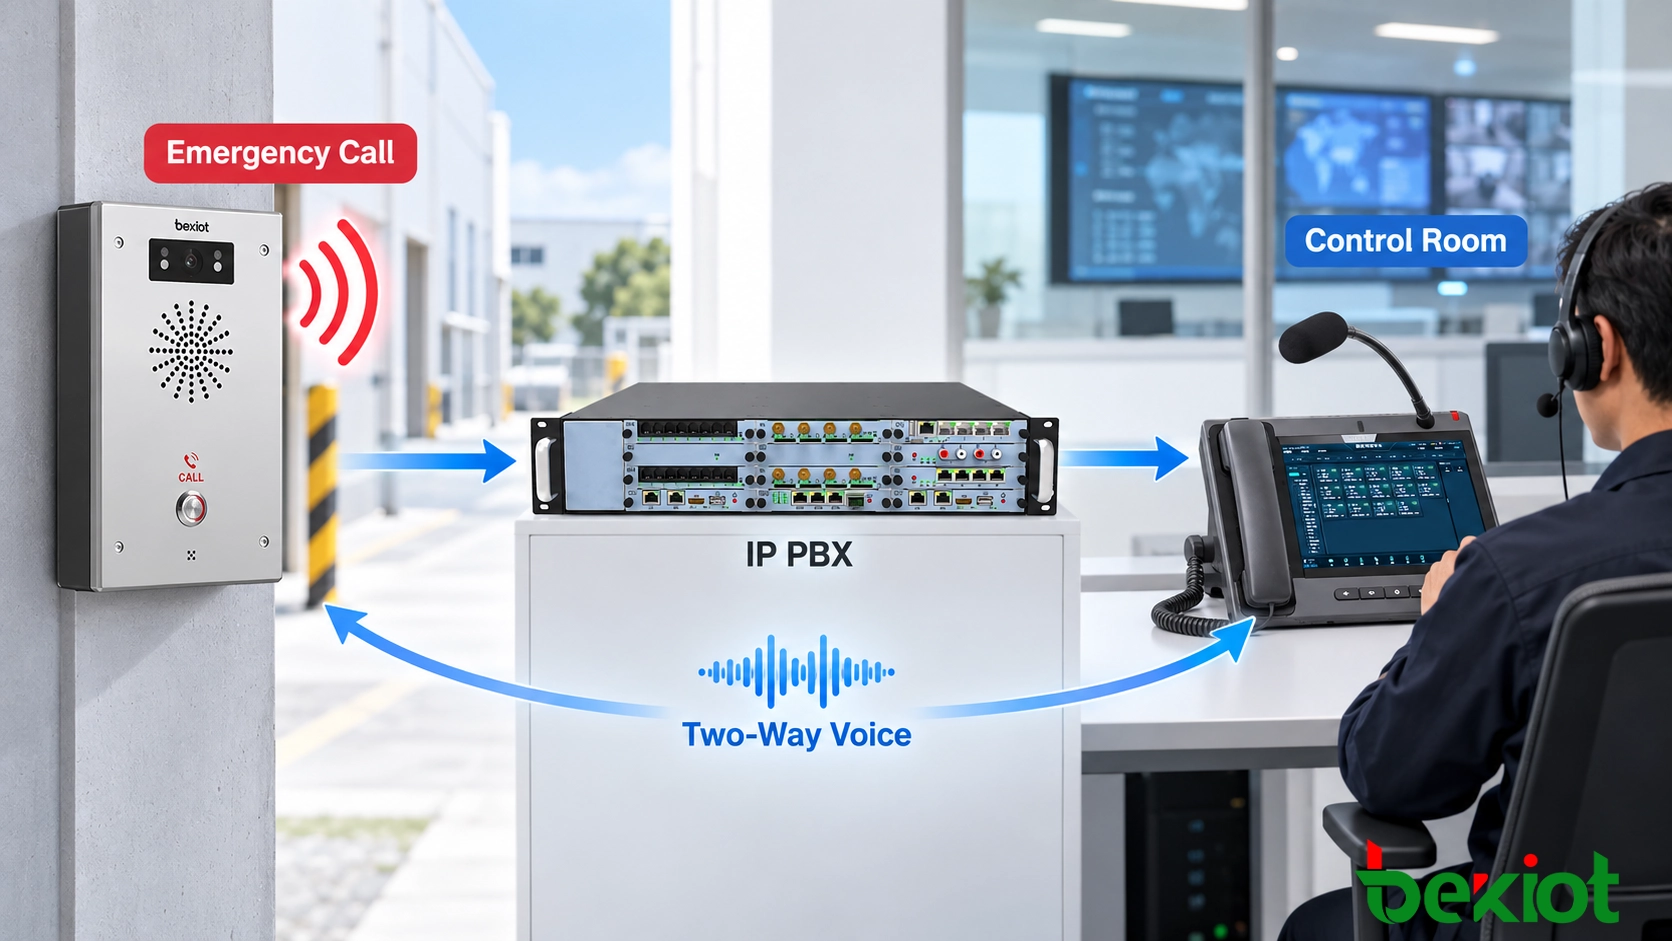
Step 4: Response From Control Room
After the IP PBX completes call routing, the emergency request reaches the designated response terminal. Depending on the system design, the receiving side may be a security phone, dispatch console, control room terminal, or another authorized SIP endpoint.
The response process usually includes:
Receiving the incoming emergency call notification
Identifying the calling device or location
Accepting the call request
Establishing two-way voice communication
In emergency applications, operators need to quickly understand where the request originated and communicate with the person requiring assistance. Therefore, device identification and location information are important parts of the response workflow.
Step 5: RTP Audio Communication and Voice Quality
After SIP signaling completes the call setup process, RTP is responsible for transmitting the actual voice data between the emergency intercom and the response terminal.
Voice quality during an emergency call depends on several factors:
Network stability
Bandwidth availability
Audio codec configuration
Echo cancellation performance
Microphone and speaker installation environment
Unlike normal office communication, emergency intercoms are often installed in public areas, industrial locations, parking facilities, transportation environments, or outdoor spaces. Therefore, clear voice communication is an important part of system design.
Emergency Intercom Deployment Considerations
A reliable SIP emergency intercom system depends not only on call flow but also on proper deployment planning. The installation environment, network design, and maintenance strategy all affect long-term operation.
Network Reliability
SIP emergency intercoms rely on IP networks for communication. Network planning should consider availability, traffic priority, and communication stability.
For critical applications, engineers may consider:
Network redundancy
VLAN separation
Quality of Service (QoS)
Monitoring of connected devices
Power Supply and Availability
Emergency communication devices should remain available when assistance is needed. Depending on the application, power planning may include PoE switches, backup power systems, or UPS protection.
Installation Location
The installation position directly affects usability. Emergency intercom locations should be easy to identify, accessible to users, and suitable for the surrounding environment.
Common installation locations include:
Parking areas
Campus entrances
Industrial facilities
Transportation stations
Public help points
Handling Missed Emergency Calls and Escalation
Emergency communication systems should consider situations where the first response operator cannot answer the call immediately.
A reliable configuration may include:
Multiple destination numbers
Call forwarding rules
Retry mechanisms
Escalation to additional response personnel
For example, an emergency intercom in a parking area may first call the security desk. If the call is not answered within a defined period, the system can transfer the request to another authorized location.
SIP Emergency Intercom vs Traditional Emergency Telephone
SIP emergency intercoms provide advantages compared with traditional emergency telephone systems by using IP communication technology and software-based management.
| Category | SIP Emergency Intercom | Traditional Emergency Telephone |
|---|---|---|
| Communication Network | IP network and SIP communication | Dedicated telephone lines |
| Management | Centralized management through SIP platforms | More limited configuration options |
| Integration | Supports IP PBX, dispatch, and security integration | Usually requires additional systems |
| Expansion | Flexible through network deployment | More dependent on physical wiring |
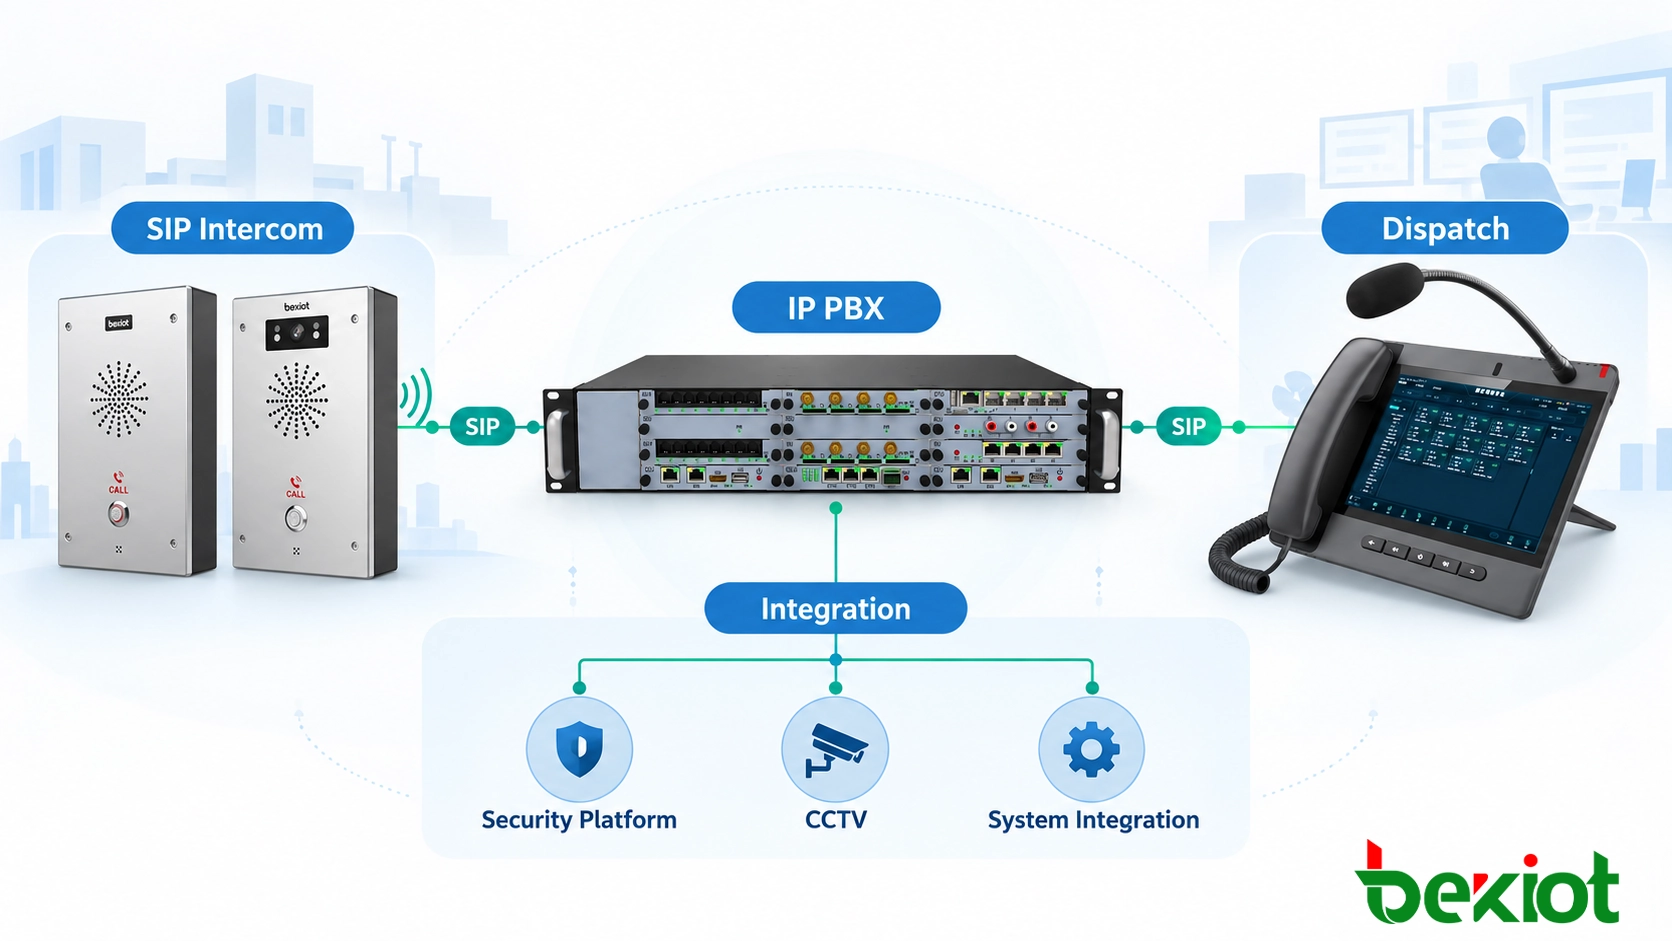
Integrating SIP Emergency Intercoms With Other Systems
One of the main advantages of SIP-based emergency communication is the ability to integrate with other IP-based systems.
Depending on project requirements, SIP emergency intercoms can work together with:
IP PBX systems
Dispatch consoles
CCTV platforms
Access control systems
Mass notification platforms
This integration allows emergency communication to become part of a wider response workflow instead of operating as an isolated device.
Related Product: IP PBX System
Becke Telcom SIP Emergency Communication Solutions
Becke Telcom provides SIP-based emergency communication solutions designed for applications requiring direct voice communication, fast response, and flexible system integration.
A complete SIP emergency communication workflow connects field communication points, IP communication platforms, and response personnel into one coordinated system. This allows organizations to manage emergency requests more efficiently and improve communication reliability during critical situations.
Becke Telcom SIP emergency communication solutions can support different application requirements, including:
Public emergency help points
Industrial emergency communication locations
Campus assistance systems
Transportation and public facilities
Security communication points
SIP emergency intercom terminals can connect with IP PBX systems, dispatch platforms, and other SIP communication devices to create a complete communication path from the emergency location to the response team.
When designing an emergency communication system, organizations should consider the complete workflow rather than only selecting the endpoint device. Factors such as response location, network architecture, escalation rules, and integration requirements all affect system performance.
Related Product: SIP Intercom
Emergency Call Testing and Acceptance
After installation, SIP emergency intercom systems should be tested to ensure that every part of the communication workflow operates correctly.
A complete acceptance test may include:
Button Trigger Test
Verify that the emergency button activates the configured call function correctly and that the device generates the expected communication request.
Call Routing Test
Confirm that emergency calls reach the correct response terminal according to the configured routing rules.
Audio Quality Test
Test two-way voice communication to ensure that the microphone, speaker, and network transmission provide clear communication.
Failover and Escalation Test
Verify the behavior when the first response terminal does not answer. The system should perform the configured forwarding or escalation process.
Regular testing helps ensure that emergency communication equipment remains reliable when it is needed.
FAQ
What happens when the emergency button is pressed on a SIP intercom?
The device detects the button activation, generates a SIP call request, and sends the request through the communication server to the configured response terminal.
Does a SIP emergency intercom require an IP PBX?
Many SIP emergency intercom systems use an IP PBX or SIP server for call routing, although the exact architecture depends on project requirements and communication design.
How does an emergency intercom identify the caller location?
The system can identify the device through SIP extension information, device configuration, location records, or integrated management platforms.
What happens if an emergency call is not answered?
Depending on the configuration, the system can use forwarding, retry functions, multiple destinations, or escalation procedures to improve response reliability.
How do I choose a SIP emergency intercom for my project?
Selection should consider the installation environment, communication requirements, integration needs, network conditions, and expected emergency response workflow.