IntroductionOverviewPhonebookServer is a Windows desktop application designed an
PhonebookServer is a Windows desktop application designed and developed by our company for managing and distributing phonebooks to our VoIP devices. It can be used easily with simple configuration. It can also function as a module within the FDMS management platform.
This document is intended for personnel who need to distribute phonebooks to our VoIP devices.
Extract the PhonebookServer compressed package to your local computer, open the PhonebookServer folder, and run PhonebookServer.exe directly to launch the application, as shown in Figure 1: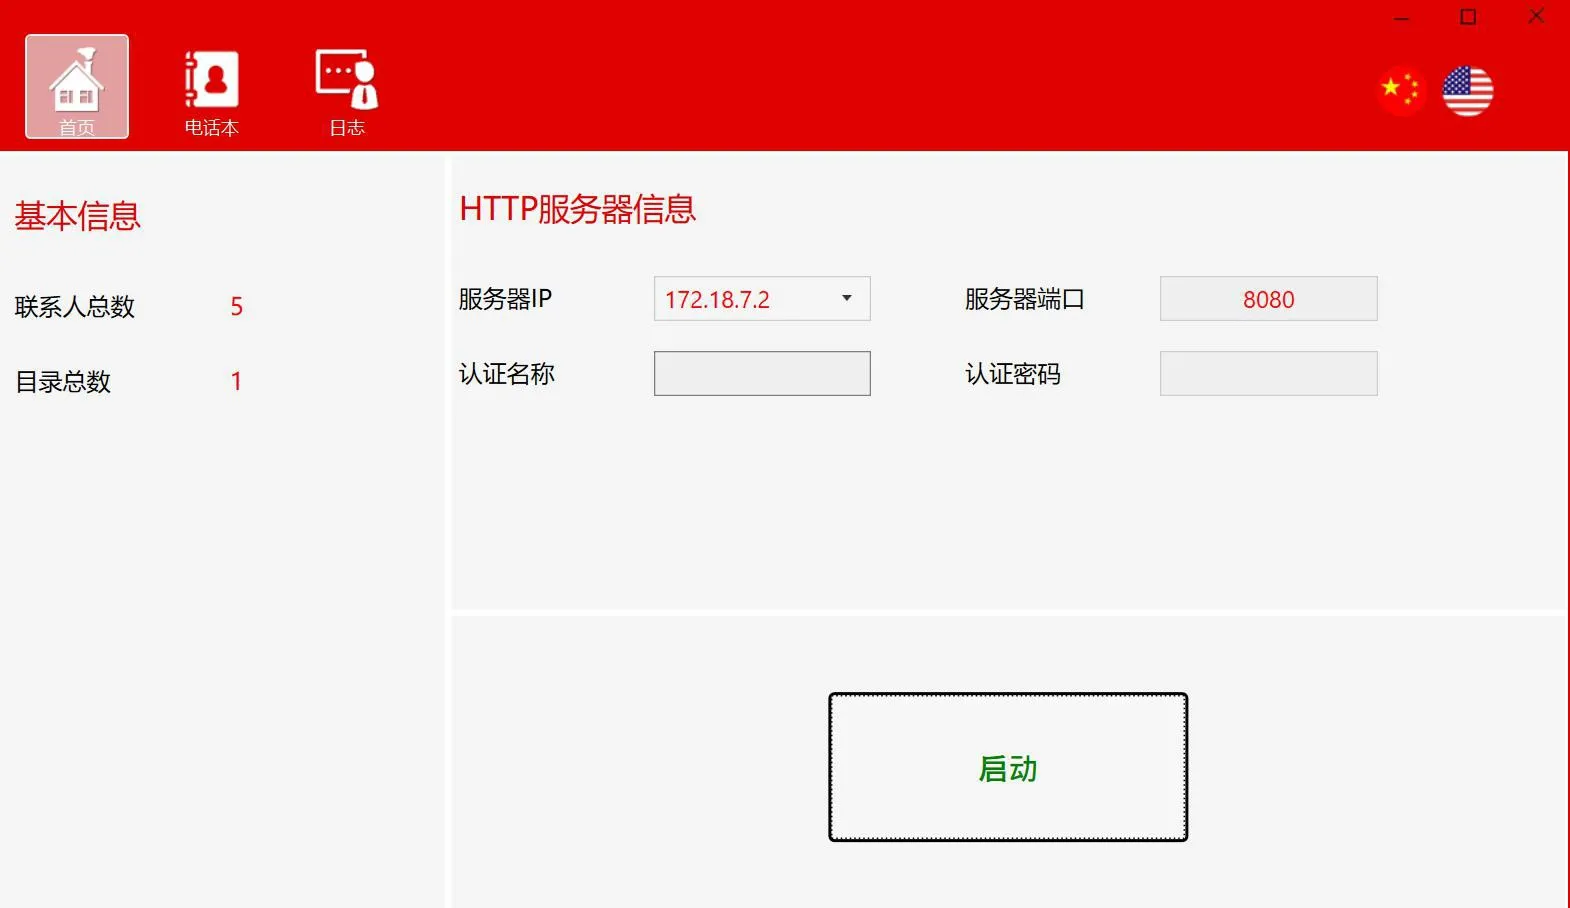
Figure 1
Before use, open the PhonebookServer software, configure the HTTP server settings, and start the server.
Basic information: total number of contacts and total number of directories
HTTP server information: server IP address and port, authentication username and password
Start button: used to start or stop the server
Configure HTTP Server Information
1. Set the server IP address
The server IP field displays the list of network adapters on the PC, and you can select the required IP address from the drop-down list.
Note: Do not use 127.0.0.1 as the server startup IP address.
2. Set the server port
You can use the default port 8080 or set another available port that is not already in use.
3. Set the authentication username and password
Start the Server
Click the Start button on the home page. After the server starts, the phonebook server address will be displayed and can be copied with one click.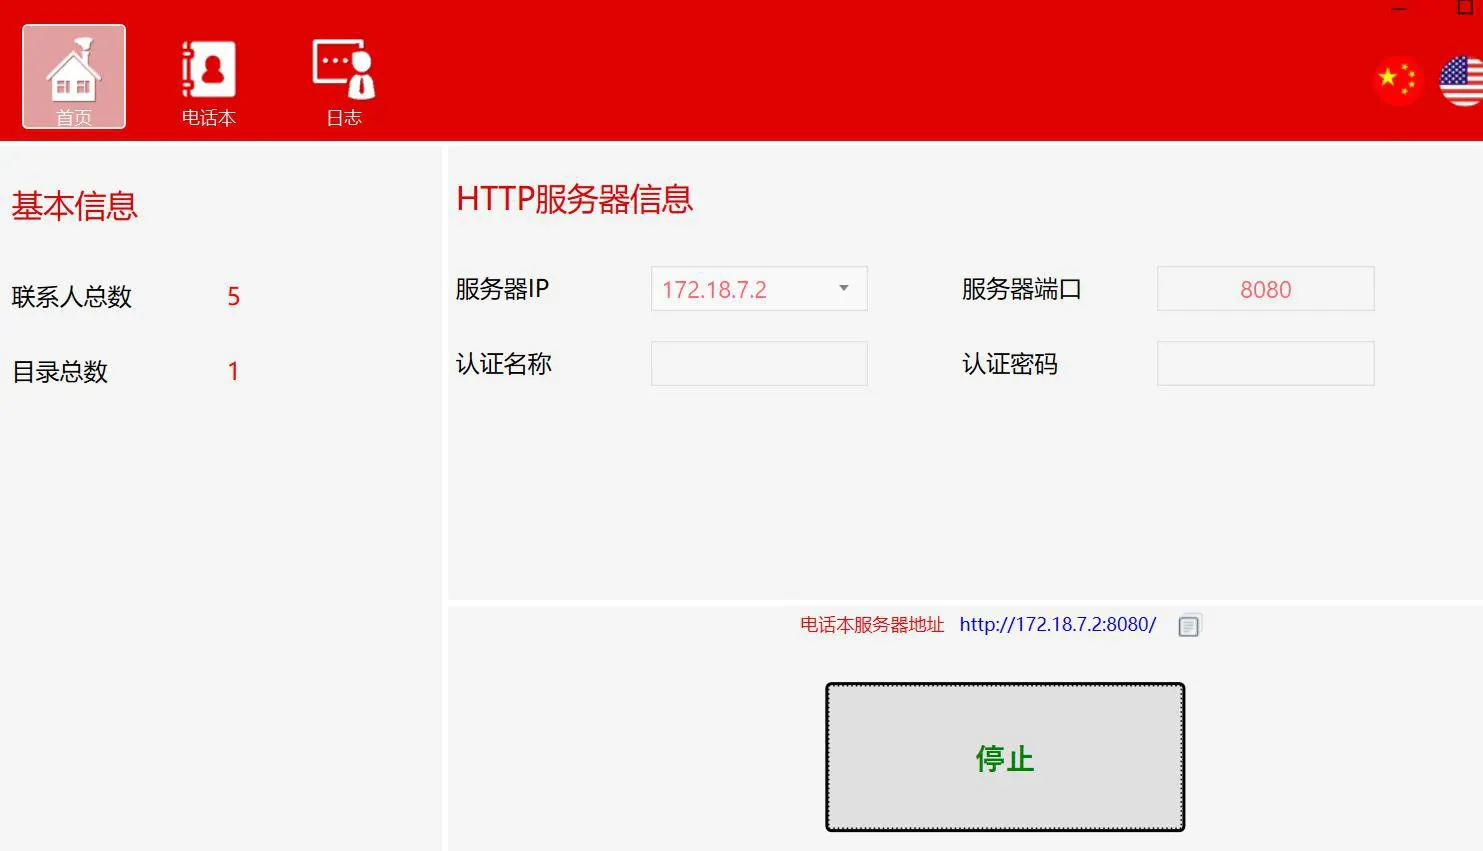
This section is mainly used for directory and contact management.
Directory Operations
Add a Directory:
1. Click the Add button
2. Right-click an empty area in the directory panel and select Add
Add a Subdirectory (multi-level supported):
1. Select the directory where you want to add a subdirectory, then click the Add button
2. Select the directory where you want to add a subdirectory, right-click it, and select Add
Delete a Directory:
1. Select the directory or subdirectory to delete, then click the Delete button
2. Select the directory or subdirectory to delete, right-click it, and select Delete
Edit the Directory Name:
1. Select the directory or subdirectory to edit, then click the Edit button
2. Select the directory or subdirectory to edit, right-click it, and select Edit
Export a Directory:
Select the directory to export, click the Export button or right-click and select Export, set the phonebook server address (or choose a previously configured phonebook server address), then select the export path and save the file.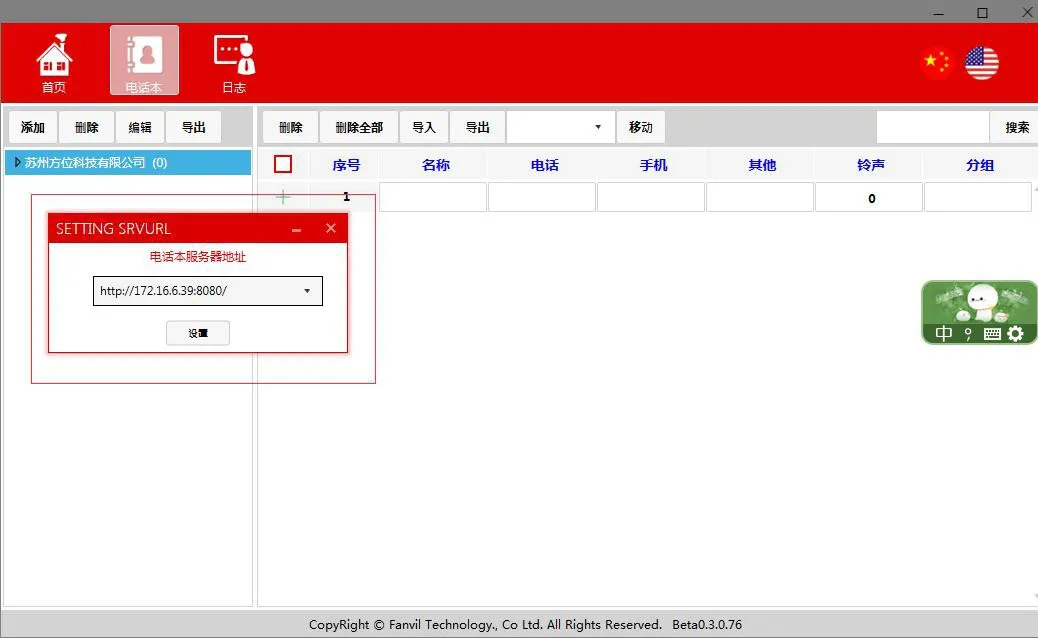
Contacts
Add a Contact:
Select the directory where you want to add the contact, edit the contact information (name and phone number are required), and after editing, click the blank area in the new contact editing field to save it.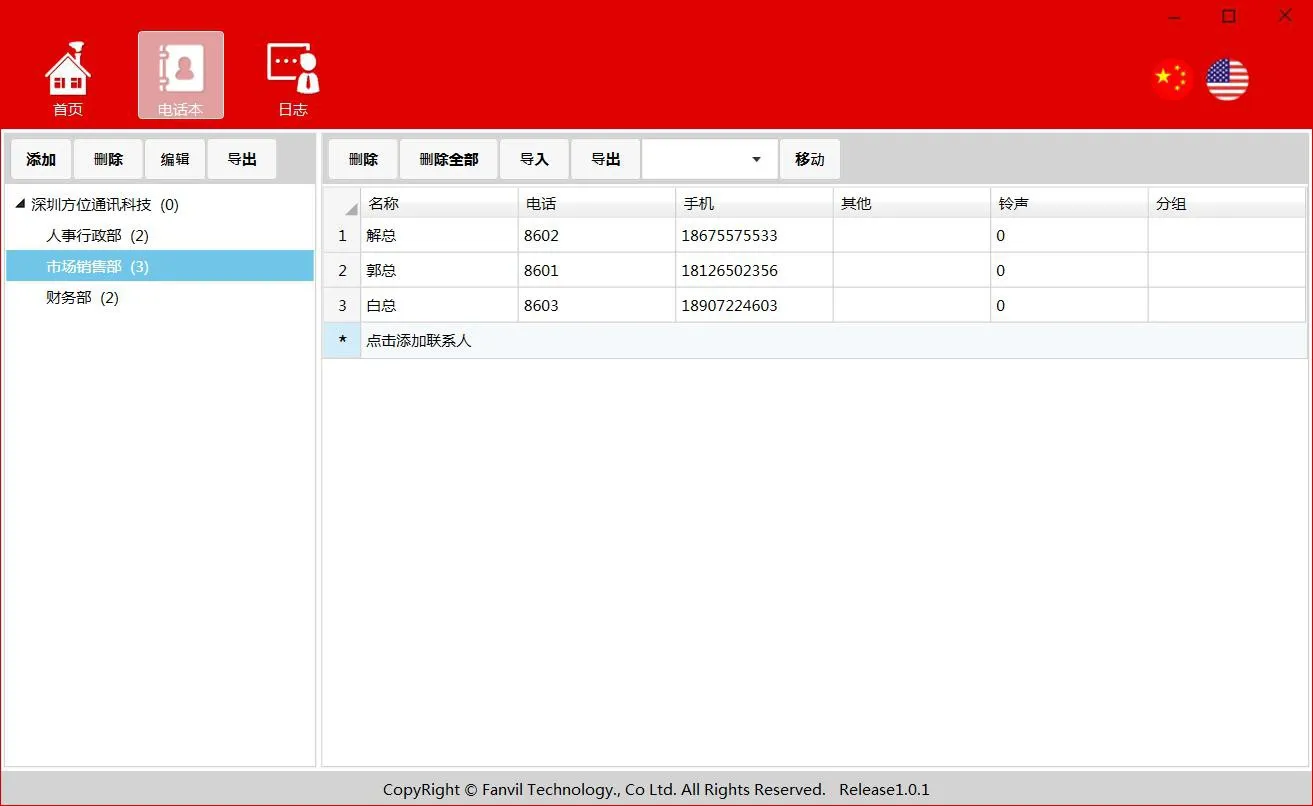
Delete a Contact:
Select the contact you want to delete, then click the Delete button
Delete All Contacts:
Import Contacts:
Select Directory->Import->select the file to import. After the import is completed successfully, the imported contacts will be displayed under the current directory.
Export Contacts:
Select Directory->Export->select the destination path for export
Move Contacts:
Select the contact to move->Select Directory->Move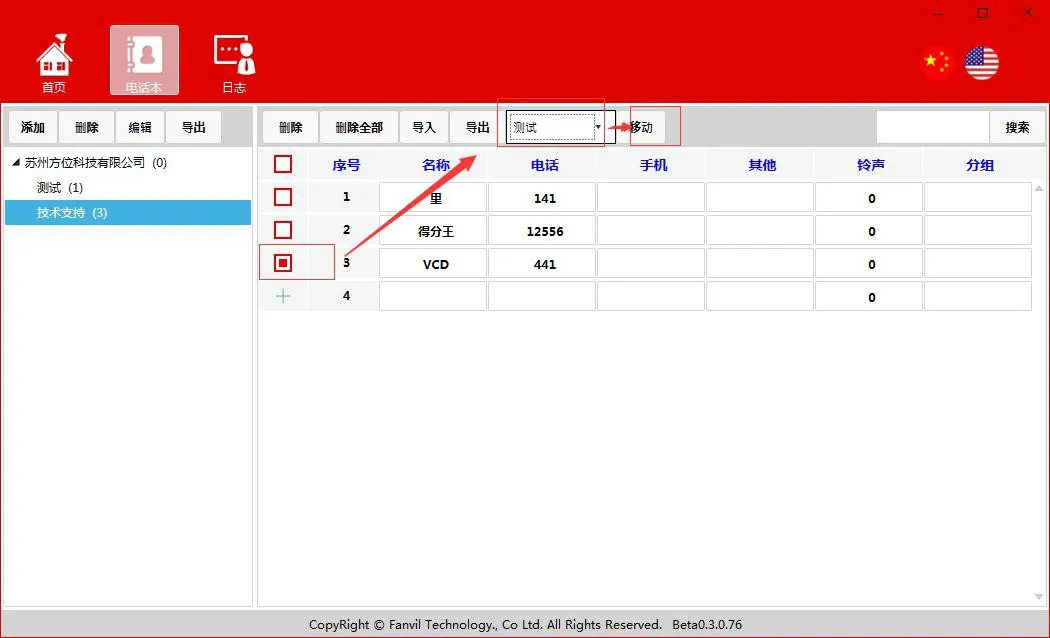
Search Contacts:
Supports matching by contact name, phone number, and other fields
Logs
The log section mainly records operations related to directories, contacts, and server start/stop actions.
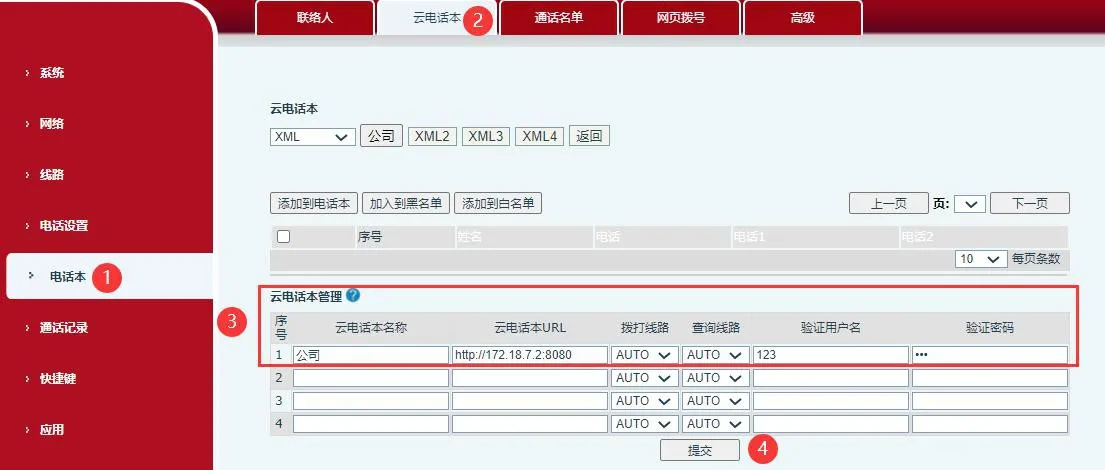
Open the phone web interface, then go to “Phonebook”-“Cloud Phonebook”-“Cloud Phonebook Management”. Set the URL to the phonebook server address, and set the username and password to the authentication credentials configured on the PhonebookServer. After saving the settings, the phone will access the phonebook server successfully.