IntroductionOverviewThis document applies to phone recording configuration.Phone
This document applies to phone recording configuration.
Phone recording includes three types: local recording (USB recording, which only supports USB devices formatted in FAT32), server recording (which only supports G.722 and G.711 A/U codecs), and SIP INFO recording (the SIP server must support SIP INFO recording, such as a 3CX server).
Applicable product models: all of our phone models
1) Log in to the phone web interface, go to Applications >> the Recording Management page, check Enable Recording, and select Local as the recording type.
Note: Only USB devices formatted in FAT32 are supported.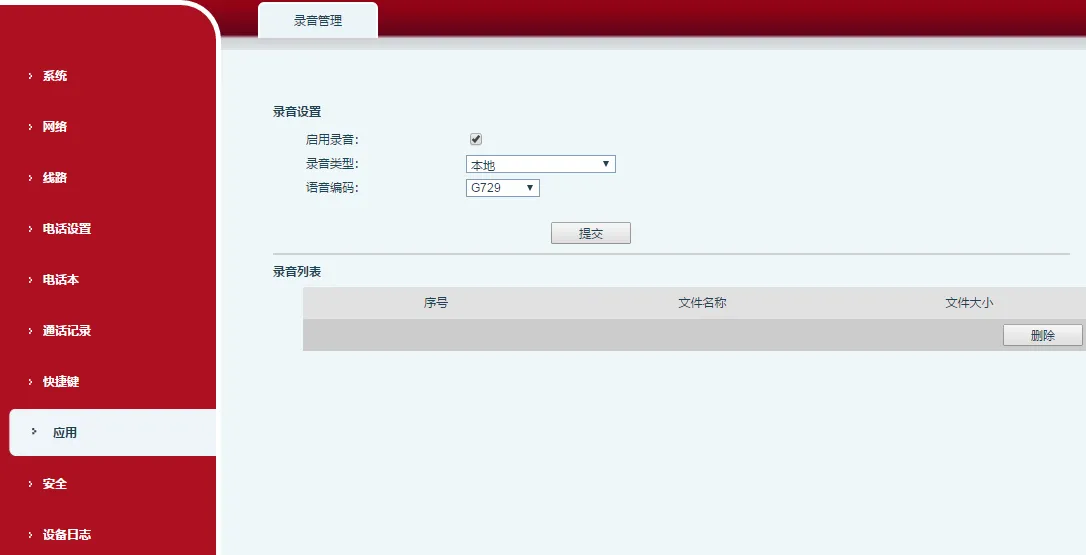
2) Go to the Function Key page, set a function key type to Function Key, and choose Record as the subtype, as shown below.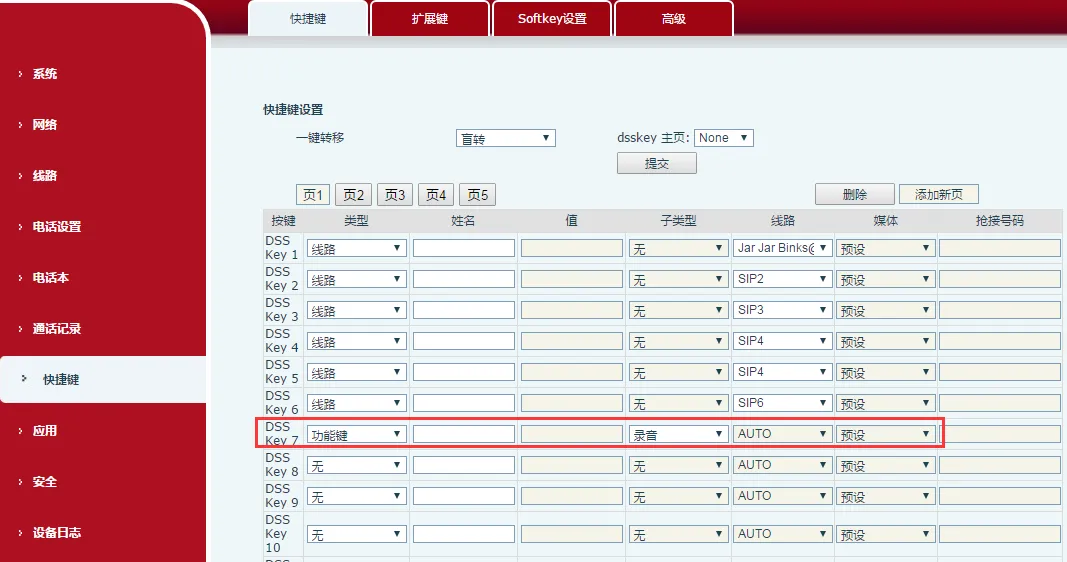
3) Insert a USB device into the phone, establish a call, and press the recording key to start recording. The LCD screen will display a recording icon. During recording, the call can be paused and resumed, as shown below: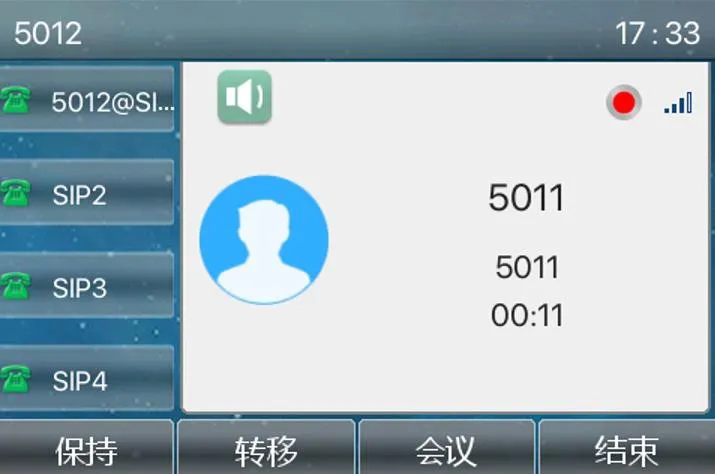
4) The call audio will be saved as a file named Record_current system time. After the call ends, users can view the recording list either from the web interface >> Applications >> Recording Management, or from the phone menu >> Menu >> Applications >> USB >> Browse Audio, as shown below: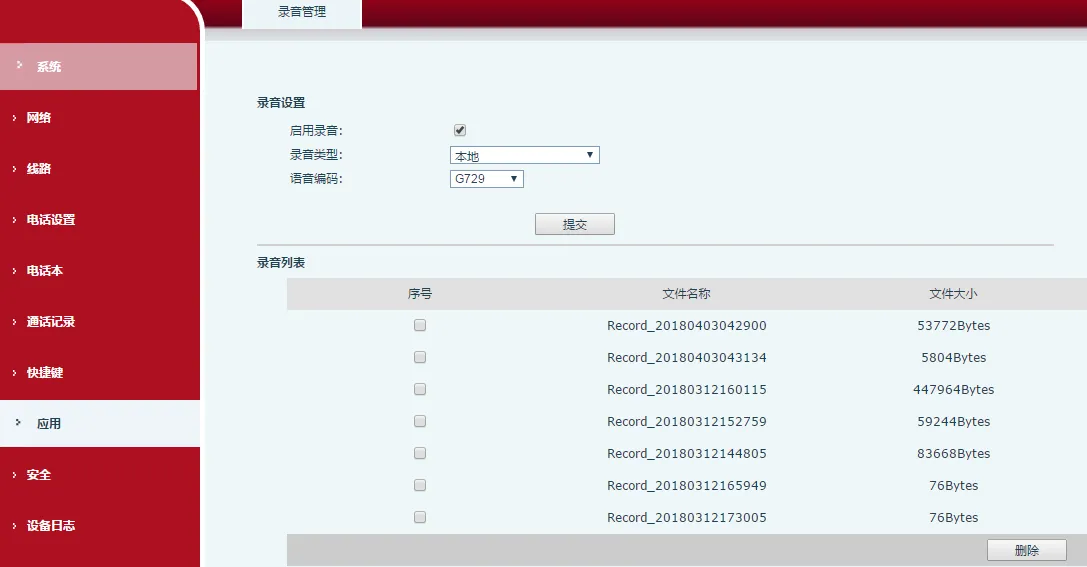
5) On the phone, users can go to Menu >> Applications >> USB >> Browse Audio, use the up and down keys to select an audio file, and press Play to play the recorded audio.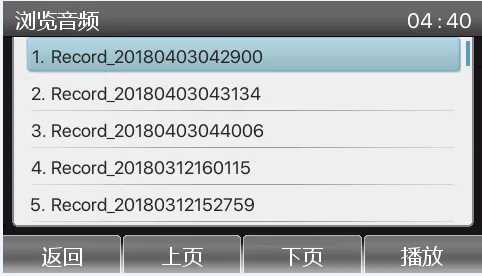
1) Log in to the phone web interface, go to Applications >> the Recording Management page, check Enable Recording, and select Network as the recording type. Enter the IP address and port of the recording software in Server Address and Server Port. Note: the current recording software only supports PCMA, PCMU, and G.722 codecs, as shown below.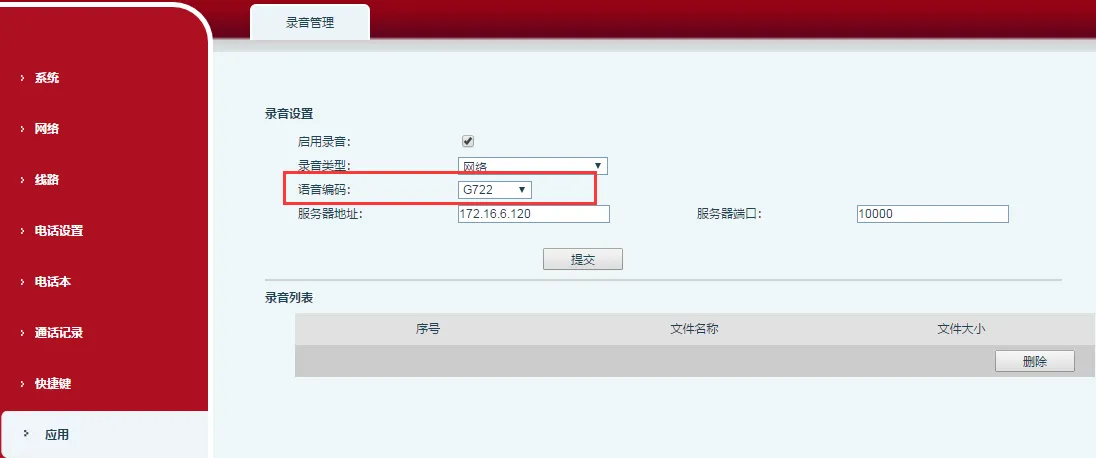
2) Go to the Function Key page and set a function key type to Function Key, with Record as the subtype.
3) Start the recording software, as shown below: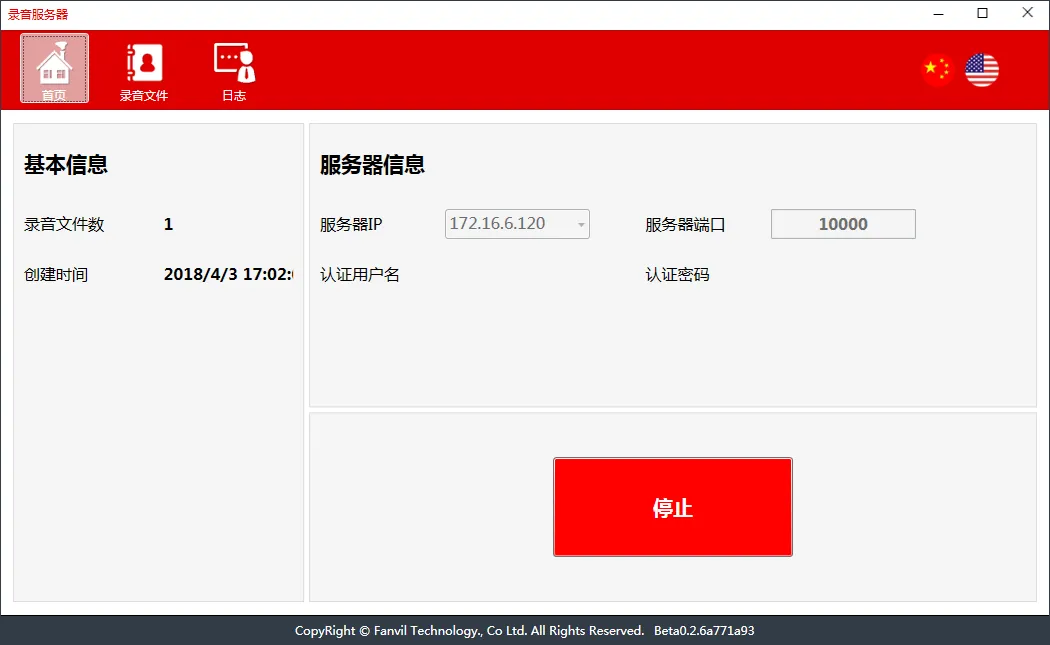
4) Establish a call and press the recording key to start recording. The LCD screen will display a recording icon. During recording, the call can be paused and resumed.
5) After the call ends, view or download the recorded audio in Audio Files in the recording software. After downloading, the file can be played locally, as shown below.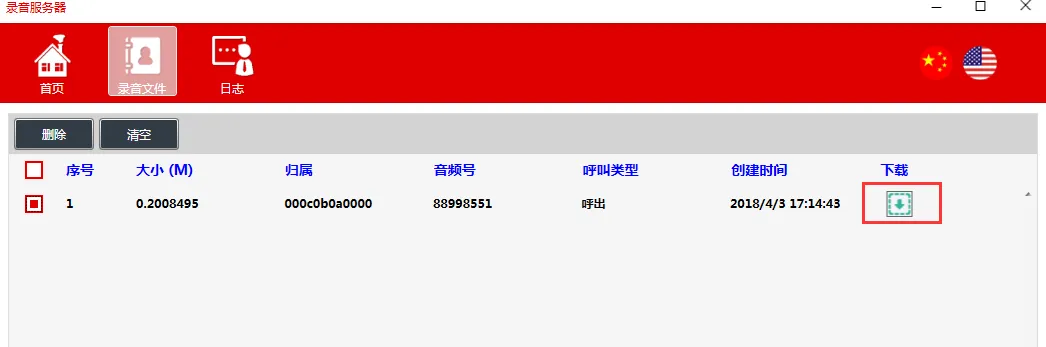
1) Log in to the phone web interface, go to Applications >> the Recording Management page, check Enable Recording, and select Sip Info as the recording type. Note: when using Sip Info recording, the SIP server must support SIP INFO recording. Here, a 3CX server is used as an example.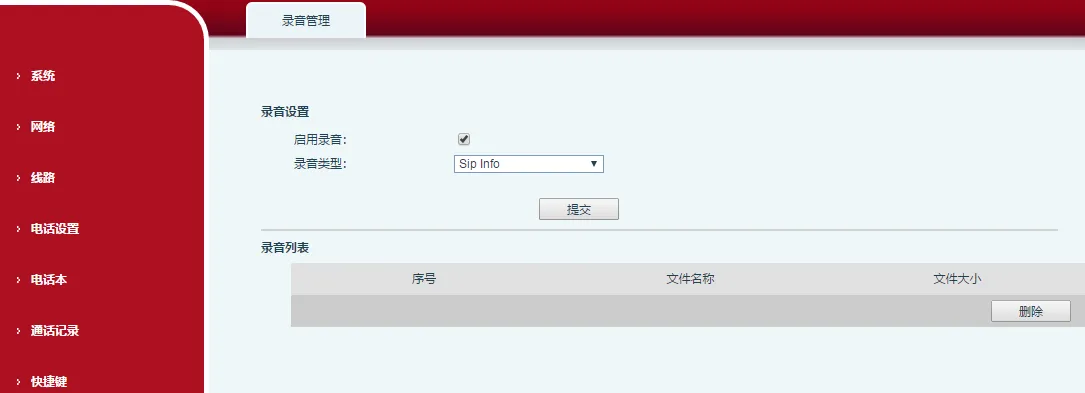
2) Go to the Function Key page and set a function key type to Function Key, with Record as the subtype.
3) Establish a call and press the recording key to start recording. The LCD screen will display a recording icon. During recording, the call can be paused and resumed.
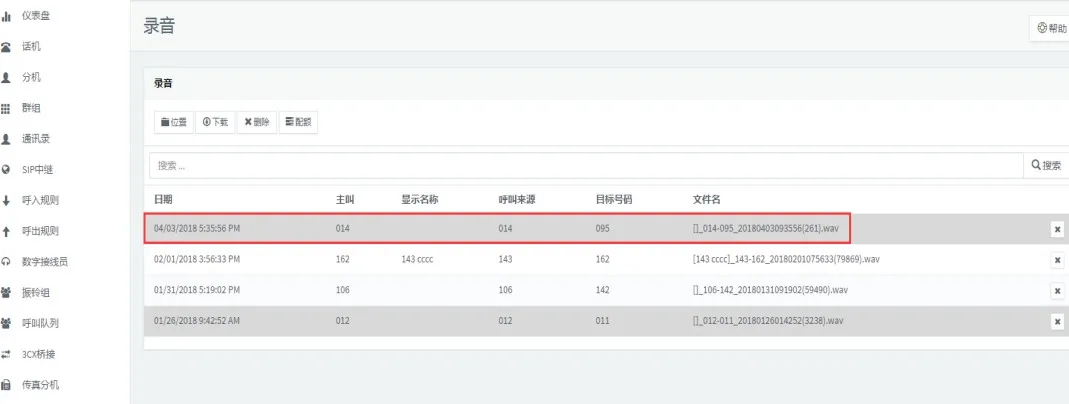
4) After the call ends, the recorded audio can be viewed on the server, such as on the 3CX server shown below.