
IntroductionOverviewThis guide explains how to synchronize the time displayed on
This guide explains how to synchronize the time displayed on the phone.
All of our phone models support this feature (X5U is used in this article as an example).
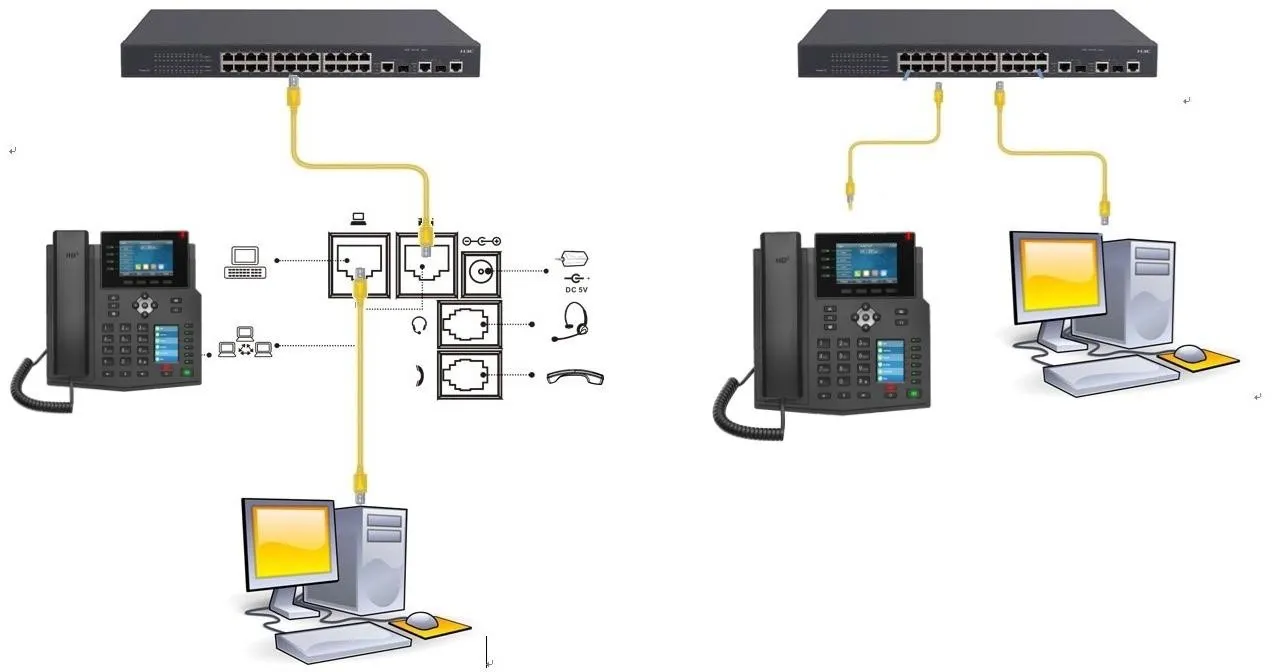
① One phone, connected to the switch and able to obtain an IP address.
② One computer for configuration, connected to the same switch as the phone to ensure network communication between the computer and the phone.
On the phone’s LCD screen, tap “Menu” — “Status” to check the phone’s IP address.
Log in to the phone’s web interface by opening a browser on the computer and entering the phone’s IP address in the address bar.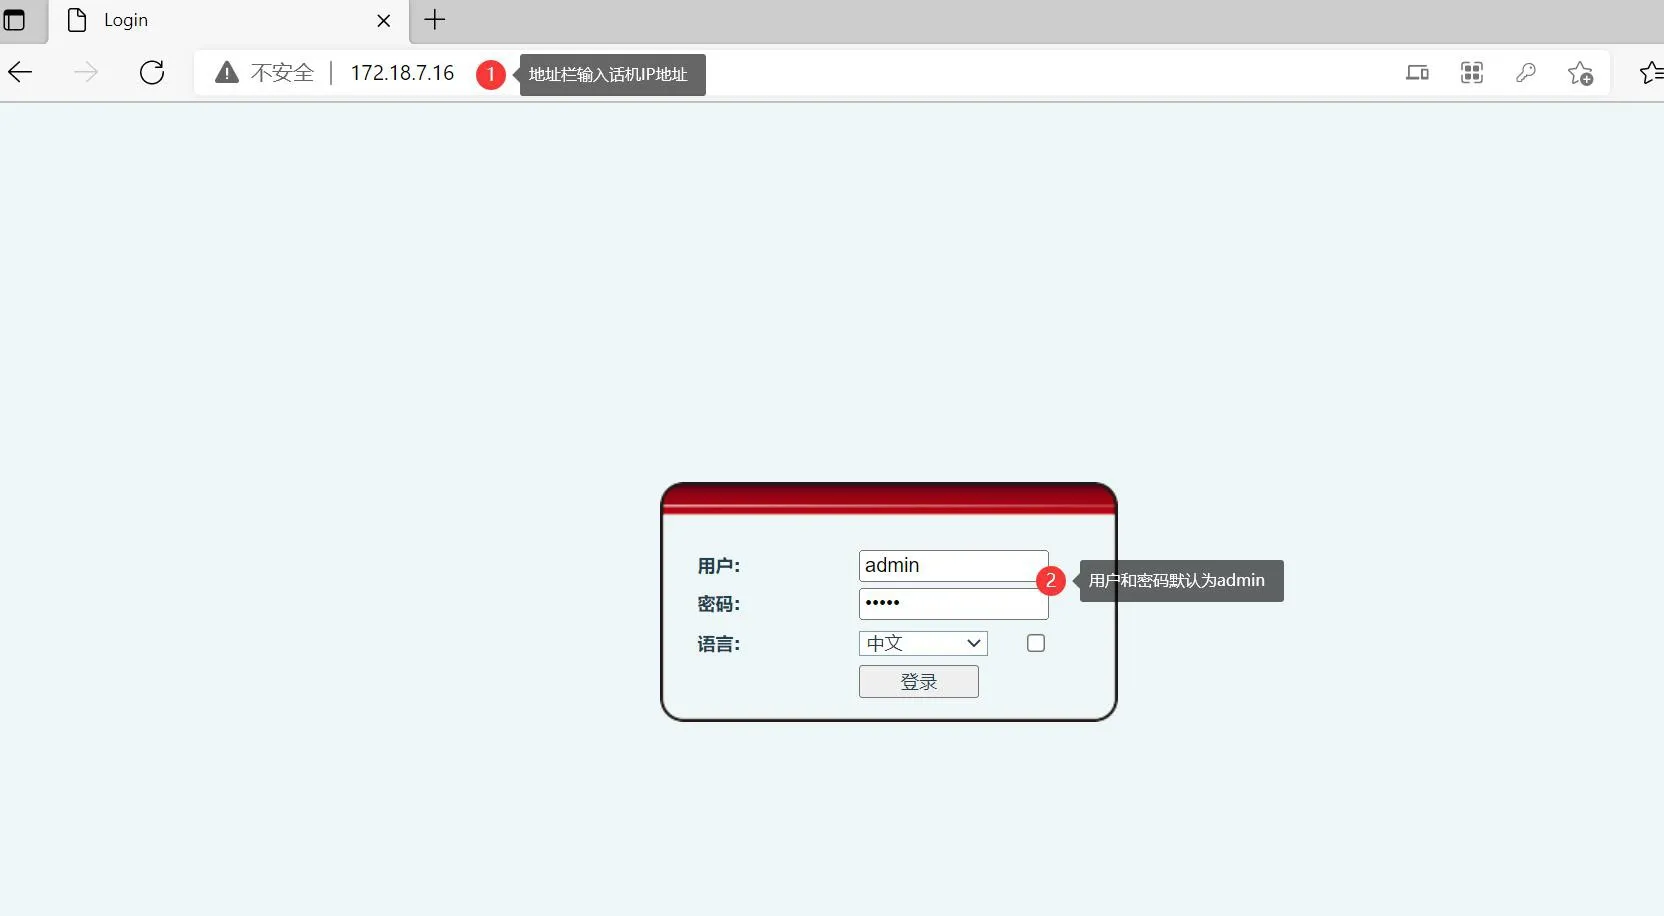
After logging in to the web interface, go to “Line” - “SIP” - “Advanced Settings” and enable “Sync Phone Time”.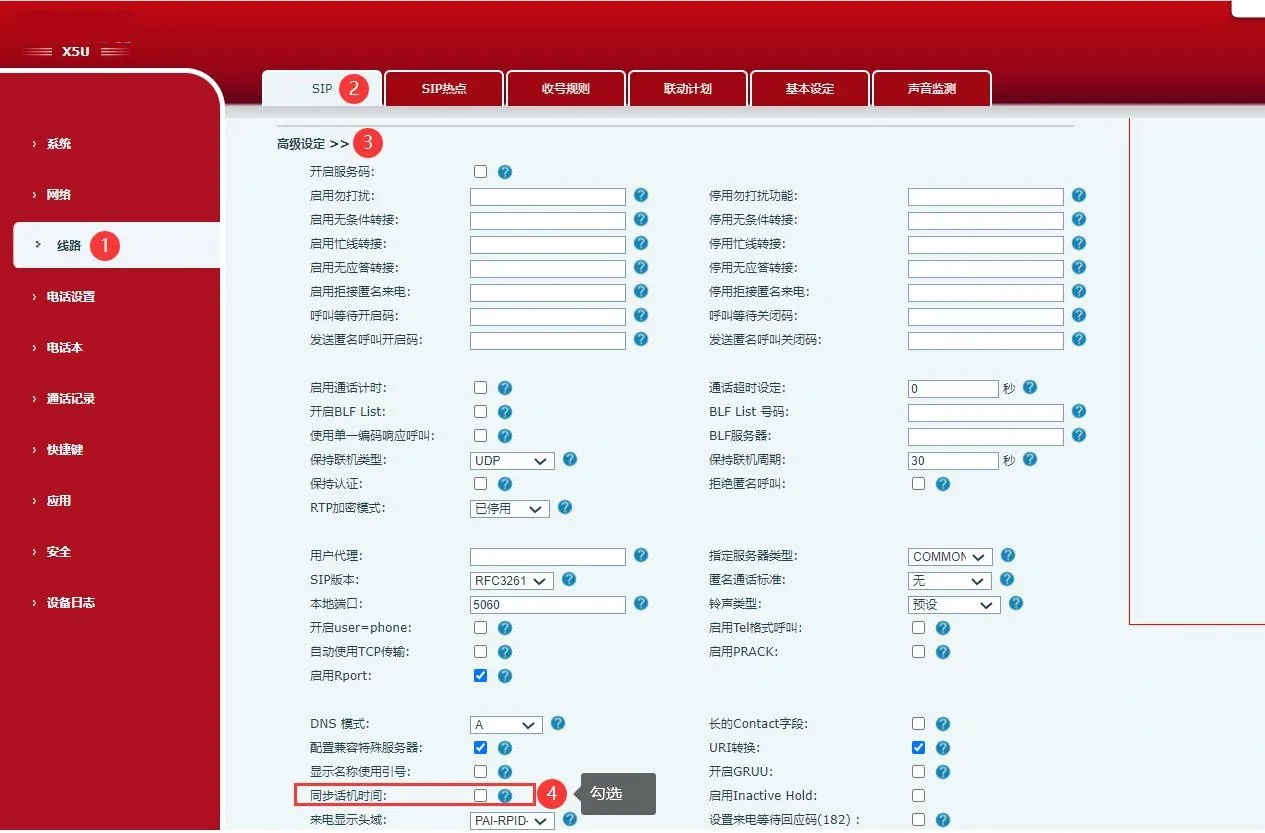
When time is synchronized through SIP registration, the phone uses the Date field in the server’s 200 OK response as the time reference, and then adjusts it according to the phone’s configured time zone for display. When SIP time synchronization is enabled, SNTP and DHCP time synchronization are automatically disabled. This method requires the SIP server to include a Date field in the 200 OK response.
Log in to the phone’s web interface, then go to “Phone Settings” - “Time/Date” and configure the settings as shown in Figure 1 below.
Using SNTP for time synchronization means configuring the “Primary/Secondary Time Server Address.” These can be set as either an IP address or a domain name. After startup, the phone queries the primary server for the current time. If the primary server does not respond, it automatically switches to the secondary server. During operation, the phone updates the time periodically. This method requires the SNTP server address to be preconfigured.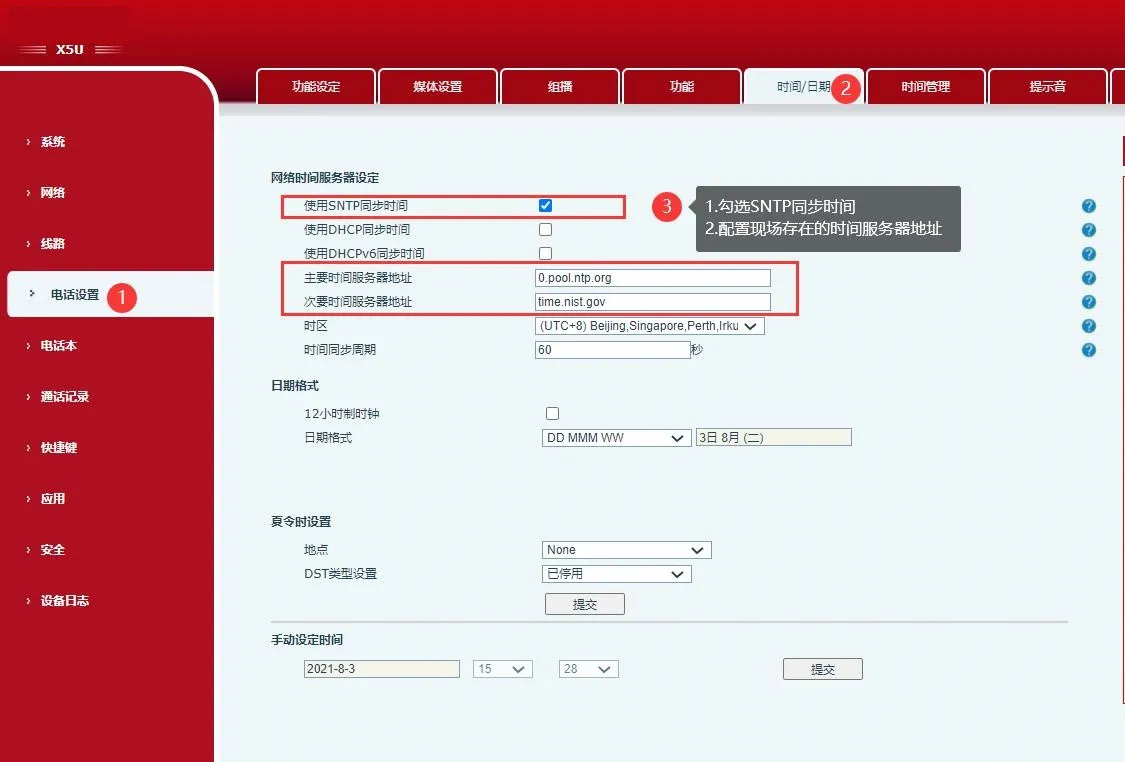
Figure 1
Log in to the phone’s web interface, then go to “Phone Settings” - “Time/Date” and configure the settings as shown in Figure 2 below.
To use this method, both “Use SNTP Time Synchronization” must be enabled and the network mode must be set to DHCP. In this mode, the phone obtains its IP address through DHCP at startup. When it receives the server’s ACK response, it reads the SNTP server address from Option 42 and writes it into the “Primary/Secondary Time Server Address” fields, then synchronizes the time through SNTP. This method requires the DHCP server to support Option 42.
Figure 2