
This guide explains how to use DHCP Option 66 for automatic deployment and batch upgrade of SIP industrial phones, covering DHCP Server setup, TFTP root directory, Option 66 path, configuration file editing, and upgrade operation.
This document explains how to batch upgrade SIP industrial phones through DHCP Option66, one method of automatic deployment. The principle is that after the SIP industrial phone restarts, it requests an IP address during startup. When the router or DHCP Server assigns the IP, it also sends the preconfigured upgrade information to the phone, allowing the phone to locate the corresponding files and upgrade its configuration.
This document applies to all models of SIP industrial phones from our company.
This document is intended for daily maintenance personnel who troubleshoot SIP industrial phone issues.
Network connection arrangement:
Install software on the PC to build a DHCP Server (download address: http://www.dhcpserver.de/cms/). Use the new DHCP Server to provide IP addresses to SIP industrial phones and configure the upgrade information sent to the phones. Also configure an FTP or TFTP server on the PC to store required upgrade files, such as firmware or configuration files.
The final network topology is as follows: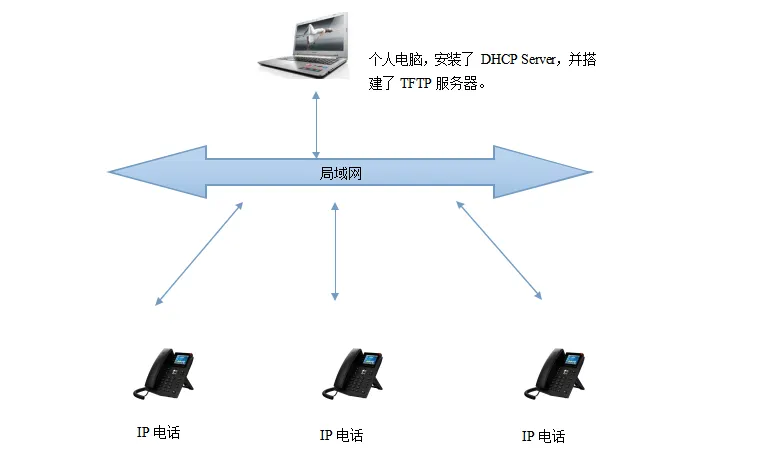
1. Configure DHCP Server
Download DHCP Server from http://www.dhcpserver.de/cms/, extract it to a directory without Chinese characters, and set the computer to a fixed wired-network IP address such as 192.168.1.2.
Double-click dhcpwiz.exe and run DHCP Server. When the setup window appears, click Next:
Select the wired network adapter that was configured with the fixed IP address, so this adapter can distribute IP addresses to SIP industrial phones: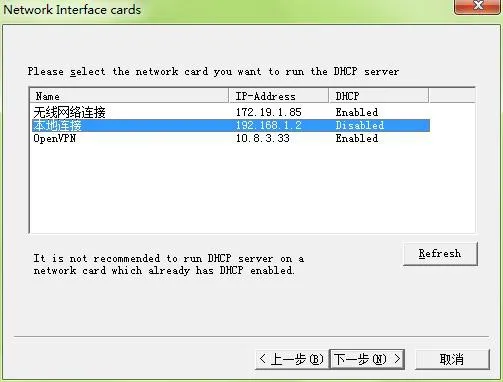
Enable the integrated TFTP server. The selected TFTP root directory is where upgrade files are stored. SIP industrial phones will search this directory for the required firmware and configuration files. Avoid paths containing Chinese characters and remember this directory:
Click Next and set the IP address range that will be distributed: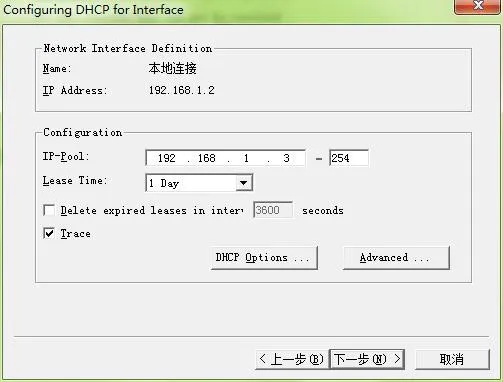
Set DHCP Option 66. This option tells the SIP industrial phone where to download the upgrade files: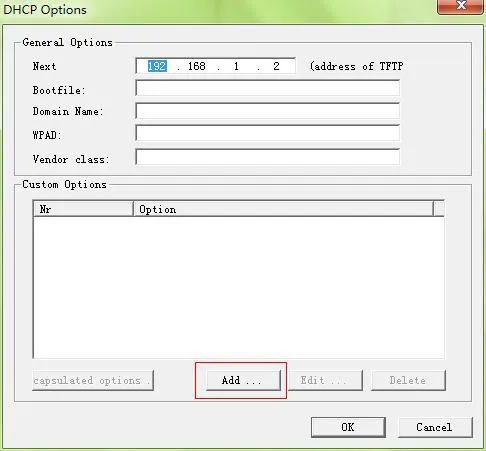
Click Add to add a DHCP option. The content is shown below: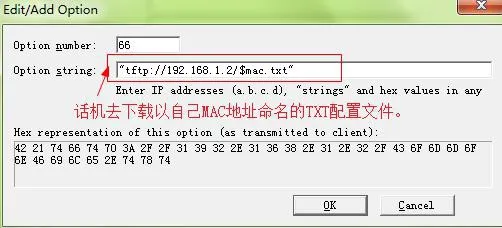
When adding the path (“tftp://192.168.1.2/CommonFile.txt”), do not omit the quotation marks. This path is sent to the SIP industrial phone when the IP address is assigned. The phone will download CommonFile.txt from 192.168.1.2. This instruction file tells the phone what to do. Click OK twice to confirm.
Click Next again to review the summary of the previous settings: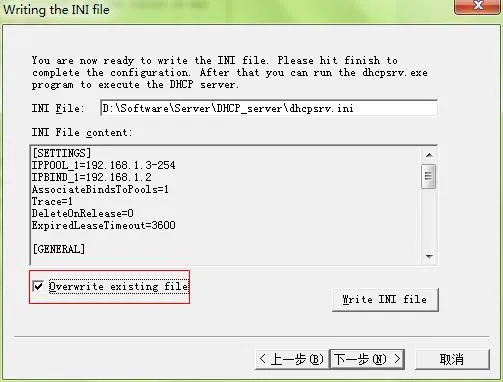
Check Overwrite existing file, click Write INI file, and then click Next:
Click Install to make the configuration take effect:
Check the required option, then click Start to start DHCP Server. The status will change to running: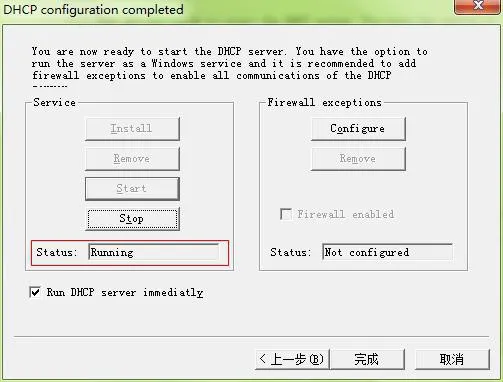
Click Finish:
Click . In the pop-up prompt, click Yes. The following icon will appear in the lower-right taskbar: . This means DHCP Server has been installed on the computer.
After the SIP industrial phone upgrades this configuration file, the phone will restart. After the restart, the updated configuration takes effect.
This configuration file should be modified according to actual needs. First export the configuration file from the SIP industrial phone, then keep only the parameters that need to be changed. Be careful when modifying parameters: after keeping the specified parameters, do not change parameter names or spaces. Otherwise, the configuration file may fail to upgrade to the SIP industrial phone. In this example, the retained parameters are used to modify the registration port, server address, display name, registration account, phone number, and password: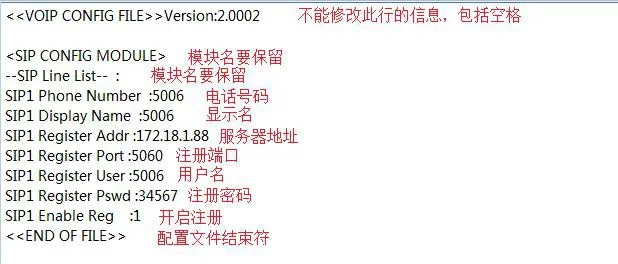
Open the configuration file. The content is short, but the address must be correct:
The SIP industrial phone firmware address includes the TFTP server host address, which is the computer address, and the firmware file name. If the file name is firmware.z, the phone will look for firmware.z. Put the firmware in the TFTP root directory, and the phone will download it for upgrade.
Note: When modifying the instruction configuration file, do not change any other content, not even deleting or adding spaces. Otherwise, the upgrade will fail.
After the above configuration is completed, SIP industrial phones can be upgraded in batches.
1. Put the SIP industrial phone configuration file, such as 00A859D0DACE.txt, into the TFTP root directory. Each SIP industrial phone corresponds to one configuration file. If there are multiple phones, create one configuration file for each phone.
2. Restart the SIP industrial phone. It can be restarted manually or powered on again in batches depending on site conditions. On the PC, you can see the prompt that the restarted phone obtains an IP address. After waiting about 30 seconds, the phone screen shows that it is downloading upgrade software. After the phone restarts automatically once, the upgrade is complete. Then exit DHCP Server on the PC and restore the original router connection.