This guide explains how to view and set the IP address of voice access control devices, covering i20S/i23S dynamic IP announcement, DSS key static IP switching, default static address, web backend IPv4 settings, and IP scanner lookup.
This document introduces how to view the device IP address, set a static address, and switch between dynamic and static addresses.
i20S/i23S。
Connect the computer and i20S/i23S to the same LAN.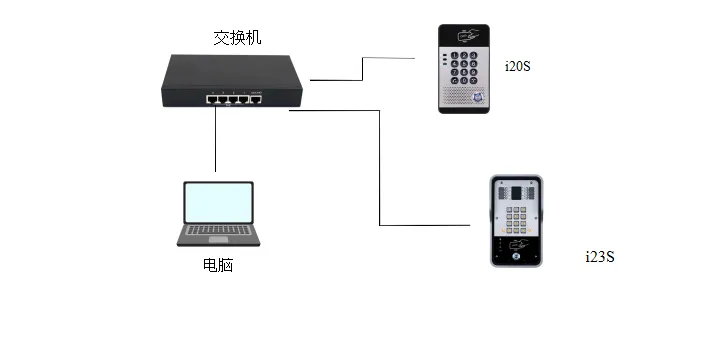
i20S/i23S uses dynamic IP by factory default.
1: When the i20S/i23S network environment can dynamically obtain an IP address
Method 1: In standby mode (30 seconds after the device is powered on), press and hold the # key for 3 seconds to directly announce the IP address.
Method 2: In standby mode (30 seconds after the device is powered on), press and hold the DSS key for 10 seconds. After hearing the “beep beep” prompt tone, release the key and quickly press it once again to announce the IP.
2: When the i20S/i23S network environment cannot dynamically obtain an IP address, switch to static IP
Method: Press and hold the DSS key for 10 seconds. After hearing the prompt tone (rapid beeping), release it immediately and quickly press it three times; it can switch to static IP, and the default static IP is 192.168.1.128.
(Tip: If the device is already in static mode, this operation will switch it to dynamic IP acquisition.)
Enter the web backend. In Network——IPV4 Settings, you can set DHCP dynamic acquisition or a static address.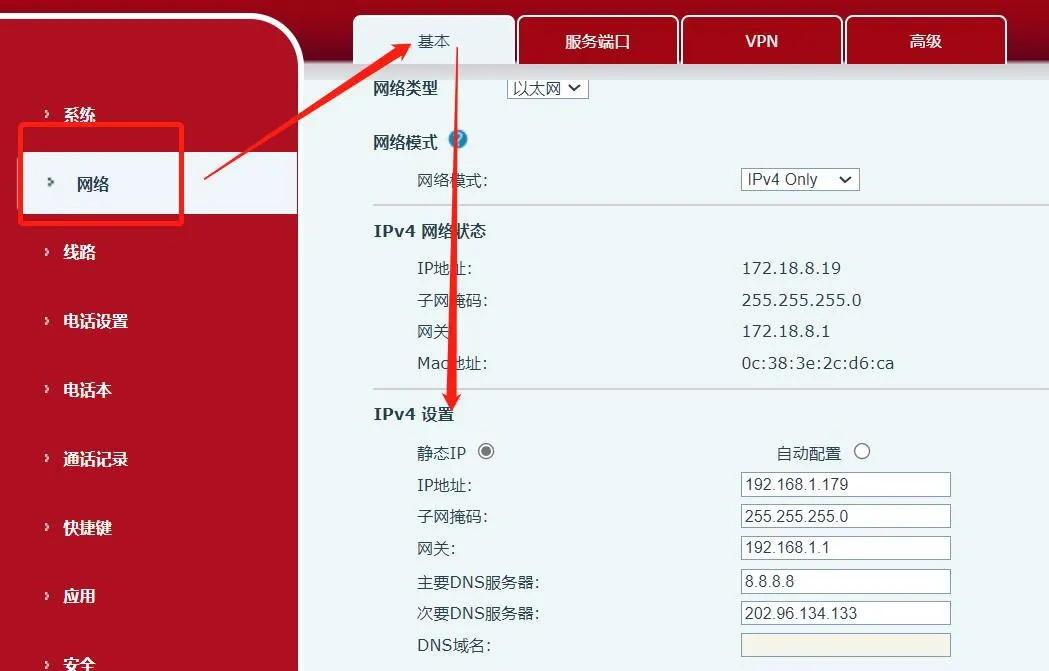
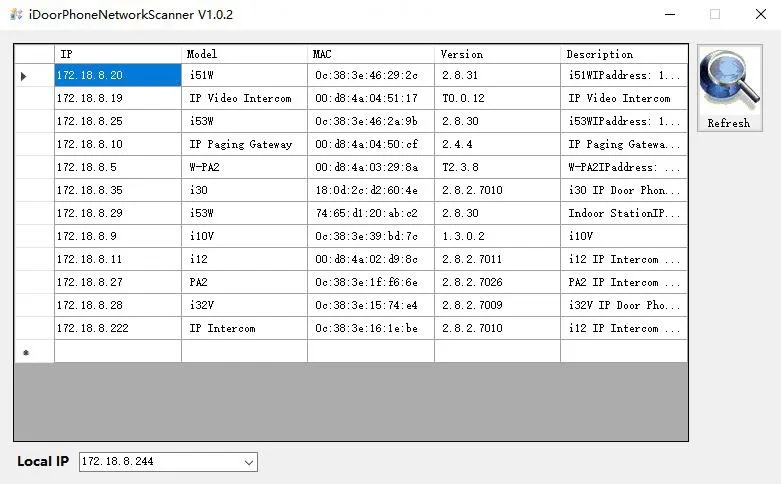
When the computer and i20S/i23S are in the same LAN, download the IP scanning tool on the computer. Download link: https://www.fanvil.com.cn/Uploads/Marketing/Tool/IPScanner_v1.2.1.zip
Open the scanning tool, select the IP address of this computer under Local IP, and click Refresh to search all access control and intercom devices in the same network segment.