
IntroductionOverviewThis document explains how to configure and use automatic re
This document explains how to configure and use automatic recording on the phone.
Applicable model: all phone models (the X3SG Pro is used as the example in this guide)
① One X3SG Pro phone, connected to a switch and able to obtain an IP address automatically.
② One configuration PC, also connected to the switch, with network connectivity to the phone.
③ Download the recording software from the official website — Technical Support — Download Center — Tools — Recording Software.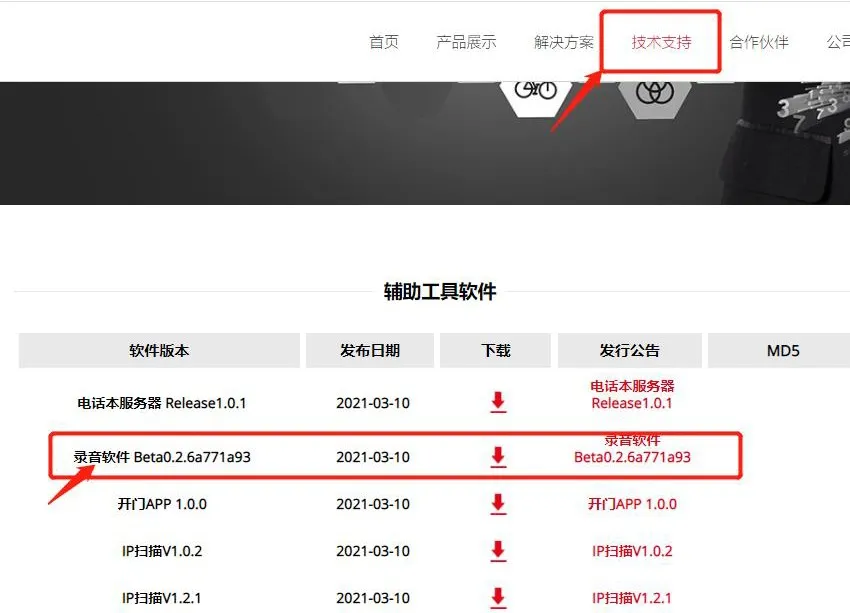
1) On the phone LCD screen, tap “Menu” — “Status” to view the phone IP address.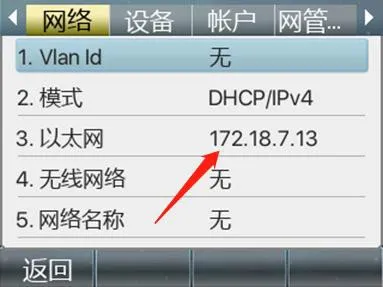
2) Log in to the phone web interface. Open a browser on the PC, enter the phone IP address in the address bar, and use admin for both the username and password.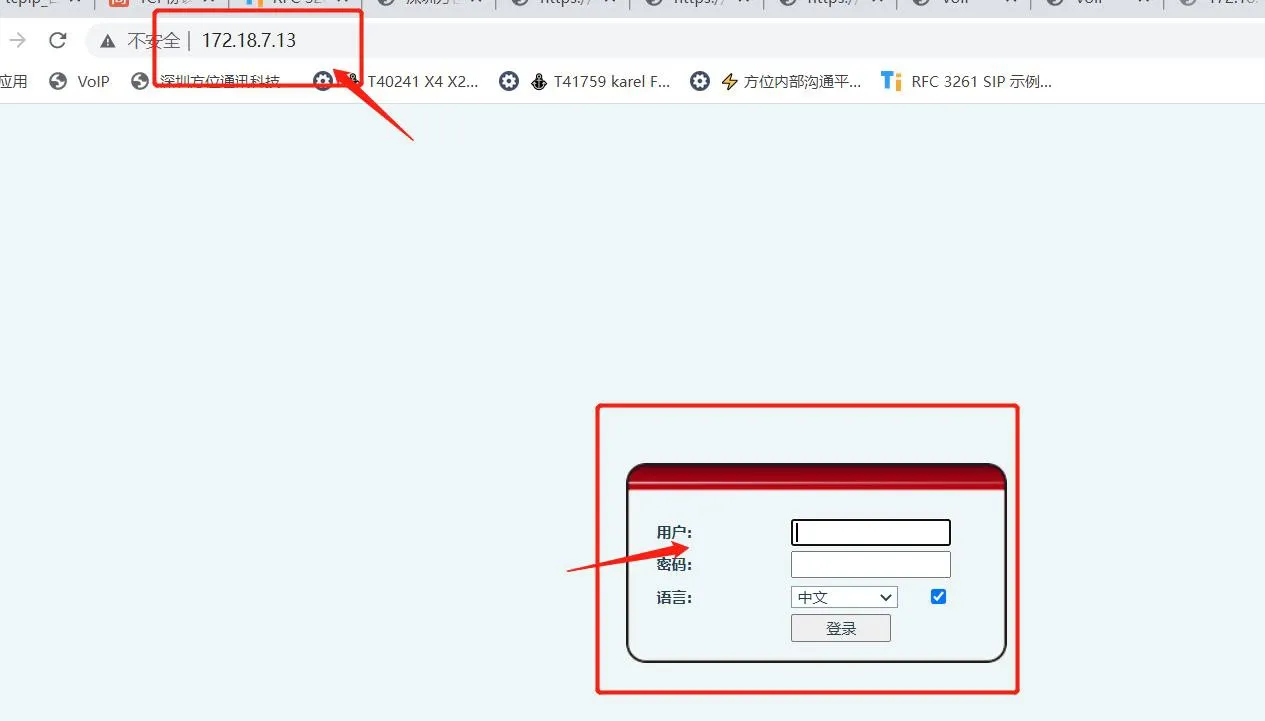
3) Open the recording software and configure the server IP address and port.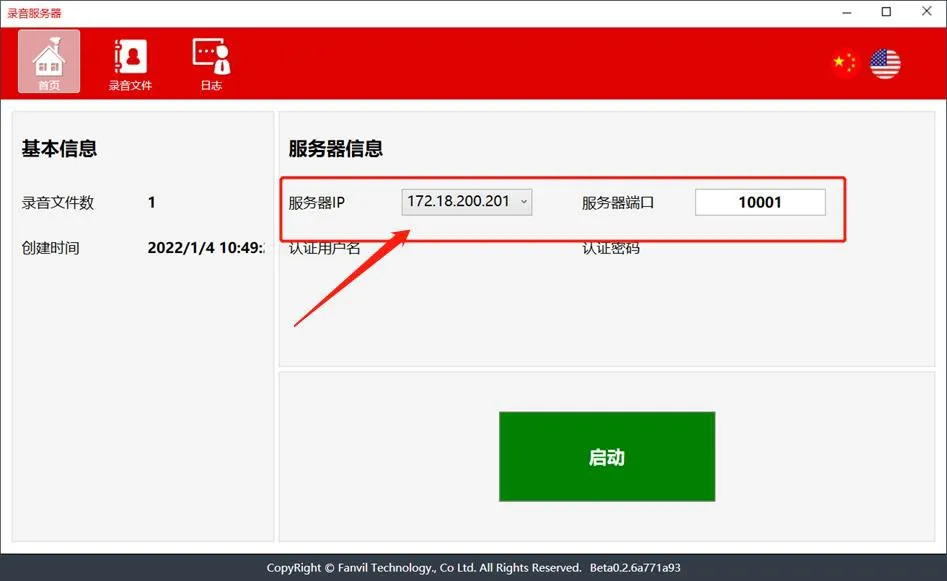
4) In the phone web interface, go to Applications - Recording Management, enable recording, select Network as the recording mode, and enter the IP address and port from the recording software.
TIPS: If you need to play the recording files on the PC, set the audio codec to PCMU or PCMA.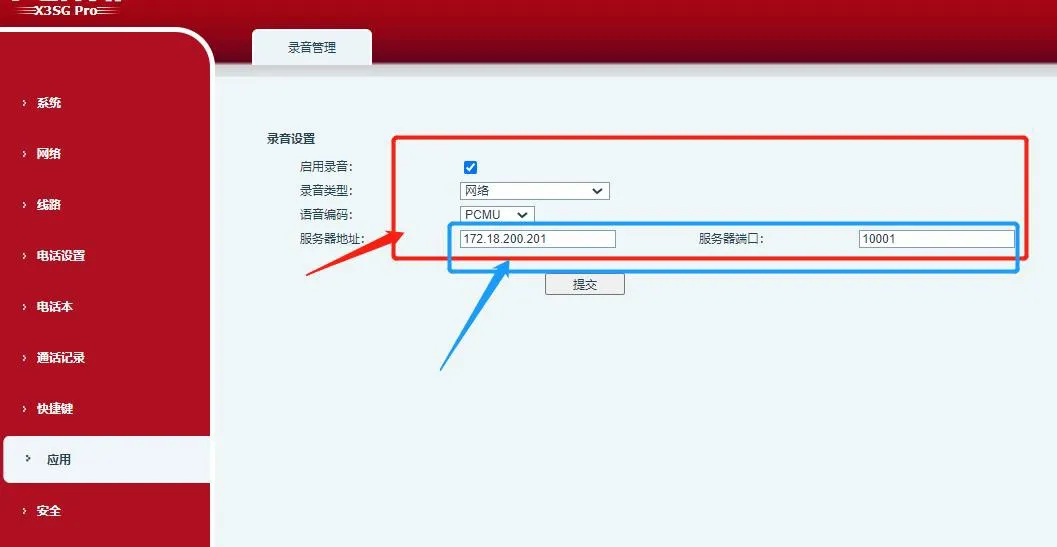
5) Go to Line - Action Plan and add an action plan. Set the number to x., set the multicast codec to PCMU or PCMA, set the type to Early or Connected, and set the action to Record. After the configuration is complete, click Submit.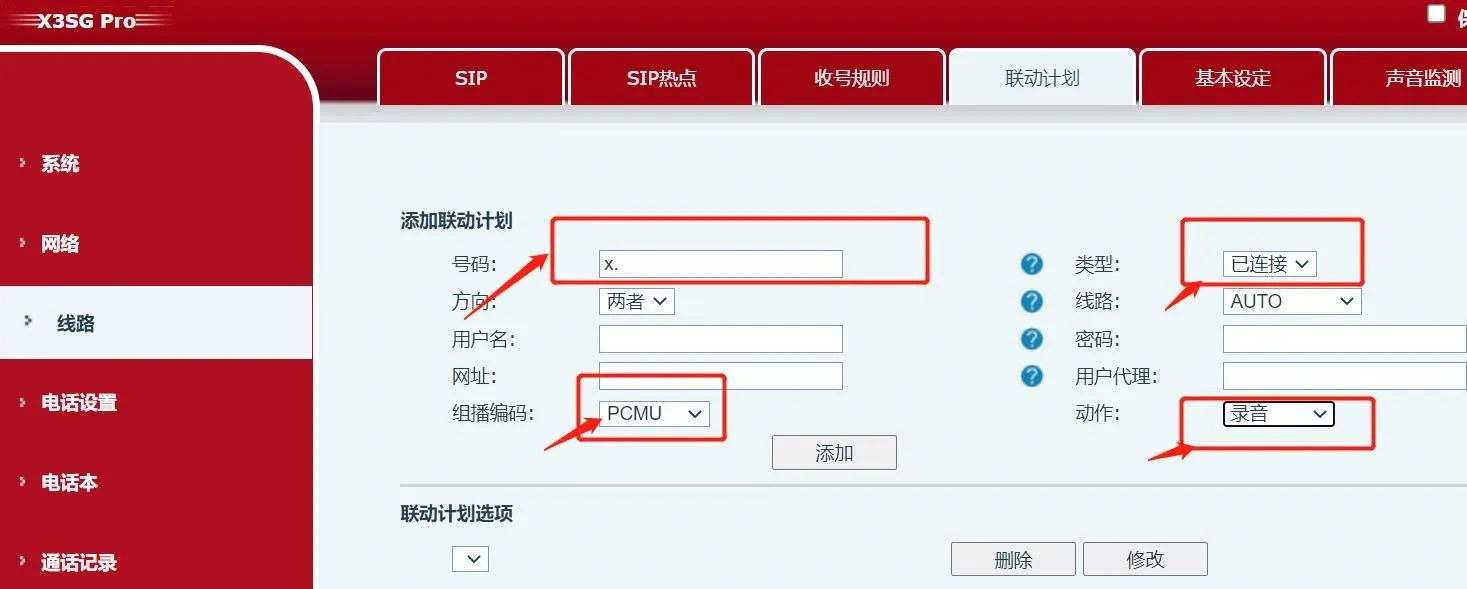
6) Start the recording software before making a call.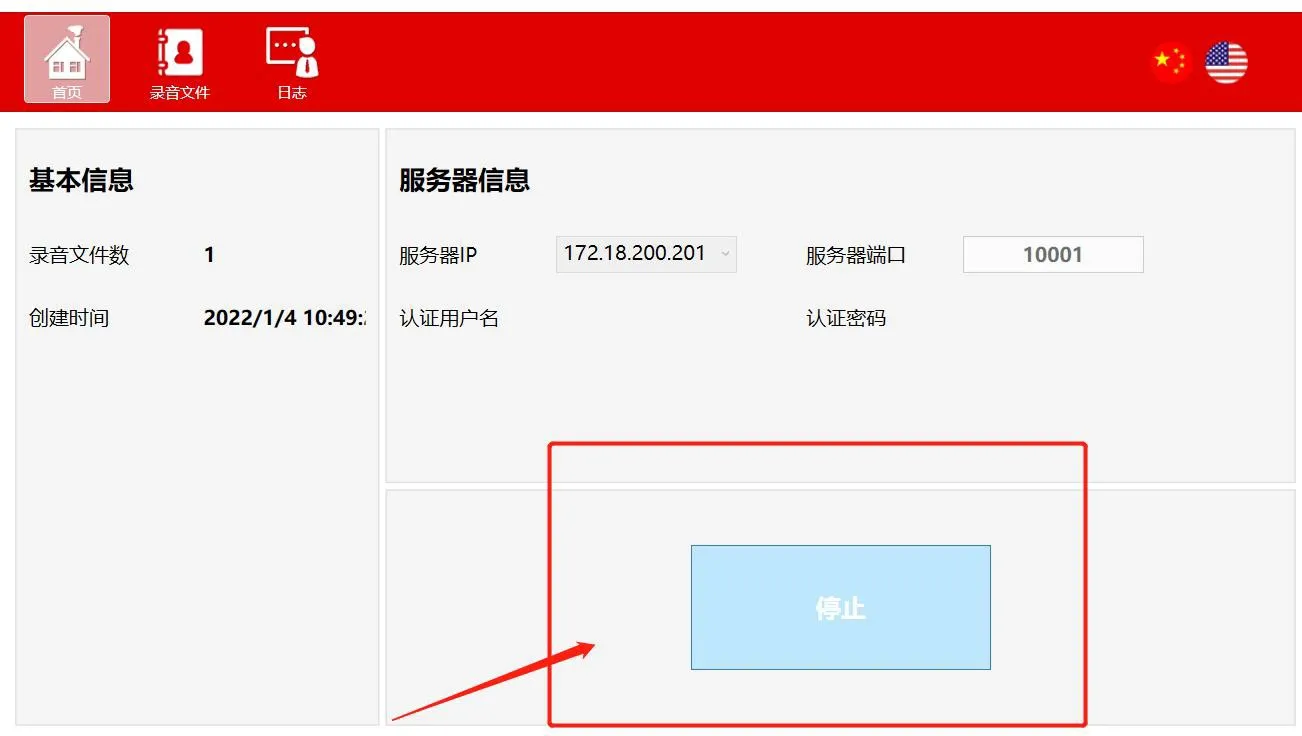
7) After the call starts, an automatic recording key will be displayed on the phone screen during the conversation.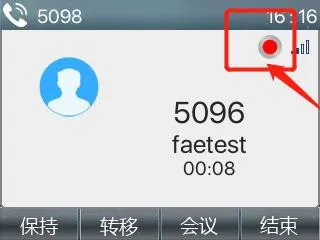
8) After the call ends, go to Audio Files in the recording software to view or download the recorded audio. After downloading, the file can be played locally, as shown below.