
IntroductionOverviewIf the phone displays Post Mode during startup, or if the de
If the phone displays Post Mode during startup, or if the device needs to be reflashed, the firmware can be upgraded through the POST upgrade function.
Applicable models: BX1 / BX2 / BX2C / BX3S / BH3 / BH5
① An FTP server for POST upgrade
② The firmware upgrade package
③ A Telnet tool, such as the built-in Windows Telnet client, PuTTY, or SecureCRT
1. Run wftpd32 on the PC, then select Security -> User/rights from the menu bar.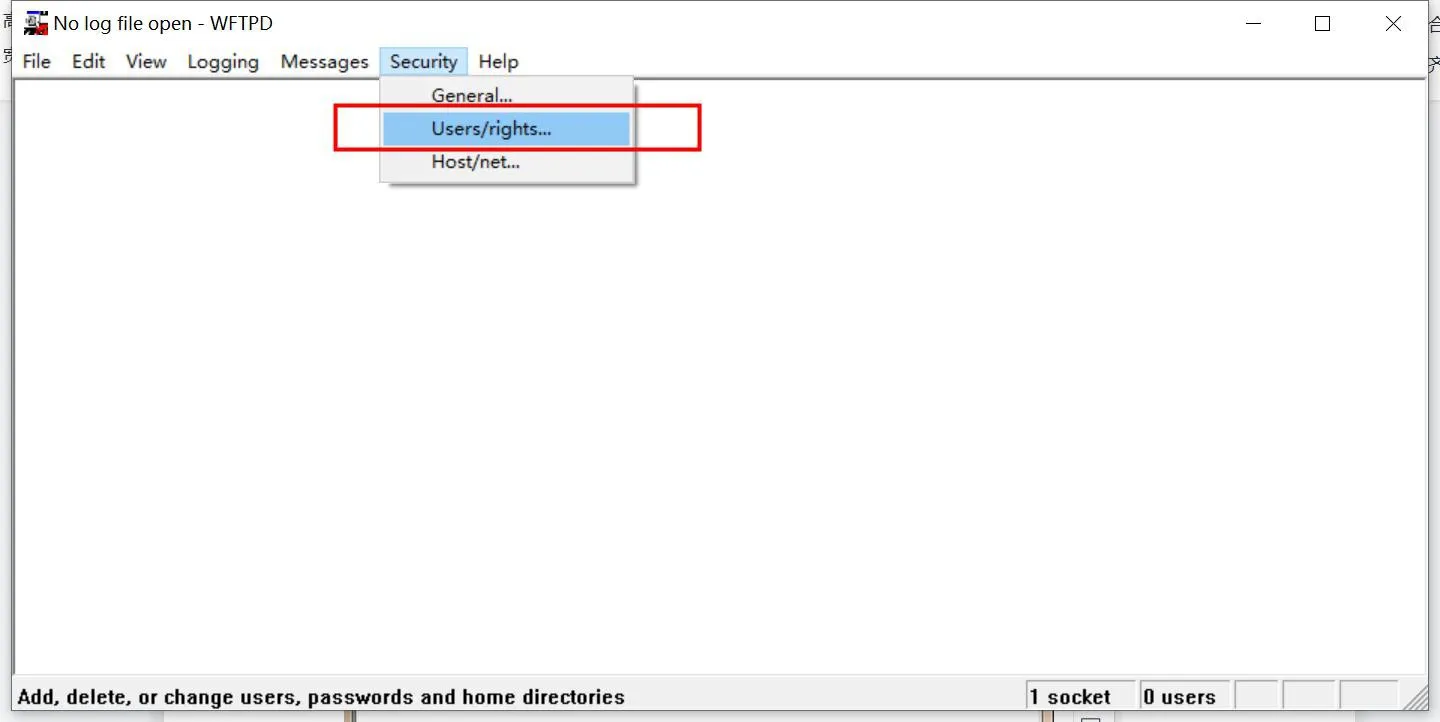
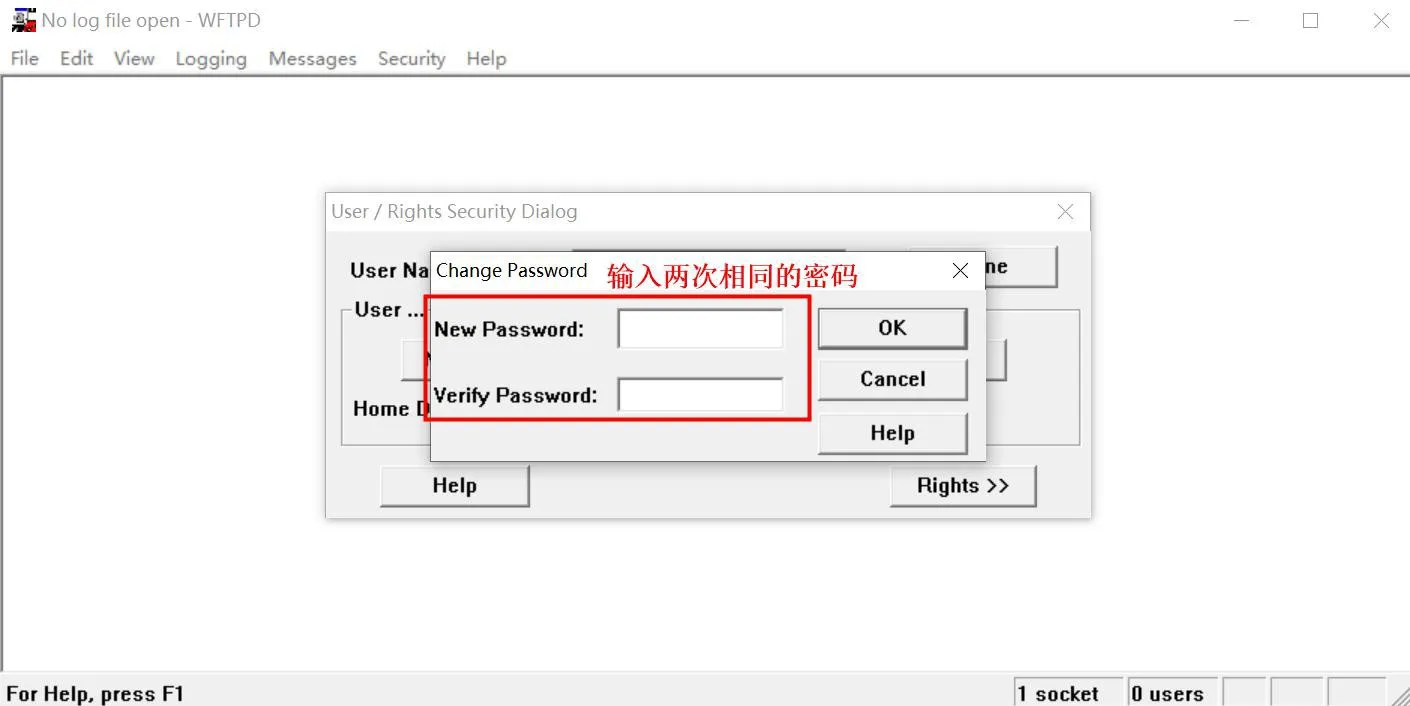
2. Create a username and password for FTP server access: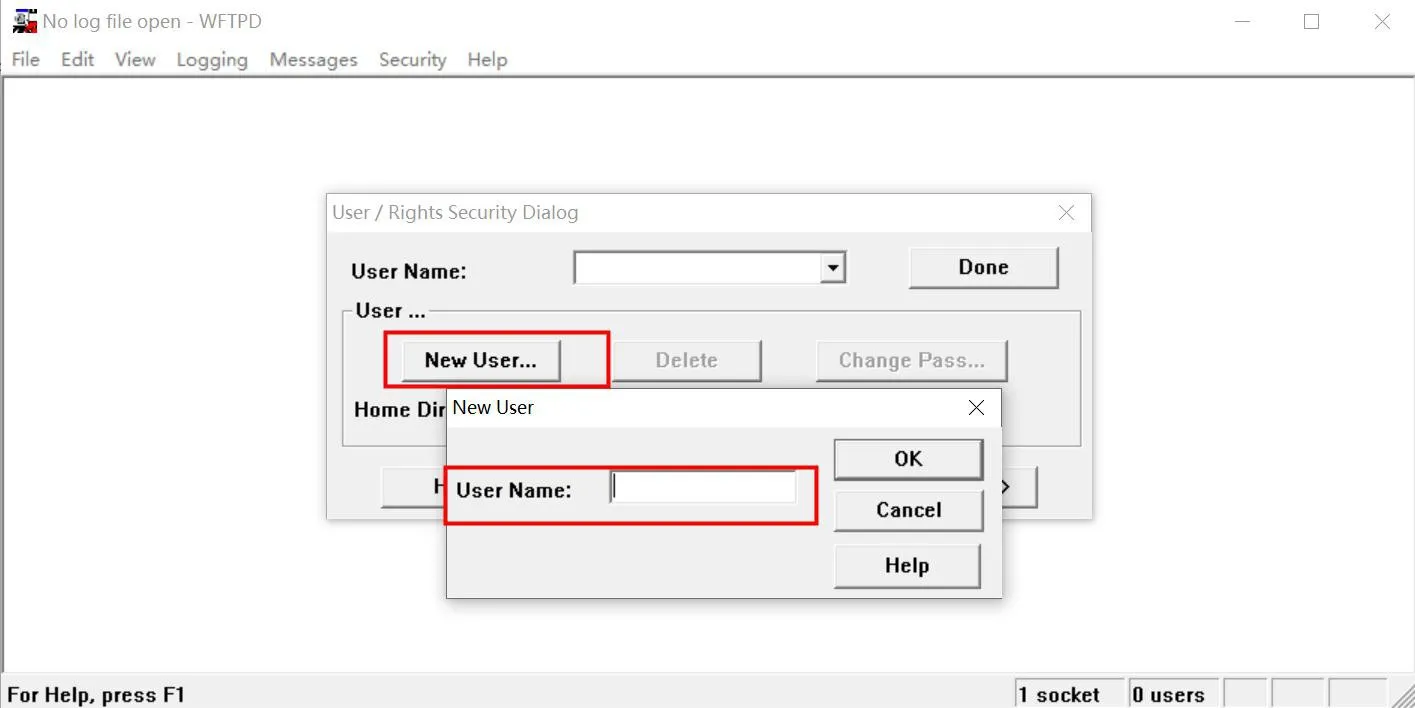
3. Set the file storage path:
Enter the path where the firmware package is stored in Home Directory, then select Restricted to home. After the settings are complete, click Done, as shown below: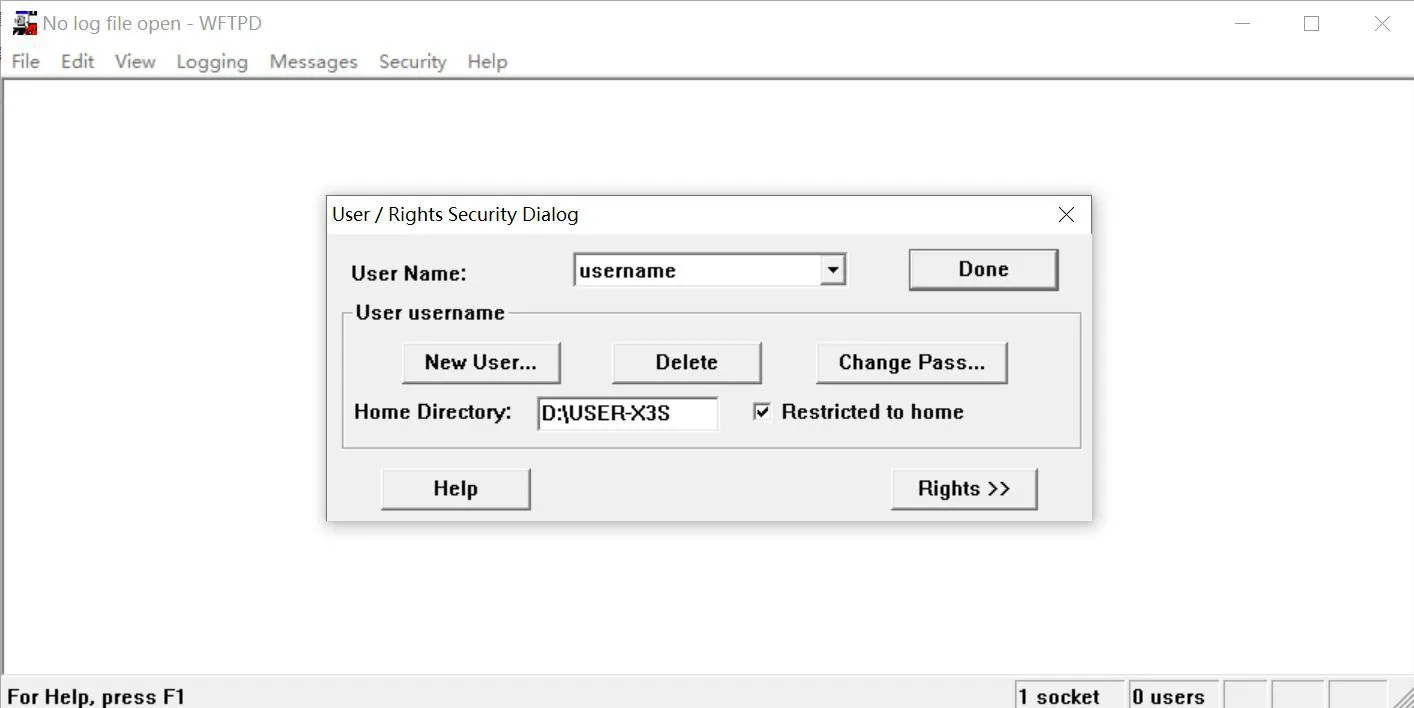
4. Enable the log option so the upgrade process can be monitored more easily.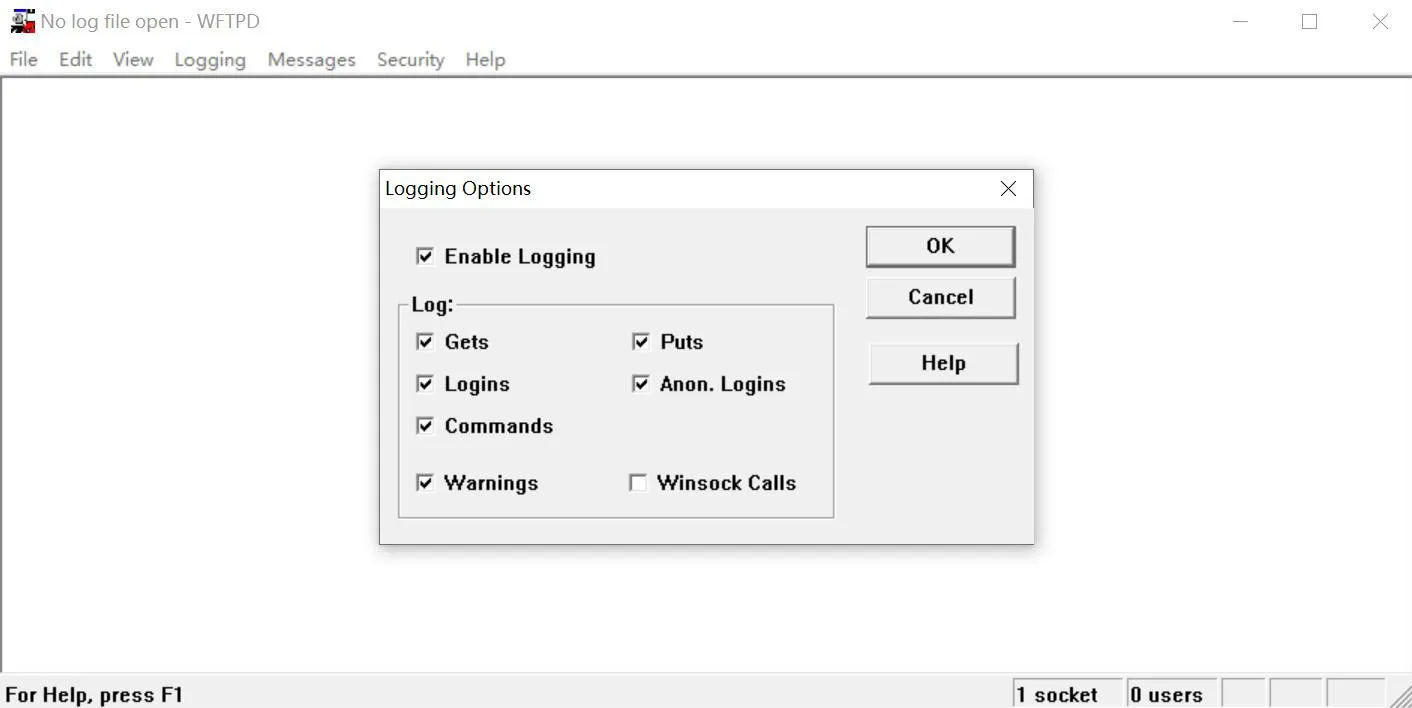
[Note] Do not close the FTP server while performing the POST firmware upgrade.
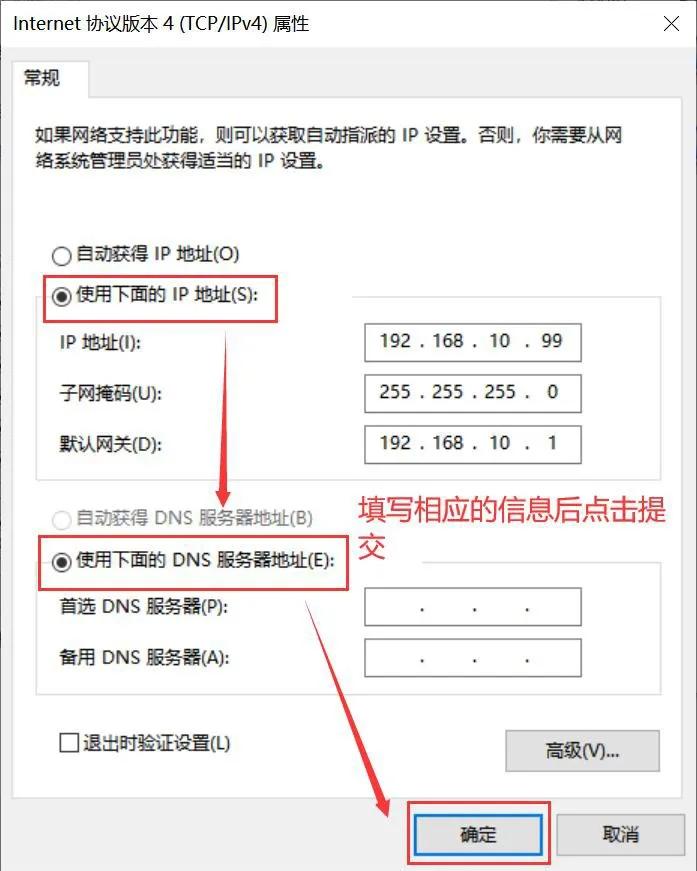
1. Configure the PC network settings:
IP Address (I): 192.168.10.99
Subnet Mask (U): 255.255.255.0
Default Gateway (D): 192.168.10.1
The following example is based on Windows 10: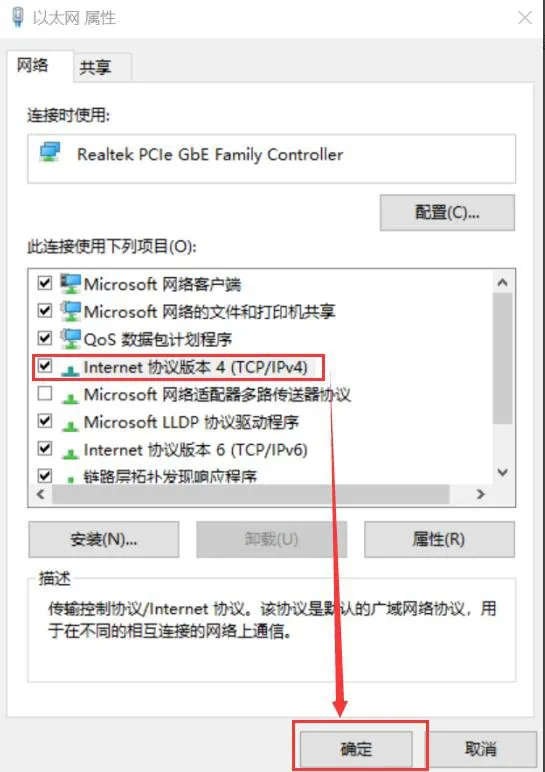
2. Enable the Telnet service on the PC
First, open the Control Panel, then click Programs and Features - Turn Windows features on or off, and check Telnet Client.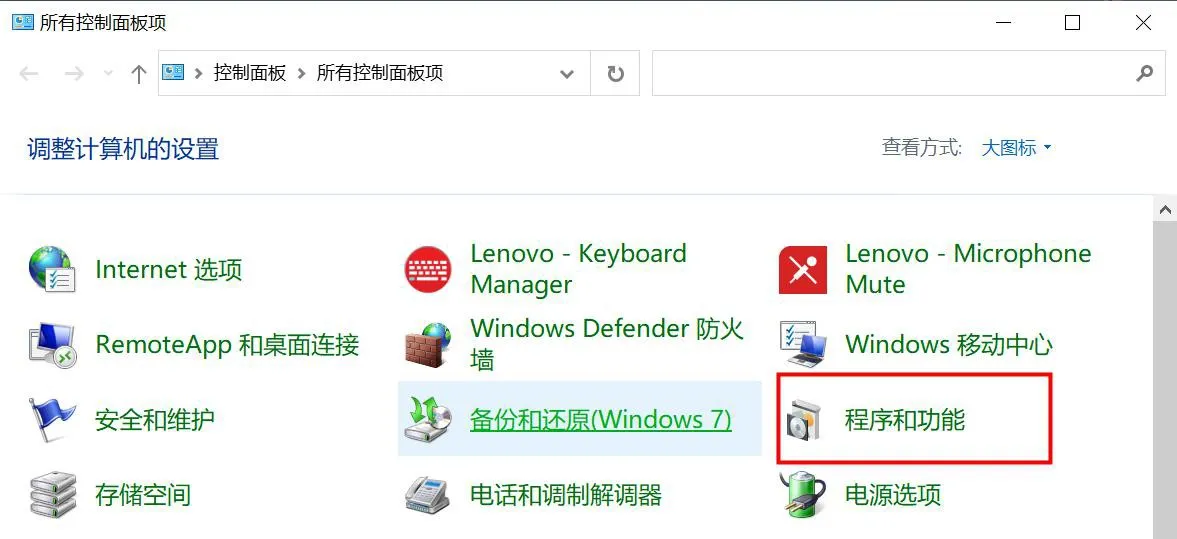
Put the phone into POST MODE
Connect the PC network port to the phone Internet port with an Ethernet cable, then restart the phone. During startup, press and hold the # key to enter POST MODE. In POST mode, the default IP address of the phone is 192.168.10.1.
2. On the PC, press WIN+R to open the Run dialog, then launch the cmd window.
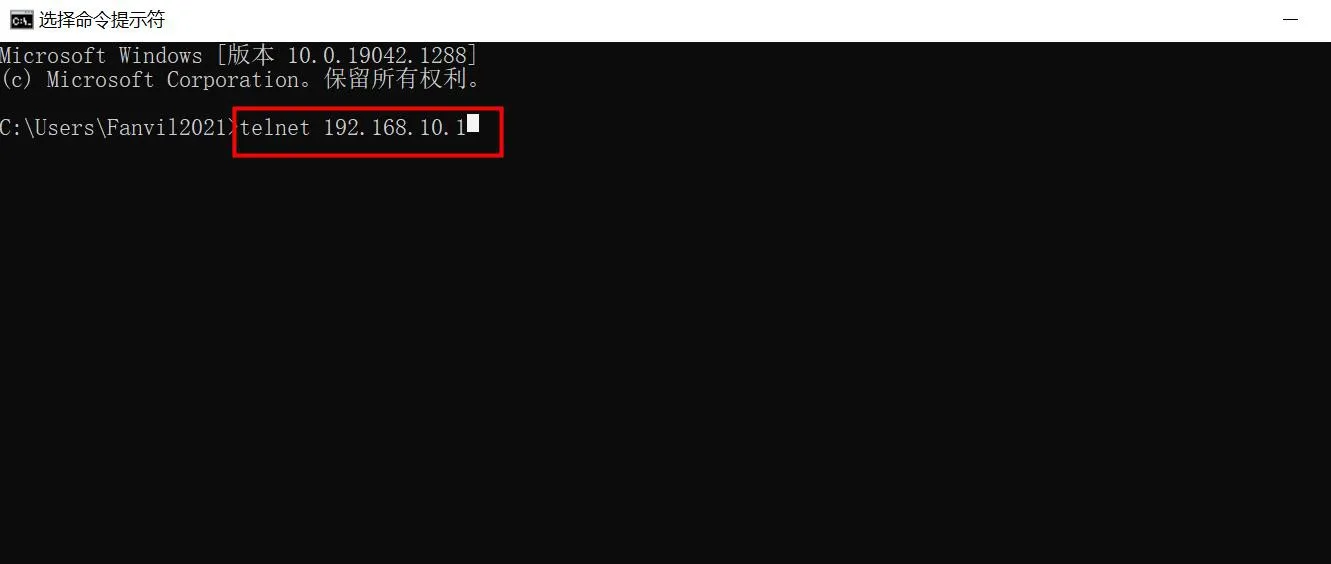
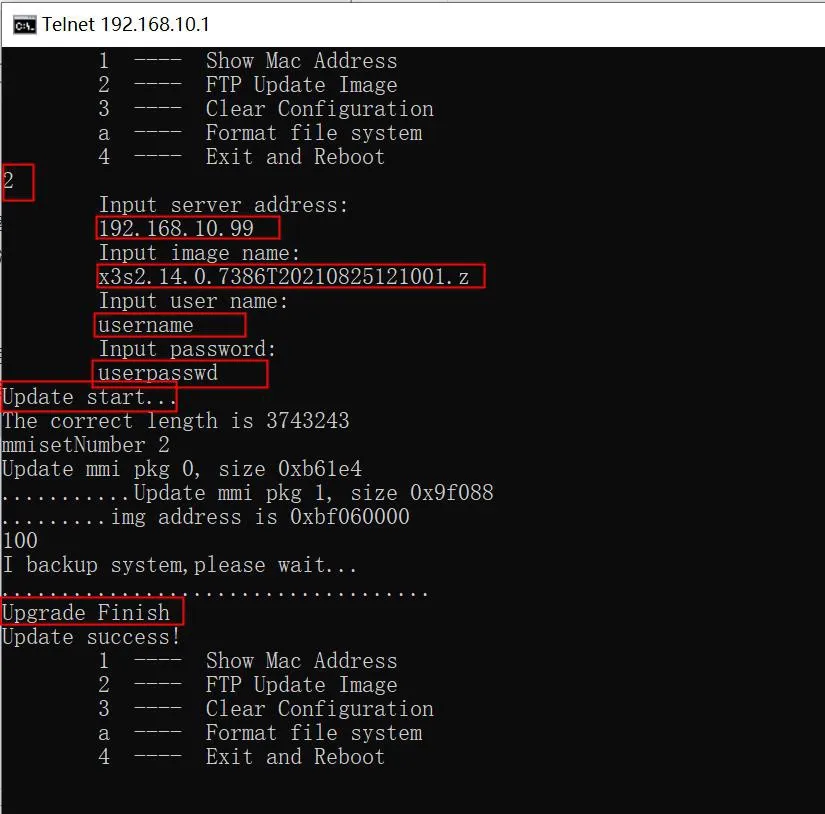
3. Enter the upgrade command to start the firmware upgrade.
The FTP server window will also display the related download information: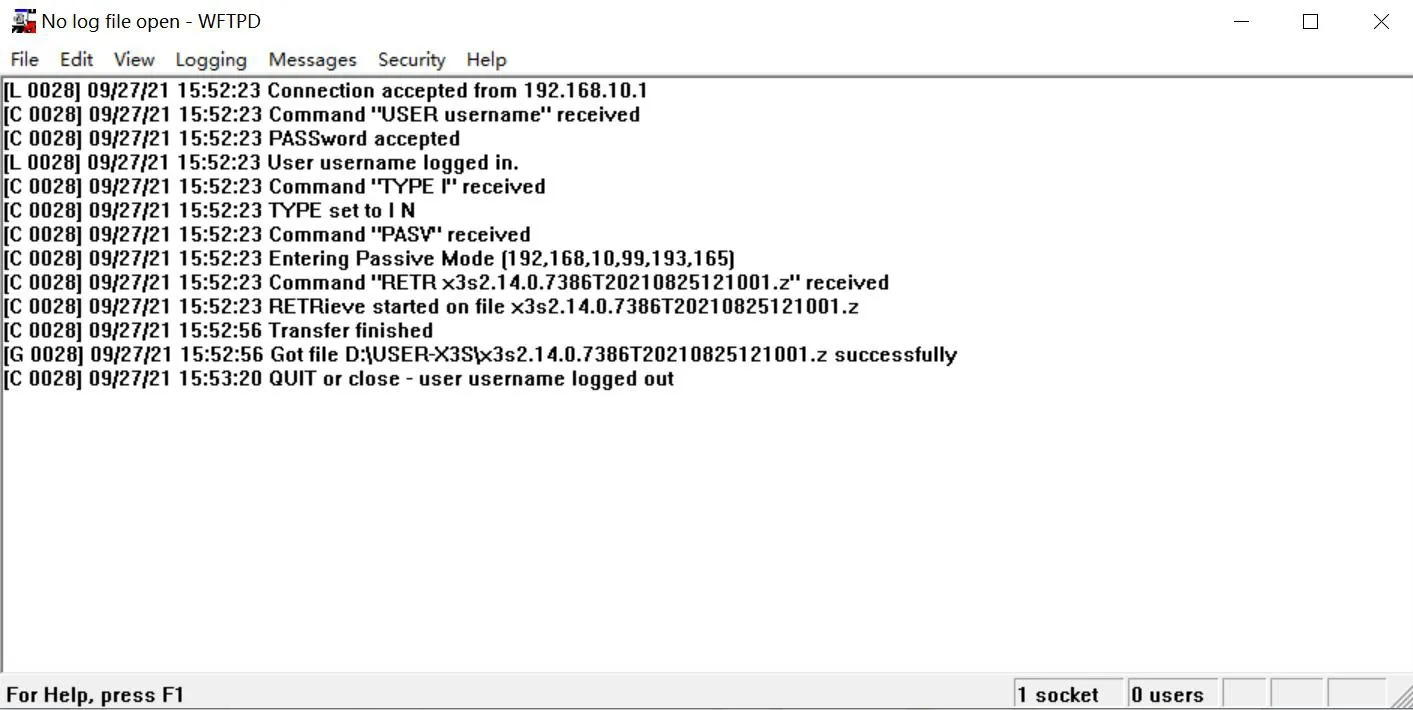
Execute command 4 to restart the phone. The upgrade is then complete.