
Learn how to configure DSS shortcut keys for one-touch dialing by combining IP direct calling and SIP calling, including hot key setup, advanced dialing modes, and required SIP settings
All of our products support both IP direct calling and SIP calling. This guide explains how to use these two methods together to configure DSS shortcut keys for one-touch dialing.
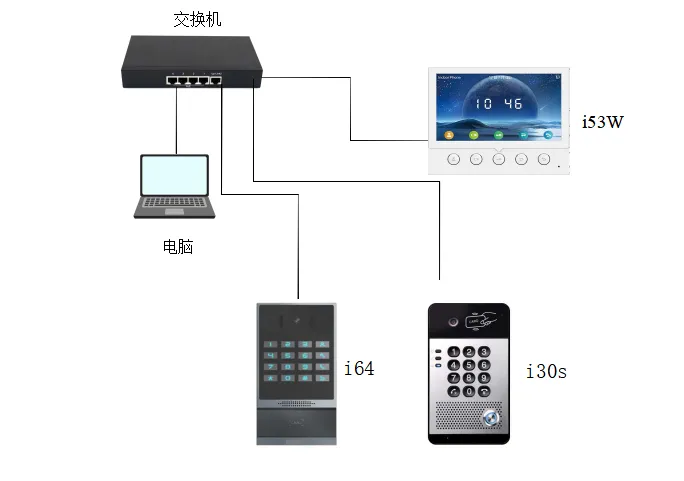
All indoor monitors, access control devices, and intercom products. In this guide, the Bi52W, Bi64, and Bi30 are used as examples.
Connect the PC, Bi52W, Bi64, and Bi30 to the same local network.
1. Check and obtain the device IP address.
For access control and intercom devices:
Press and hold the DSS key for 10 seconds until you hear a beep, then press it once quickly and the device will announce its IP address.
For indoor monitor devices:
Non-touchscreen models: Bi51W, Bi52W
Press and hold the OK key, then go to System Information —— Network —— IPv4.
Touchscreen models: Bi53W, Bi56A
Go to Menu —— Status —— Network —— IPv4.
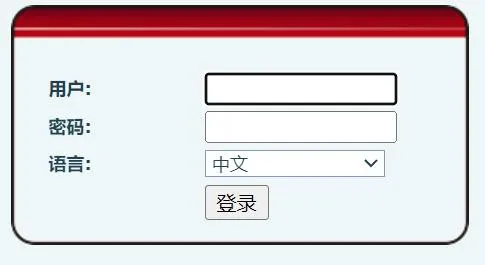
2. Open a browser and enter the device IP address.

The default username and password are both admin.
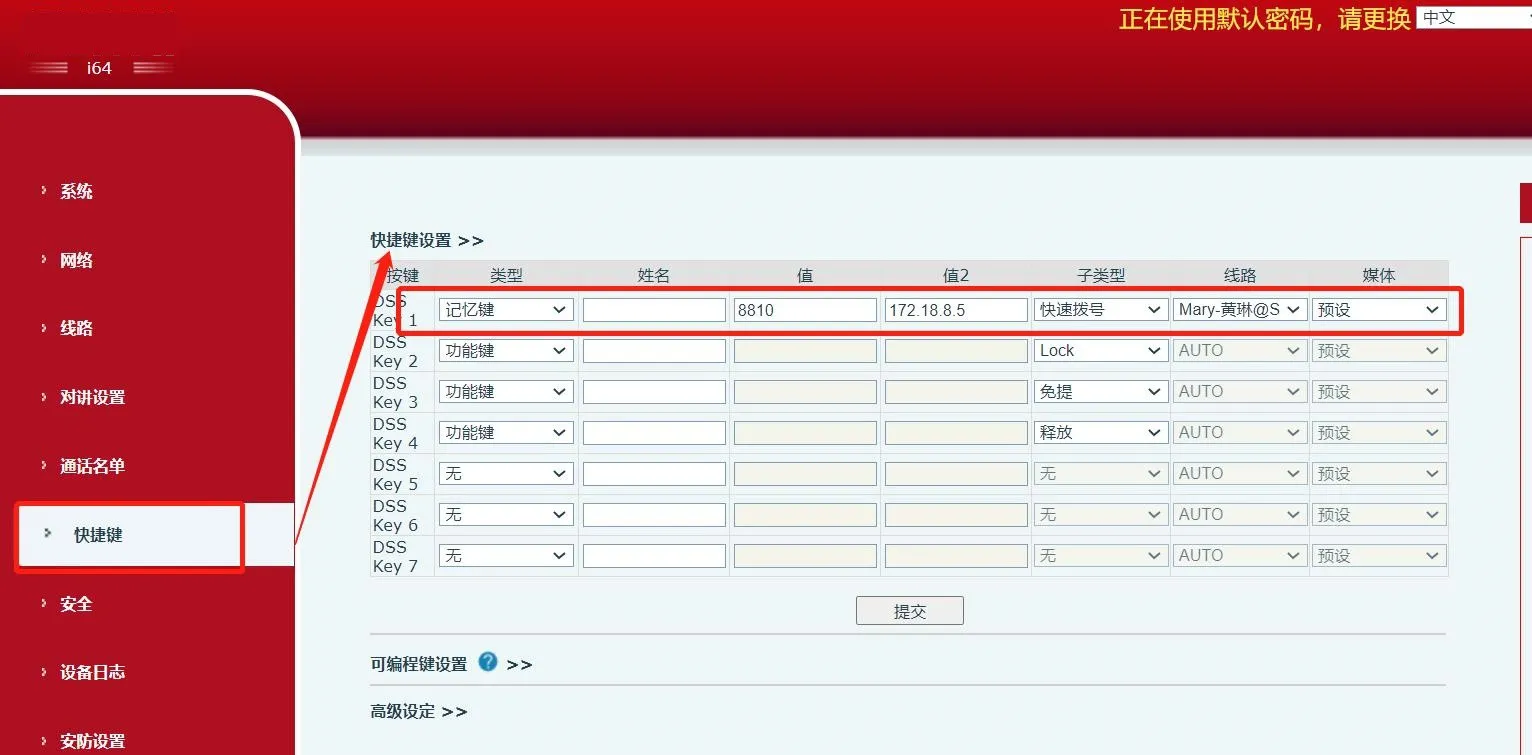
1. Log in to the web interface, then go to Function Key —— Function Key Settings.
① Type: Memory Key
② Value 1 and Value 2: enter either the phone IP address or the SIP account registered on the server
③ Line: select the outgoing line number
④ After completing the settings, click Submit.
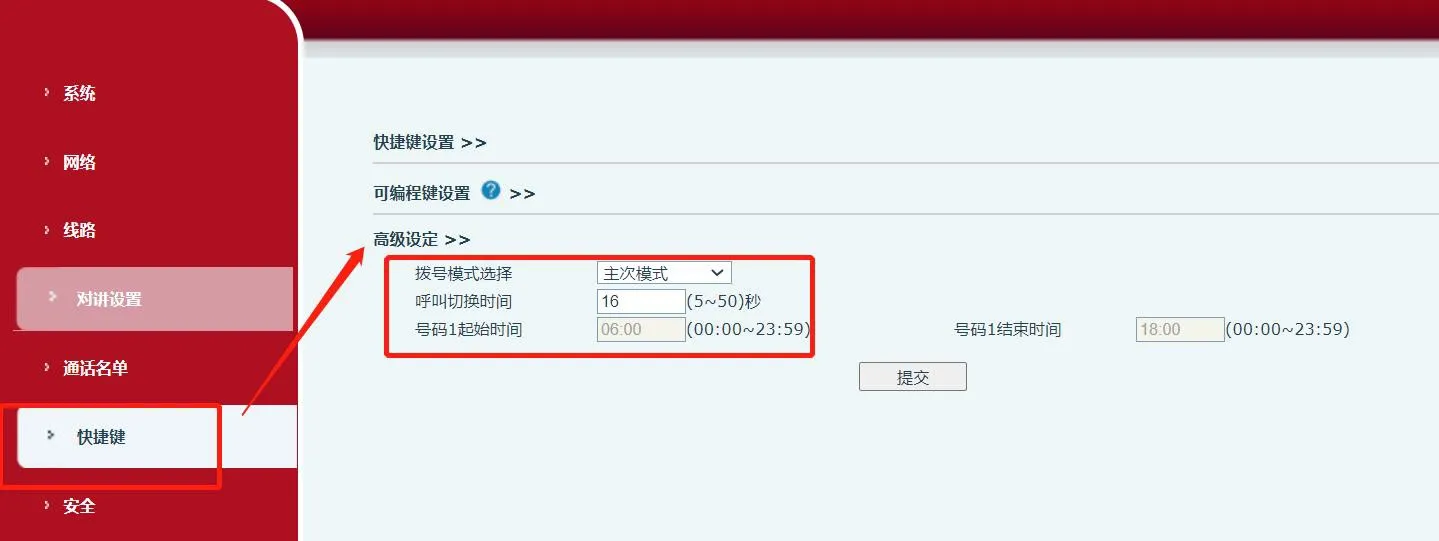
2. Two advanced dialing modes are available.
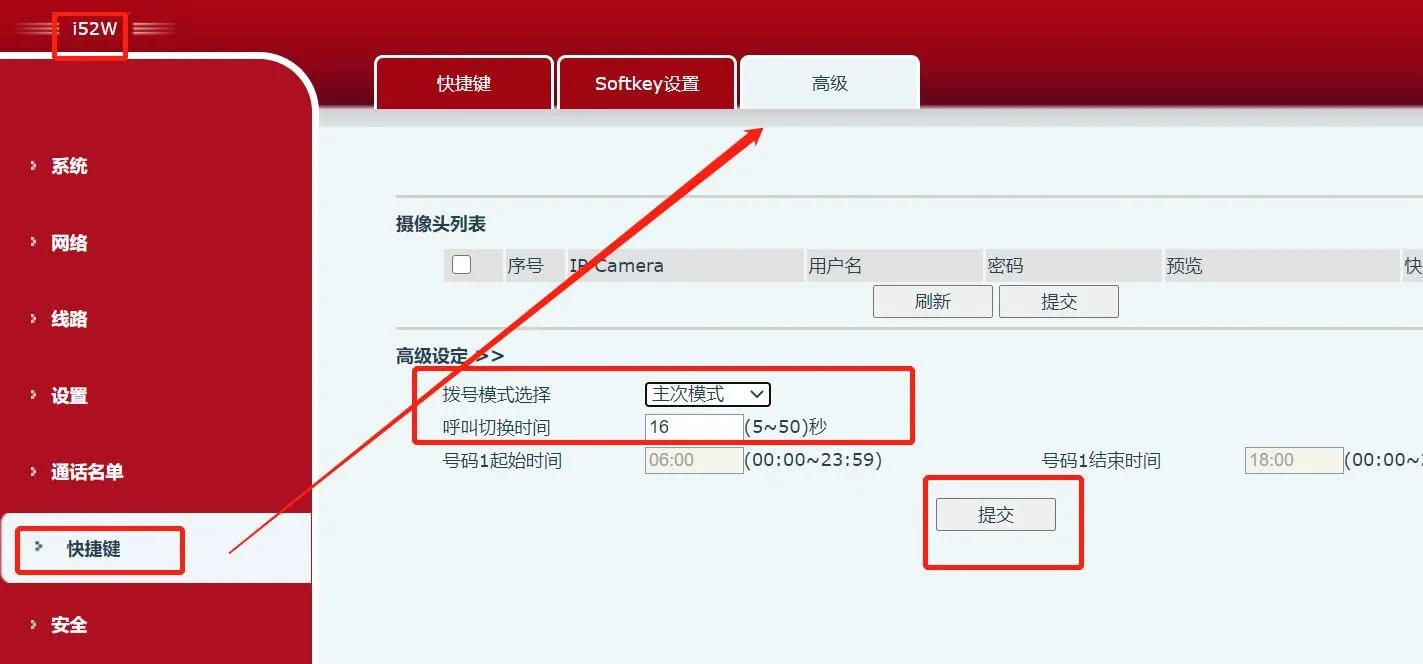
1. Primary/Secondary Mode
① Go to Function Key —— Advanced Settings
② Dialing Mode: Primary/Secondary Mode
③ Call Switch Time: enter a value from 5 to 500 seconds
④ Then click Submit.
After these two settings are applied, pressing the shortcut key will first call the phone defined in Value 1 by IP address or SIP account. If the call is not answered within the configured switch time, the device will automatically call the phone defined in Value 2.
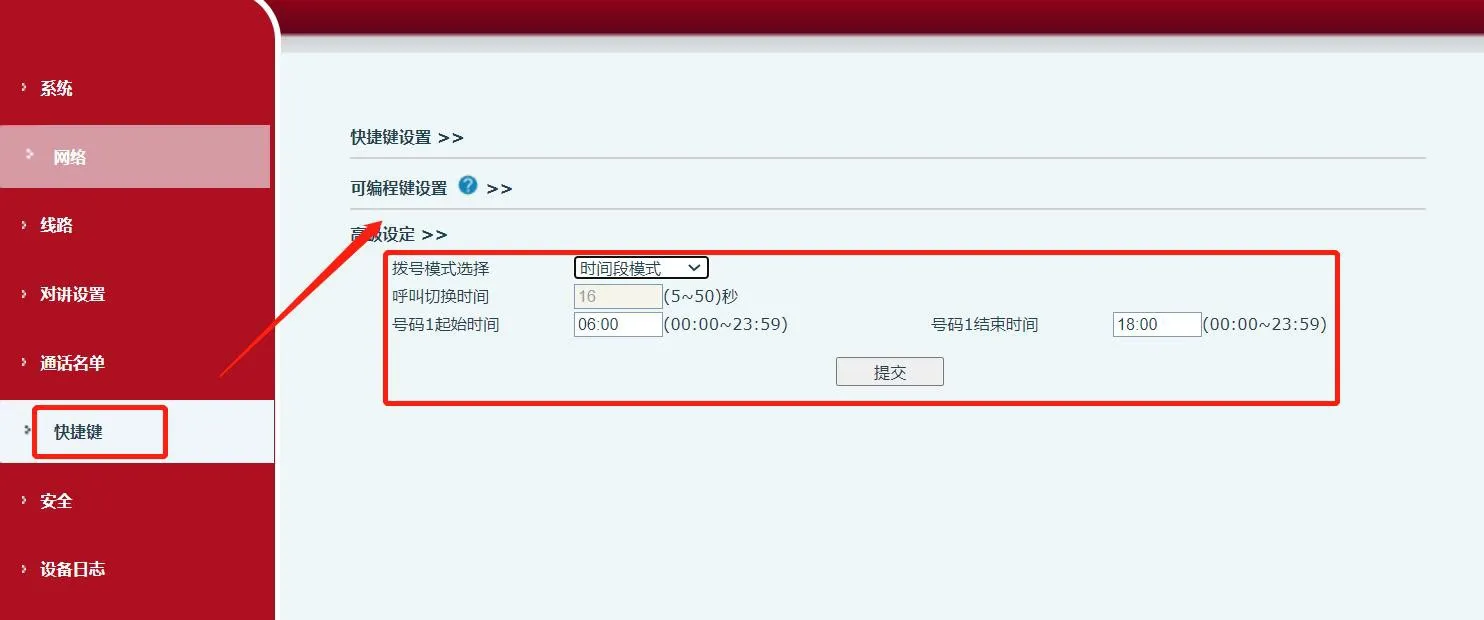
2. Time-Based Mode
① Go to Function Key —— Advanced Settings
② Dialing Mode: Time Period Mode
③ Number 1 Start Time: 00:00--23:59
④ Number 1 End Time: 00:00--23:59
⑤ Then click Submit.
After these settings are saved, pressing the shortcut key will call the phone defined in Value 1 during the configured time range. At all other times, it will call the phone defined in Value 2.
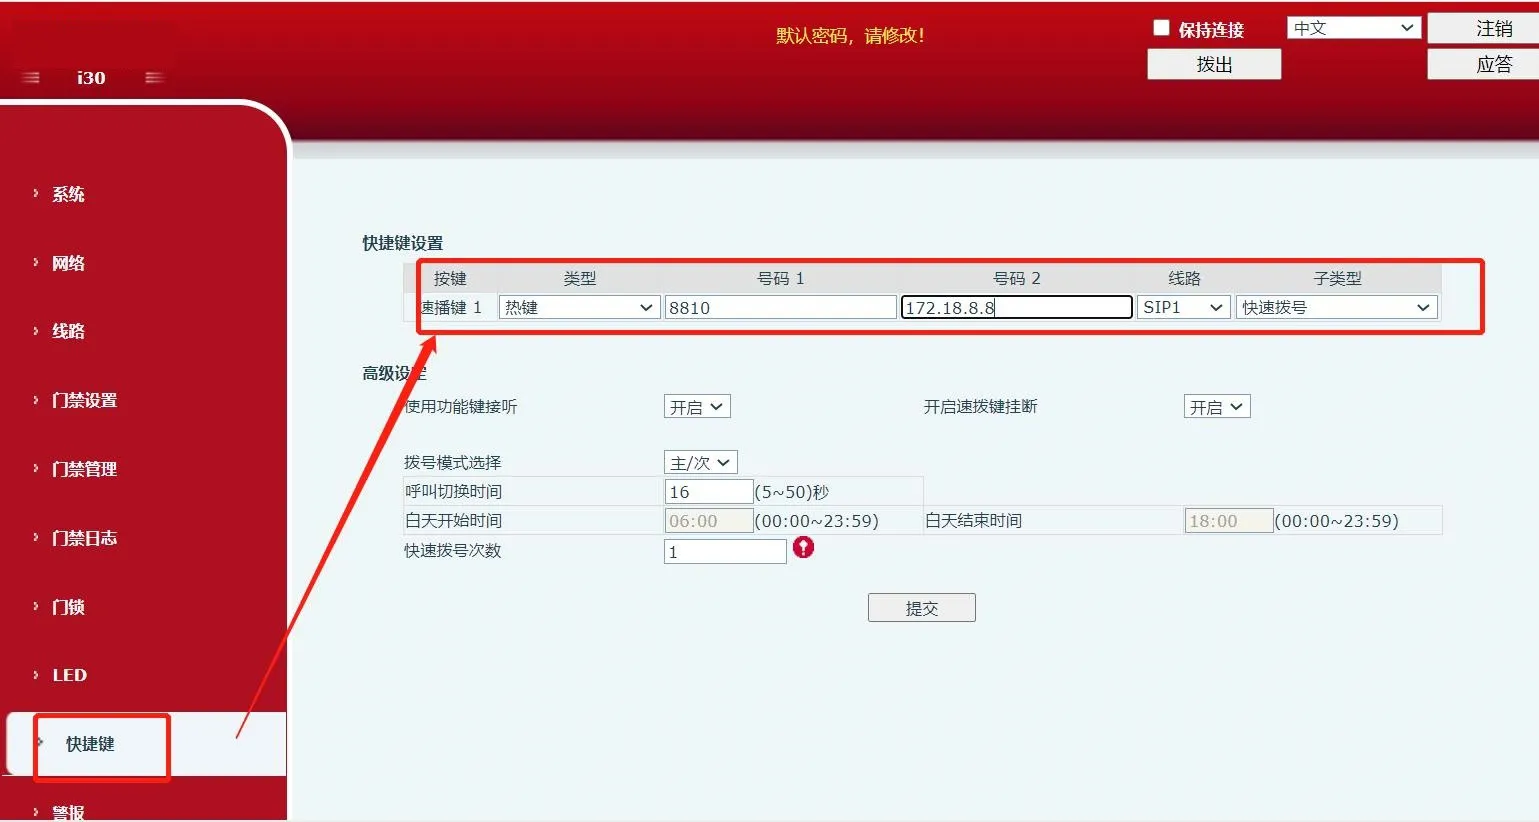
1. Log in to the web interface, then go to Function Key —— Function Key Settings.
Type: Hot Key
Value 1 and Value 2: enter either the phone IP address or the SIP account registered on the server
Line: select the outgoing line number.
2. Two advanced dialing modes are available.
1. Primary/Secondary Mode
Go to Function Key —— Advanced Settings
Dialing Mode: Primary/Secondary Mode
Call Switch Time: enter a value from 5 to 500 seconds
Then click Submit.
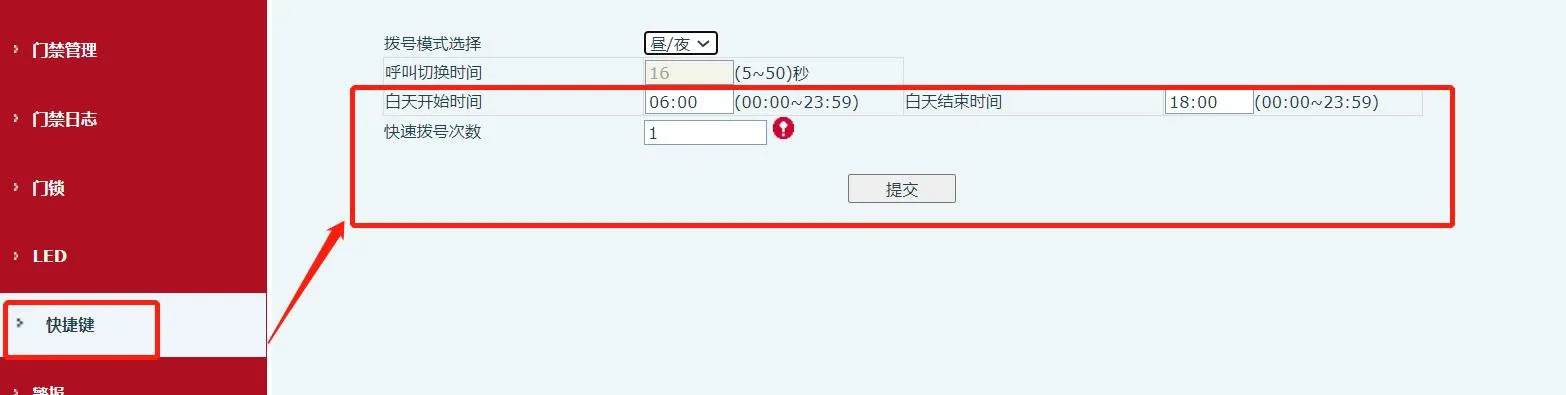
2. Time-Based Mode
Go to Function Key —— Advanced Settings
Dialing Mode: Day/Night Mode
Day Start Time: 00:00--23:59
Day End Time: 00:00--23:59
Then click Submit.
After these settings are saved, pressing the shortcut key will call the phone defined in Value 1 during the configured daytime period. Outside that time range, the device will call the phone defined in Value 2.
When using IP direct calling, you must disable the device restriction for IP direct dial. Using the i53W as an example, go to Line -> SIP -> SIP Global Settings, then clear the Enable Strict UA Match option, as shown below, and click Submit to save the setting.

You also need to go to Line -> SIP -> Basic Settings, then enable Allow Unregistered Outgoing Calls and click Submit to save the setting.
