Learn how to register indoor monitors, access control devices, and intercom terminals to a PortSIP server, including extension setup, domain settings, SIP account configuration, and device login steps
When a device needs to communicate by using a registered SIP account, a SIP server must be available and the account must be registered on the device. This guide explains how to register industry devices to a PortSIP server.
All of our indoor monitors, access control devices, and intercom products. In this guide, the Bi52W and Bi63 are used as examples.
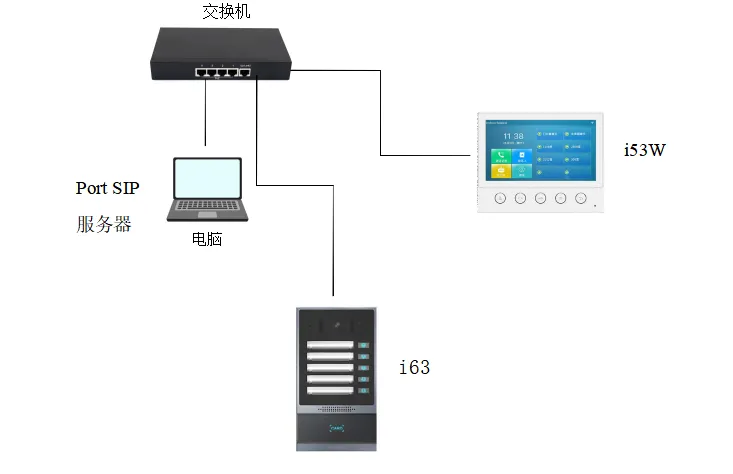
Connect the PC, Bi63, and Bi53W to the same local network, as shown below.
Before registering the device to the PortSIP server, the server environment must be set up first. In this example, a PortSIP server installed on a PC is used to demonstrate the process.
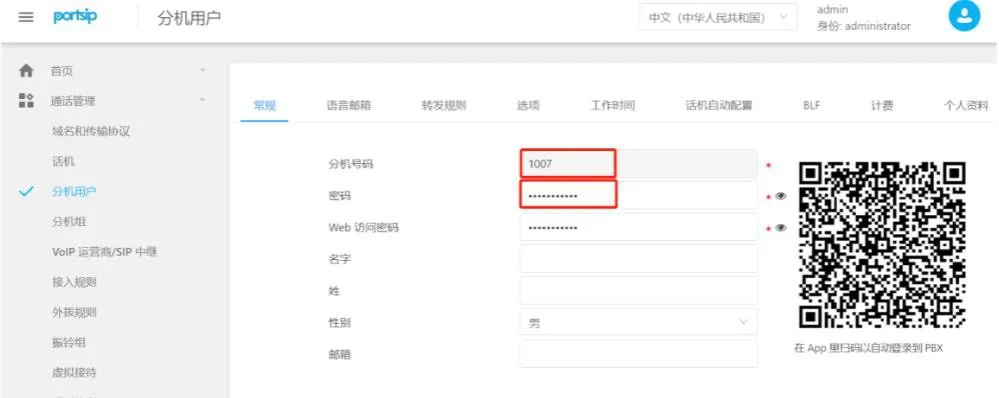
1. Add an extension.
Log in to the server web interface, then go to Call Management —— Extension Users. Click the Add button, then enter the extension number and password to create a new extension account, as shown below.
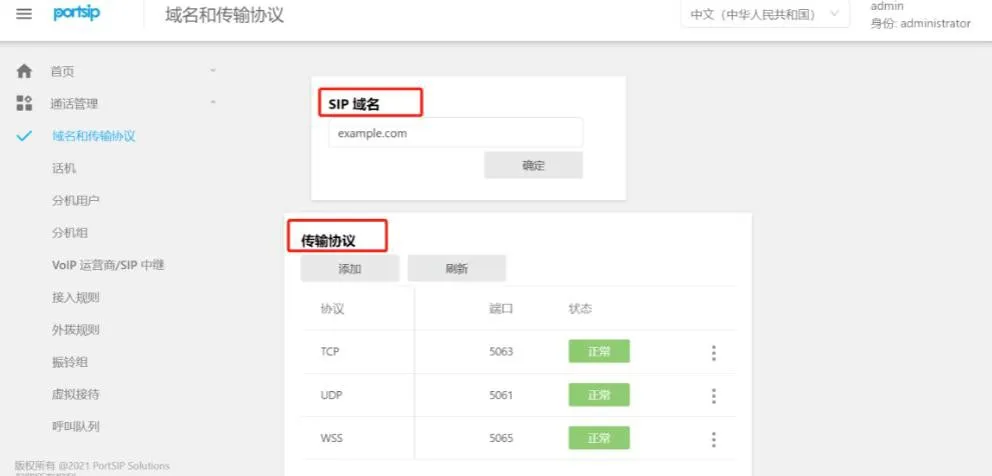
2. Check the server domain and transport protocol settings.
Go to Call Management —— Domain and Transport Protocol to view the SIP domain, transport protocol, and corresponding port number used by the server, as shown below.
1. Check and obtain the device IP address.
For access control and intercom devices:
Press and hold the DSS key for 10 seconds until you hear a beep, then press it once quickly and the device will announce its IP address.
For indoor monitor devices:
Non-touchscreen models: i51W, i52W
Press and hold the OK key, then go to System Information —— Network —— IPv4.
Touchscreen models: i53W, i56A
Go to Menu —— Status —— Network —— IPv4.
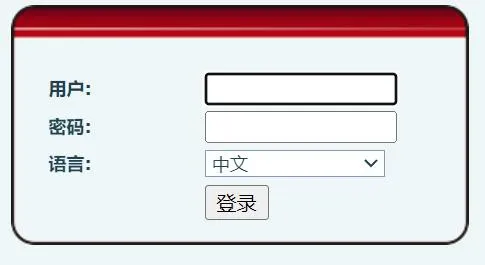
2. Open a browser and enter the device IP address.

The default username and password are both admin.
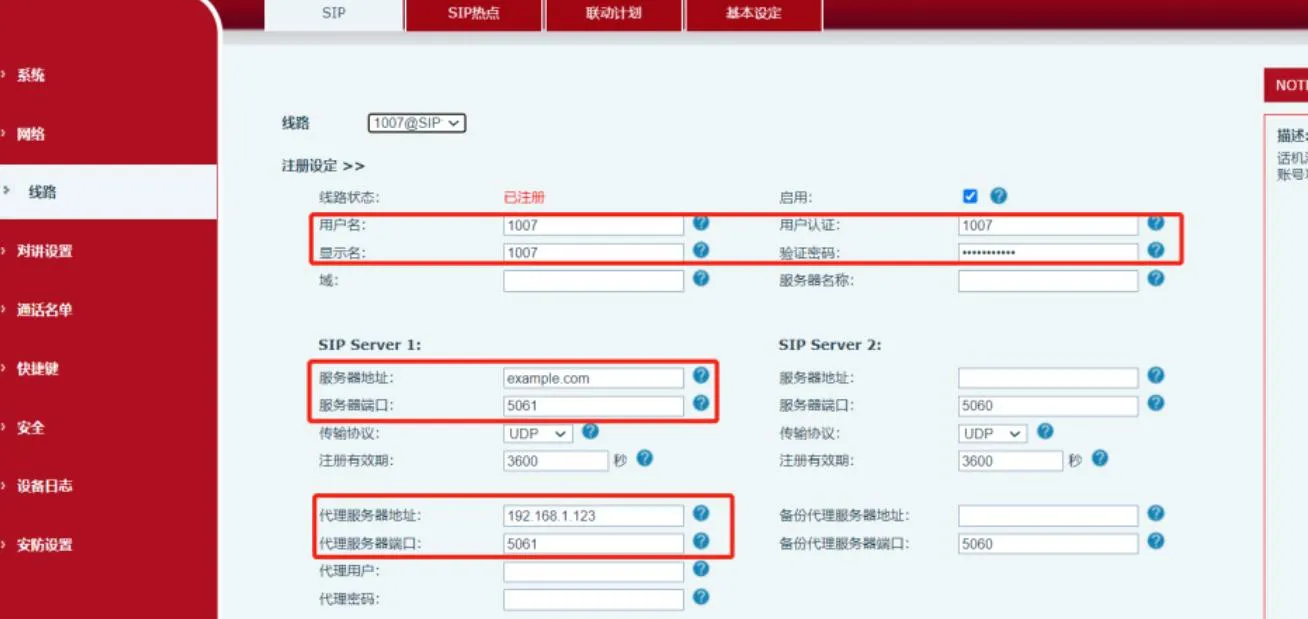
3. Go to Line → SIP → Registration Settings. Enter the account information, password, port, server address, and other required details, then click Submit.
(1) Username, Authentication User, and Password: these are the extension number and password created on the server.
(2) Server Address: enter the SIP domain of the PortSIP server.
(3) Server Port and Transport Protocol: use the transport protocol and matching port defined in the PortSIP domain and transport settings. In this example, UDP and its corresponding port are used.
(4) Proxy Server and Port: in this example, registration is performed within the local network. Since the server is installed on a PC, the proxy server should be the static IP address of that PC, and the port should match the port used by the selected transport protocol.
(5) After all settings are entered, make sure the device and the server can communicate over the network. Once registration is successful, the line status on the device will change to Registered, which means the SIP account has been registered successfully to the PortSIP server.