Learn how to batch import contacts into an IP phone by exporting a CSV template, editing contact data, preserving the correct encoding, and uploading the file through the web interface.
This article explains how to batch import contact information into the phone directory. It is intended for users who need to add multiple contacts efficiently instead of entering them one by one through the phone interface.
This method applies to all phone models. In this example, the BX5U is used to demonstrate the process.
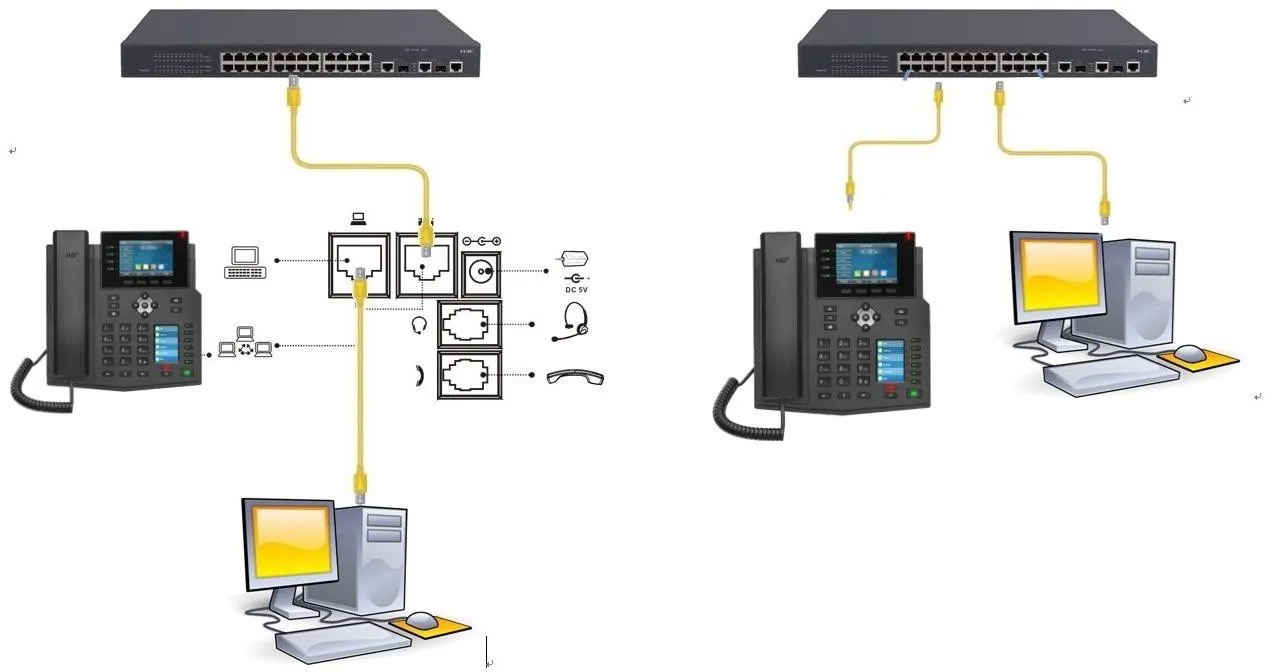
1. One phone connected to a switch and able to obtain an IP address.
2. One configuration PC connected to the same network as the phone, with network access between the PC and the phone confirmed.
On the phone LCD screen, go to Menu — Status to find the phone IP address.
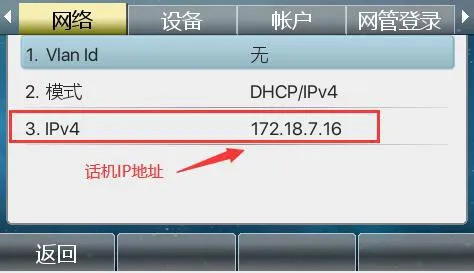
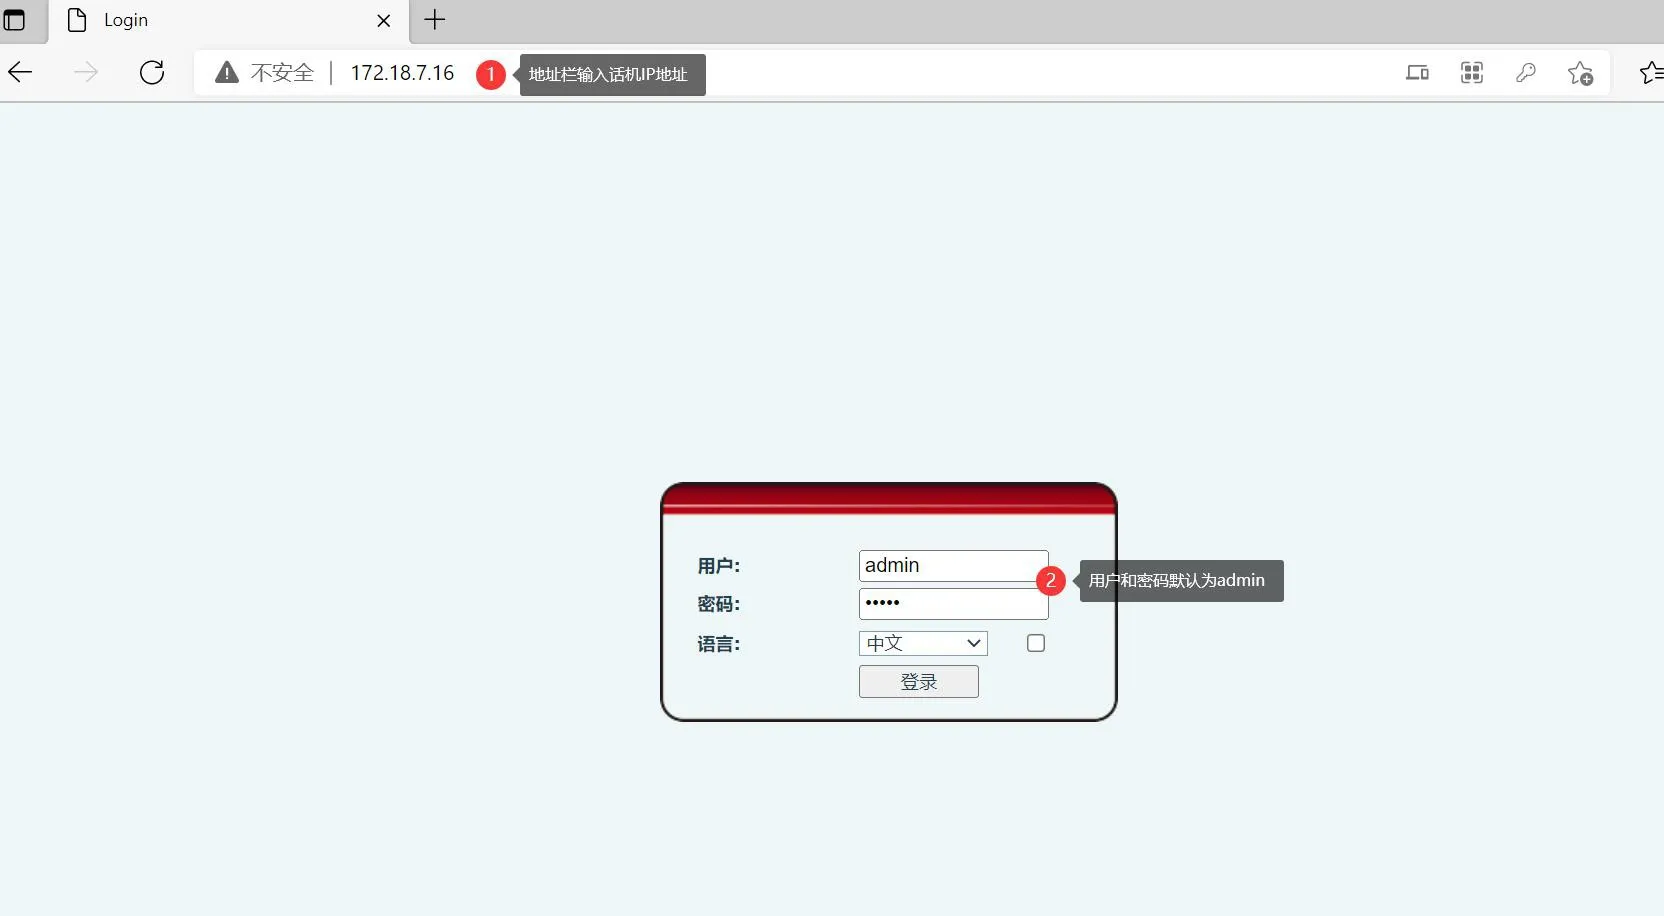
Then open a web browser on the PC and enter the phone IP address in the address bar to access the phone web interface.
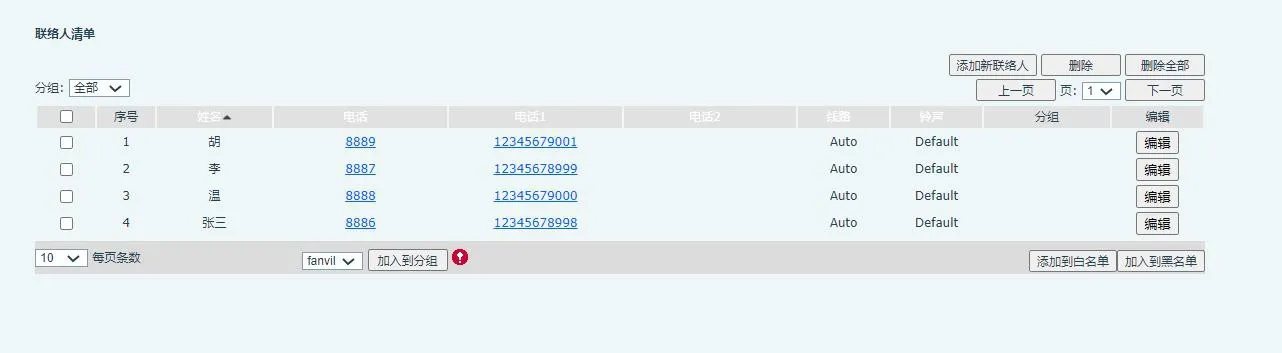
After logging in to the phone web interface, go to Phone Book — Contacts — Add New Contact. Create one sample contact first, as shown below.
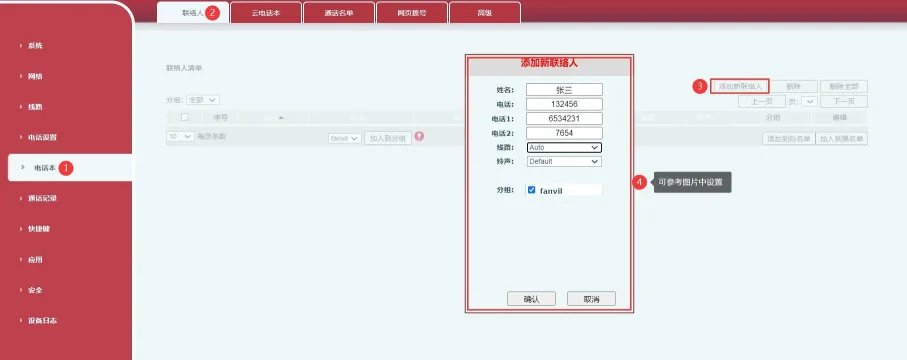
Figure 1
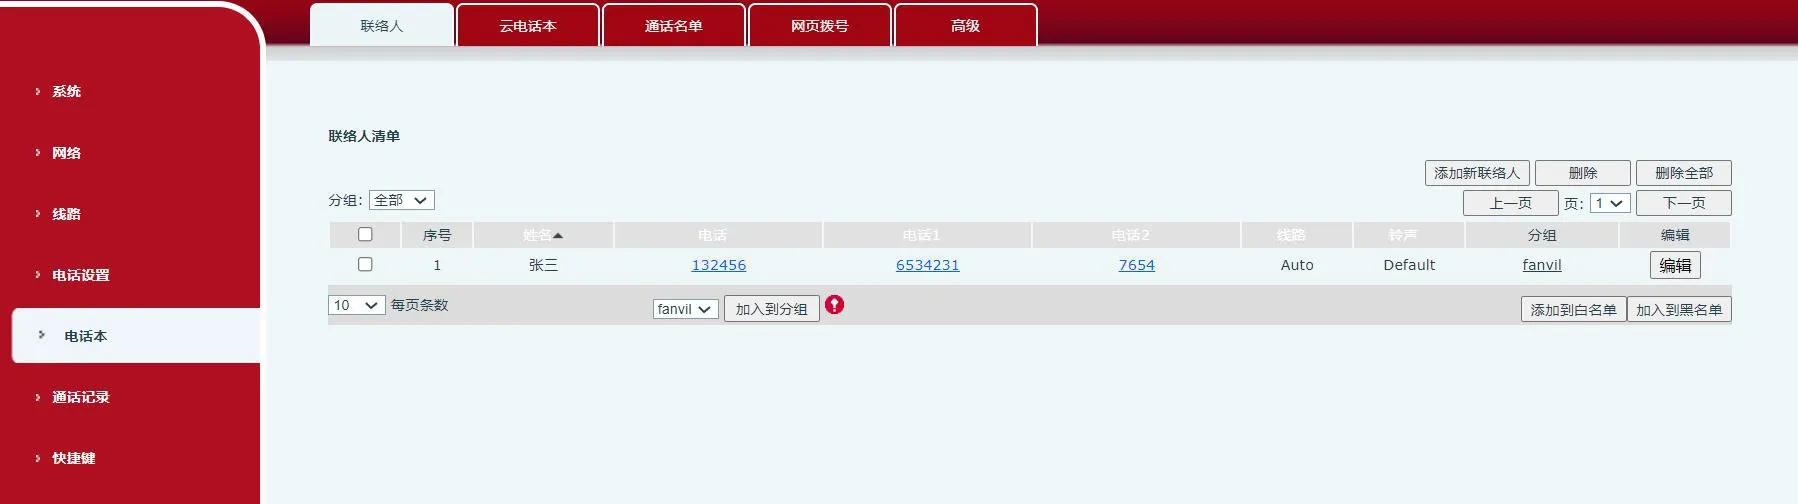
Figure 2
If your contact list needs group information, create the groups before importing contacts. Go to Phone Book — Advanced — Group List — Add Contact Group, then add the required group names.
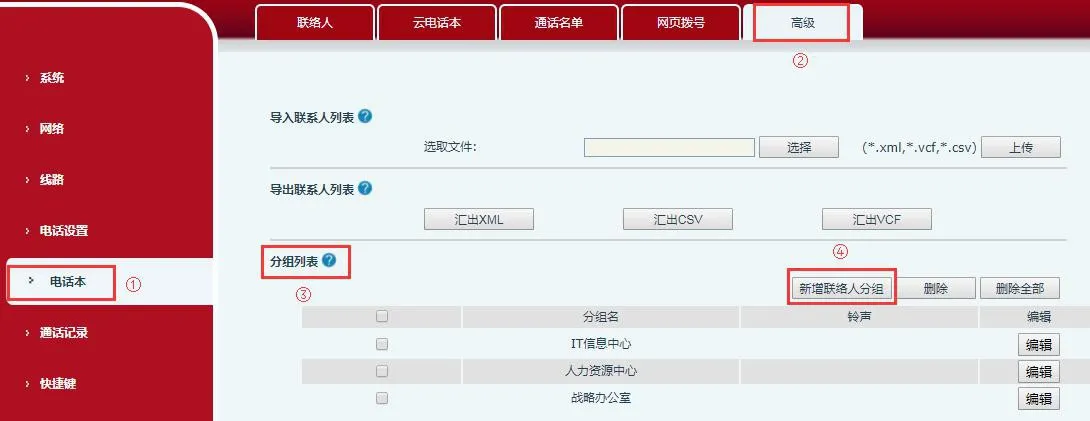
Figure 3
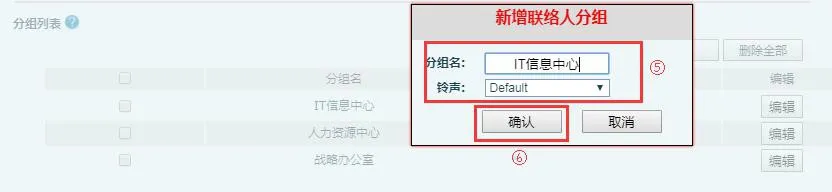
Figure 4
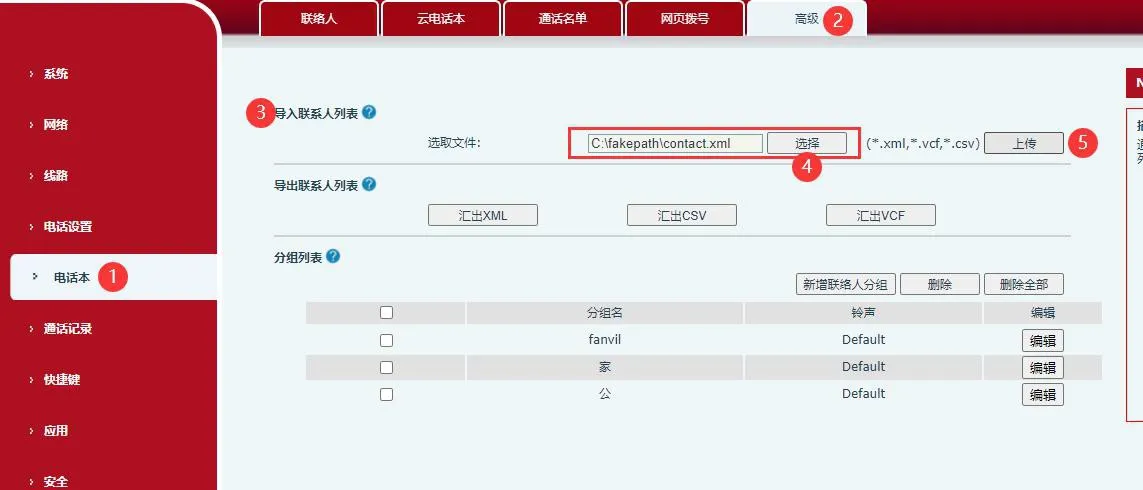
In the phone web interface, go to Phone Book — Advanced. In the contact export section, click Export CSV. The phone will export a CSV contact file, usually named contact.csv.
This exported file serves as the correct import template. You can add new contact entries to this file, but the existing file structure and format should remain unchanged to ensure a successful import later.
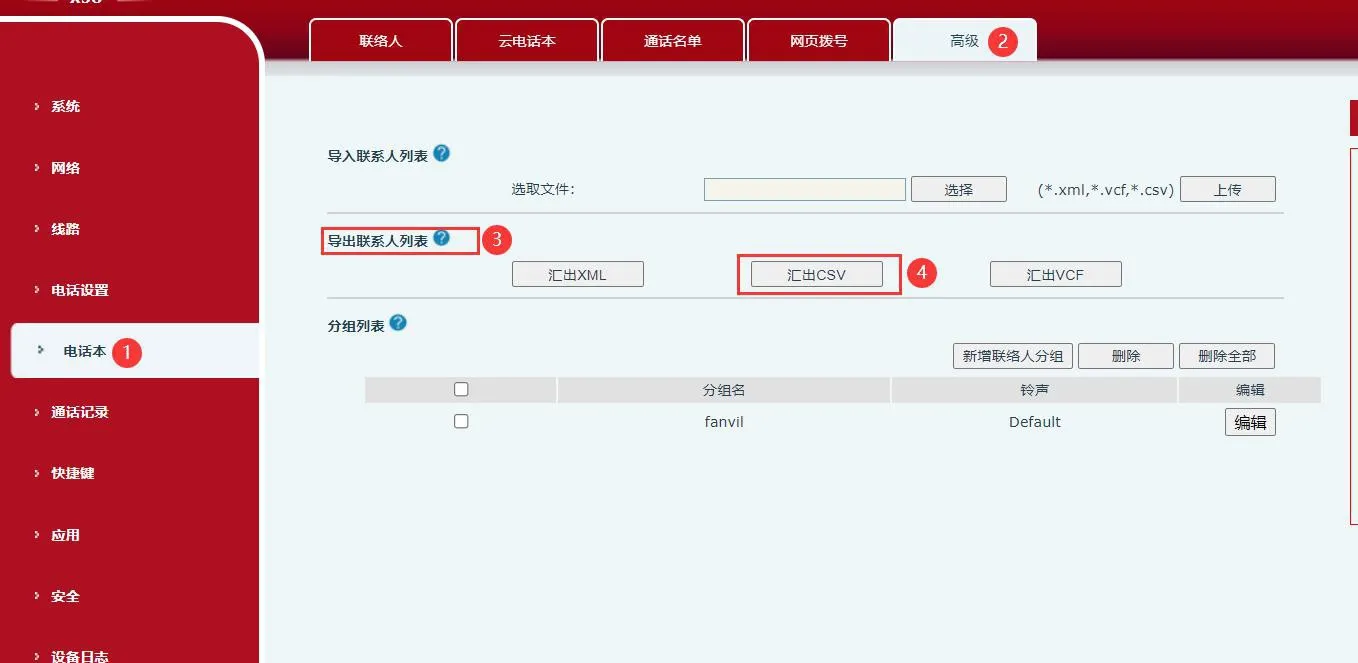
Figure 5
You can edit the CSV file using common spreadsheet tools such as Excel or WPS Office. In this example, WPS is used. Open the exported contact.csv file and enter the new contact information.
Field usage is as follows:
The name column is used for the contact name.
The work column is used for the main office number.
The mobile and other columns are used for additional phone numbers.
The ring column defines the ringtone assigned to that contact.
The groups column is used for group assignment. Any group name entered here must already exist on the phone, such as work or home.
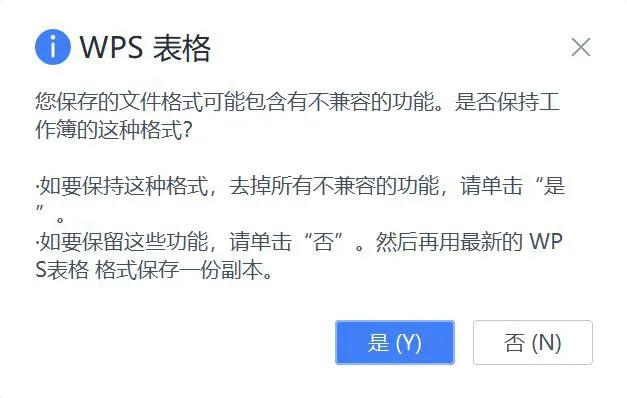
After editing, save the file. If the software warns that some formatting may be incompatible, click Yes to continue.
If you import the edited file directly after opening it in Excel or WPS, the contact names may appear as garbled text on the phone. This happens because the original file encoding may be changed by the spreadsheet software.
To avoid this issue, open the edited phonebook file in UltraEdit. In the menu bar, select File — Save As, and choose the correct file format or encoding as required.
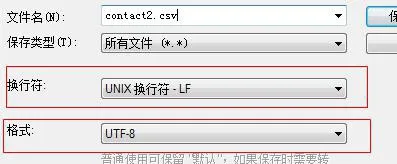
Save the file as contact2.csv. Then import this new file into the phone web interface. The contact list should display correctly without character corruption.
In the phone web interface, go to Phone Book — Advanced — Import Contact List. Select the prepared contact file and click Upload to complete the import.
The following images show the import process and the final result.