Hotel SIP Phone GUI Customization Guide covers wallpaper, logo, icon upload via web UI, 480x320 BMP specs, text alignment, font settings, and display configuration for hotel branding.
Obtain the IP Address:
There are two methods: long press the "#" key for 5 seconds, or dial "#*111".
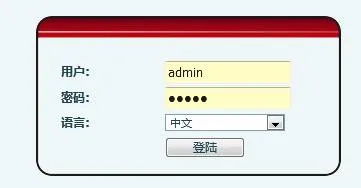
Access the Web Interface via the IP Address:
Username (default): admin; Password (default): admin
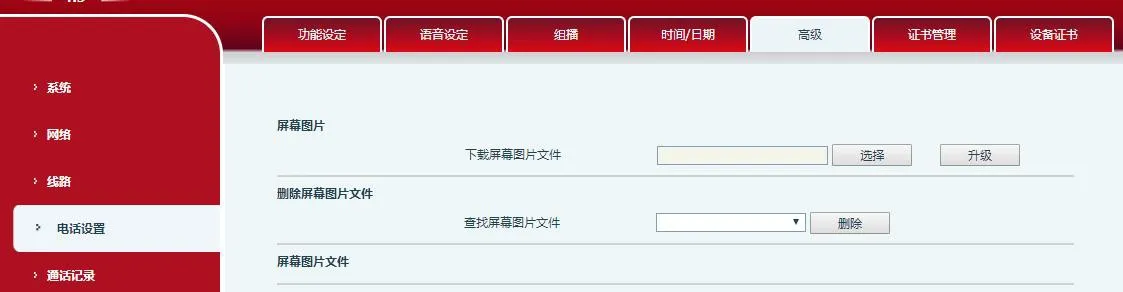
Navigate to Phone Settings - Advanced
Go to Web UI → Phone Settings → Advanced → Screen Images. Here you can upload background images, desktop icons, and logos. They will appear on the phone after a successful upgrade.
Supported formats: bmp, zbmp, tar.gz
Background Image: Must be 480 x 320 pixels, BMP format, 16-bit / RGB565.
ICONS (ICON_RECEPTION, ICON_SERVICE, ICON_CLEANING, ICON_WAKEUP, ICON_EMG, ICON_MANAGER): Must be BMP format, 54 x 54 pixels.
Logo: Must be 180 x 30 pixels, BMP format, 16-bit / RGB565. The filename MUST be "TITLE_LOGO", otherwise the upload will fail.
Power Saving Mode: Turns the backlight off after a timeout. Default backlight timeout is 30 seconds.
Set a time interval to automatically clear the redial history.
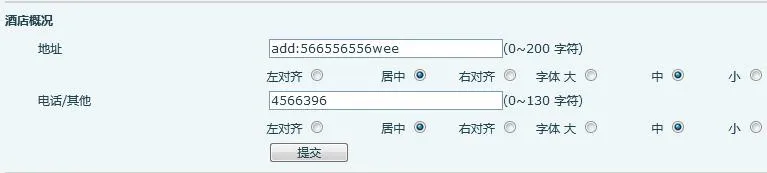
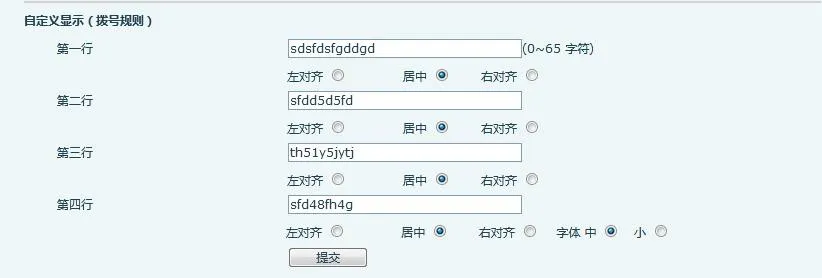
Address: Enter hotel address (max 200 characters).
Phone/Other: Enter hotel phone or other info (max 130 characters).
Format: "L" = Left, "M" = Center, "R" = Right alignment.
Font: "L" = Large, "M" = Medium, "S" = Small.
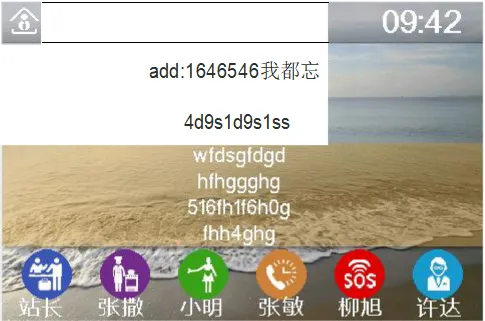
The phone supports 4 custom lines, max 65 characters per line.
Enter text, select alignment, font, color, then click Apply to display on the screen.
Format: "L" = Left, "M" = Center, "R" = Right alignment.
Font: "L" = Large, "M" = Medium, "S" = Small.
Color: "W" = White, "B" = Black.