
This guide explains how to connect SIP access control and SIP intercom devices to NVR for video recording via RTSP protocol. It covers supported models, network setup, and step-by-step configuration for Hikvision NVR integration.
This document describes how to connect SIP access control and SIP intercom devices to an NVR, mainly to realize video recording for industrial terminal products. The NVR client sends RTSP commands to the industrial video terminal, and the terminal returns the video stream of the built-in camera to the client for real-time video viewing and recording.
NVR stands for Network Video Recorder, which is the storage and forwarding component of a network video surveillance system. NVR works with video encoders or IP cameras to complete video recording, storage and forwarding functions.
BHP-SOS16, BHP-SOS18, BHP-SOS30, BHP-SOS30V, BHP-SOS33V, BK-DAB-PA2, BHP-SOS10, BHP-SOS10V, BHP-SOS11, BHP-SOS11V, BHP-SOS16V.
1.3.1 Device Preparation
Prepare an industrial video terminal with a built-in camera, and one Hikvision or Dahua NVR.
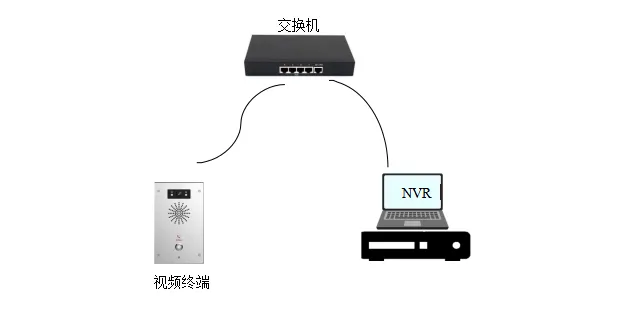
1.3.2 Network Connection Diagram
 <
<
Note: The above network diagram is for LAN use only. For public network deployment, please contact our technical support team for assistance.
① Log in to the NVR web interface via a browser.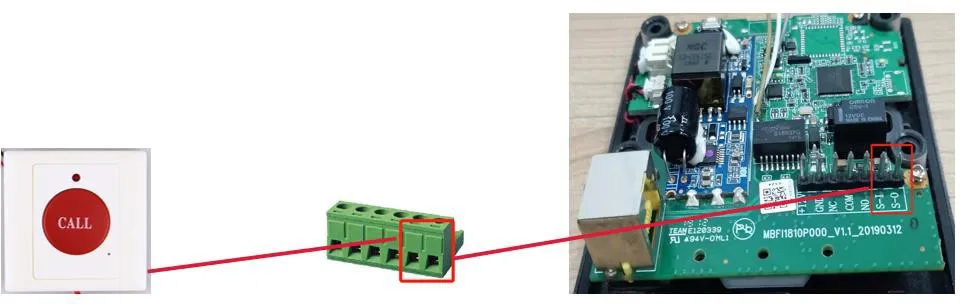
② Go to Configuration - Channel Management.
③ Configure custom protocol:
Protocol Type: RTSP
Transfer Protocol: Auto
Port: 554
Resource Path: Copy the main stream URL from Access Control Settings - Video Settings - RTSP Information
Note: The menu path varies by device model. For intercom devices, find the RTSP URL under Intercom Settings - Video Settings (Camera Settings).

④ IP Channel Configuration - Add:
IP Channel Address: IP address of the SIP access control / SIP intercom device
Protocol Type: Name of the custom protocol you created
Management Port: Use the default value from the custom protocol
Username: Custom username
Password: Custom password
Confirm Password: Same as the password above
Transfer Protocol: Default
⑤ Added successfully, status shows Online.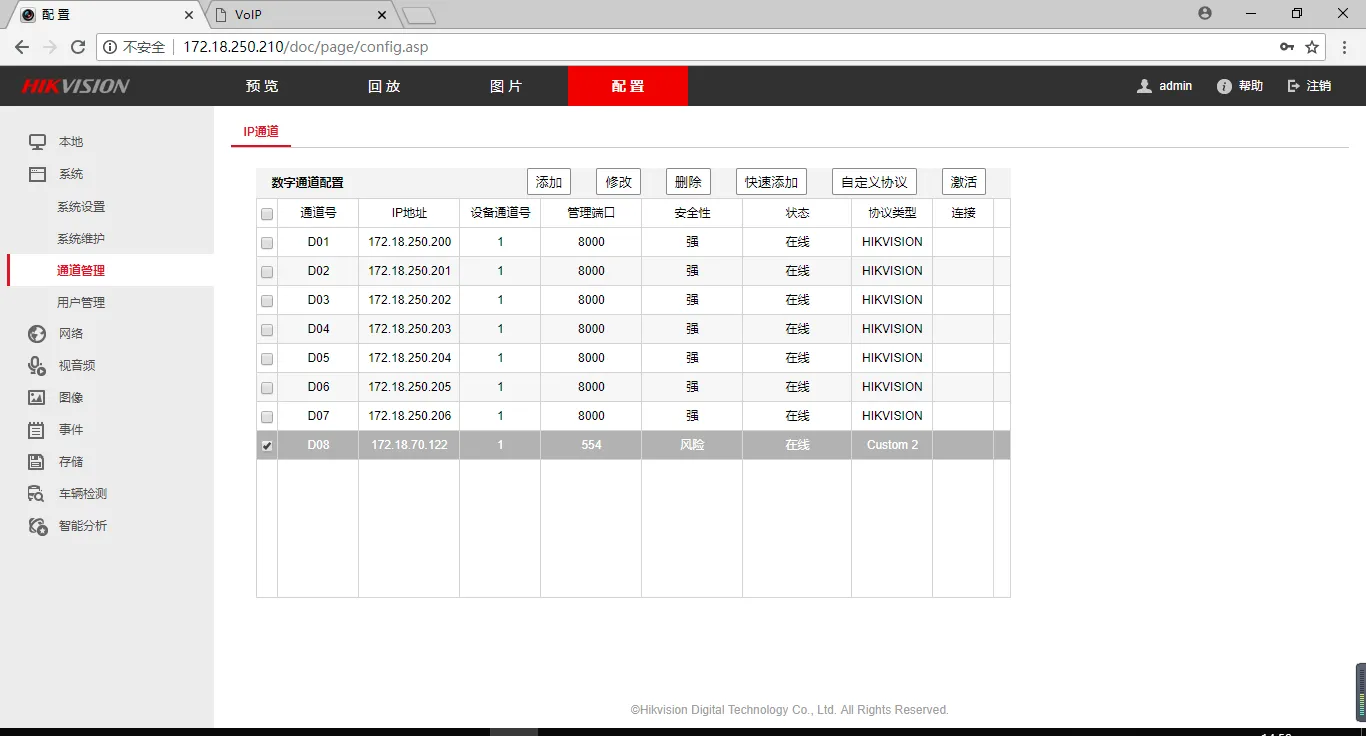
⑥ The video of the corresponding channel can be viewed in the Preview page.