Learn how to connect a camera to the BK-DAB-PA2S SIP Gateway for video calling, including local and external connection modes, hardware setup, authentication, and web configuration steps
The BK-DAB-PA2S SIP Gateway can work with a camera to support video calling and other visual communication features. Depending on the installation method, the camera can be connected in either local mode or external mode. This article explains how to complete the hardware connection and web configuration for both options.
BK-DAB-PA2S SIP Gateway
① One BK-DAB-PA2S SIP Gateway, one PoE switch (or DC power supply), and one Hikvision camera. Connect the devices to the same switch.
② One setup PC connected to the same switch, ensuring network communication between the PC and the device.
③ One BK-DAB-PA2S-KIT connected to the terminal.
Connect the device to the switch, and connect the PC to the same switch so that the PC and the device can communicate over the same network. See Figure 1.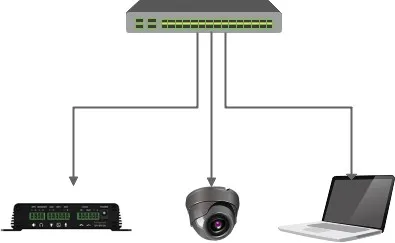
Figure 1
Connect the BK-DAB-PA2S-KIT to the Device
Use an Ethernet cable to connect the BK-DAB-PA2S-KIT to the CAMERA port on the PA2 SIP Gateway, as shown in Figure 2.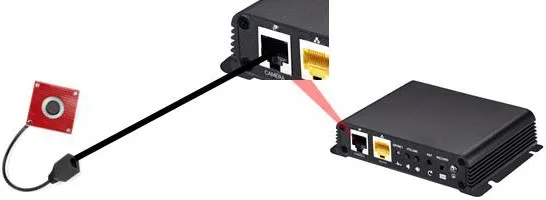
Figure 2
Set the Camera to Local Mode
① After obtaining the device IP address, log in to the web interface and go to Intercom Settings - Video Settings. Change the camera connection type to Local. The device will reboot automatically.
② There is a QR code on the back of the BK-DAB-PA2S SIP Gateway. Scan it with WeChat to obtain the authentication code, as shown in Figure 3.
③ In the Intercom Settings - Video Settings page, enter the authentication code under Authentication Settings. See Figure 4 for the example configuration.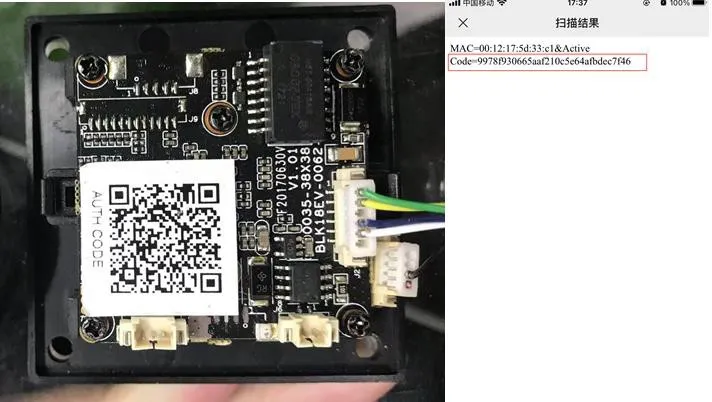
Figure 3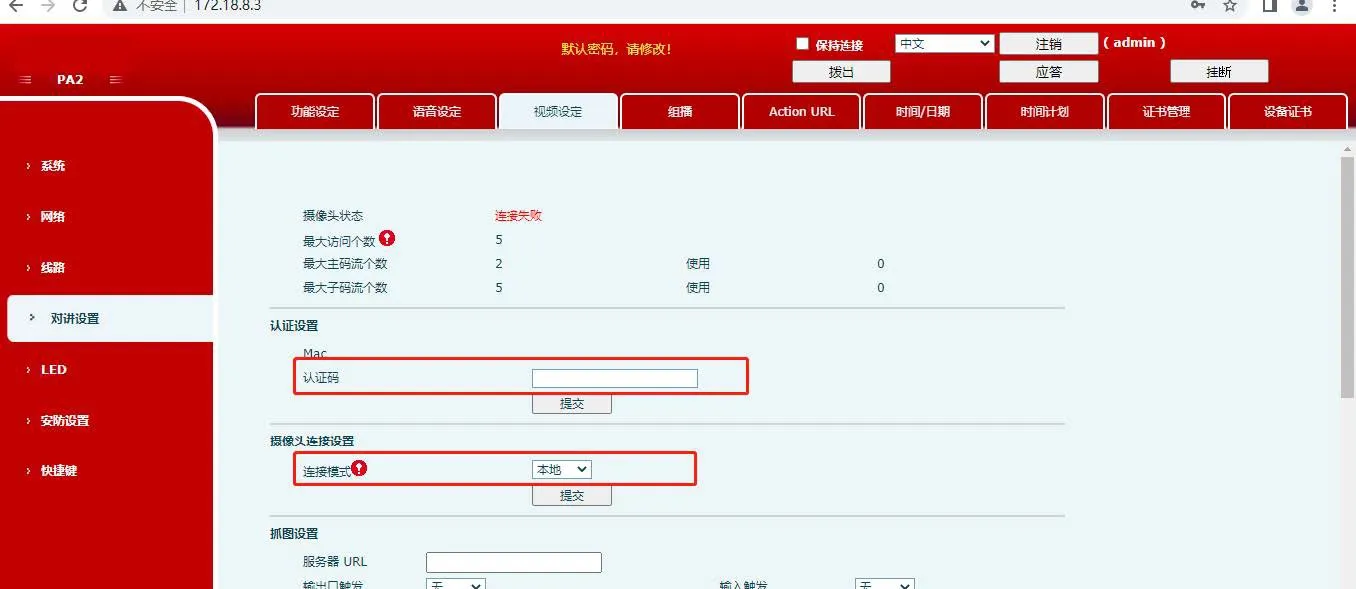
Figure 4
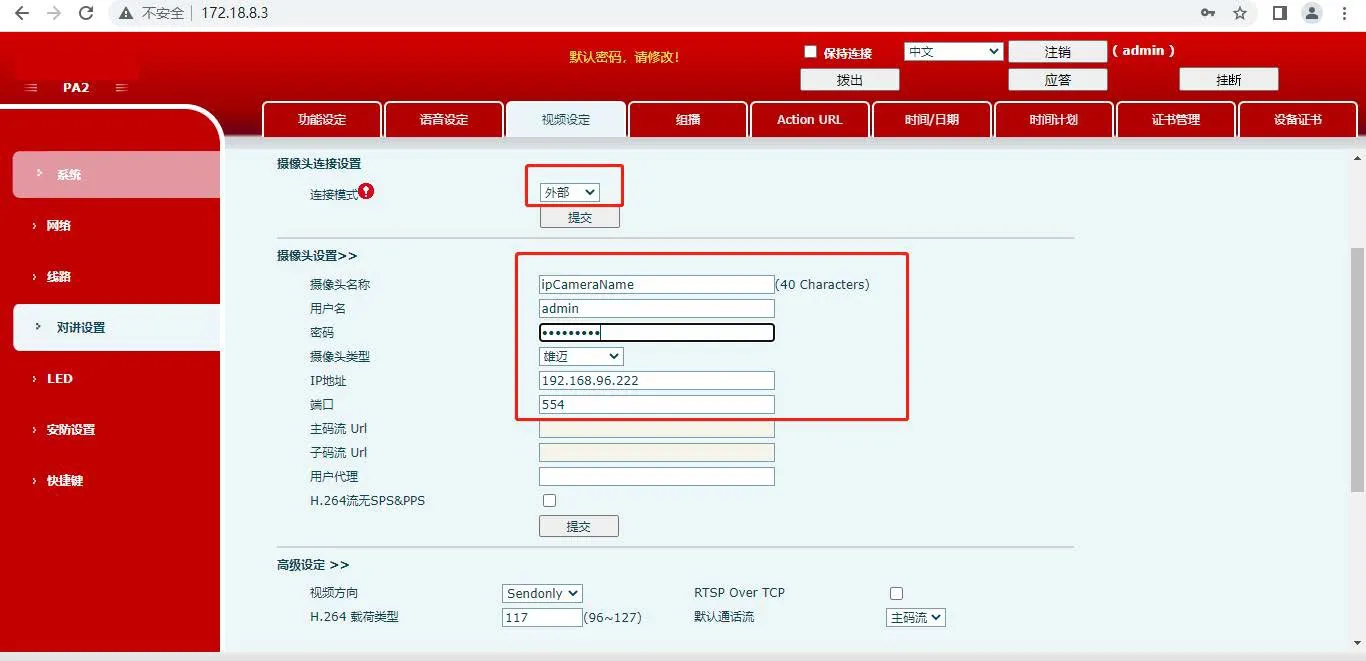
① After obtaining the device IP address, log in to the web interface and open Intercom Settings - Video Settings. Change the camera connection type to External. The device will reboot automatically.
② After the reboot, return to Intercom Settings - Video Settings and enter the external camera details, including the IP address, username, password, port number, and camera brand.
The configuration example is shown in Figure 5.