Learn how to check the IP address of PA2S and PA3 paging gateways, hear IP announcements, switch between DHCP and static IP modes, and use an IP scanner to find devices on the same local network.
This guide explains the device’s default IP behavior, how to identify its current IP address, and how to switch between dynamic and static IP modes.
PA2S and PA3.
Connect the PC and the PA2S or PA3 to the same local area network (LAN).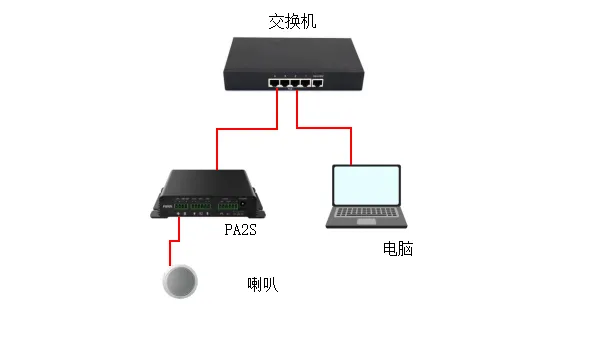
The PA2S and PA3 use DHCP by default when shipped from the factory.
2.1.1 When the PA2S or PA3 is connected to a network environment where an IP address can be assigned automatically:
Method 1: In standby mode (30 seconds after power-on), press and hold the Volume Down button for 3 seconds. The device will announce the IP address directly.
Method 2: In standby mode (30 seconds after power-on), press and hold the speed dial key until you hear a prompt tone, then release it. Quickly press the key once again and wait a moment for the device to announce the IP address.
2.1.2 When the PA2S or PA3 is in a network environment where an IP address cannot be obtained automatically, switch the device to static IP mode:
Method 1: In standby mode (30 seconds after power-on), press and hold the Volume Up button until you hear a prompt tone (a rapid beeping sound). Release it immediately, then quickly press the Volume Up button three times.
Method 2: Press and hold the speed dial key until you hear a prompt tone (a rapid beeping sound). Release it immediately, then quickly press the key three times.
Either method will switch the device to static IP mode. The default static IP address is 192.168.1.128.
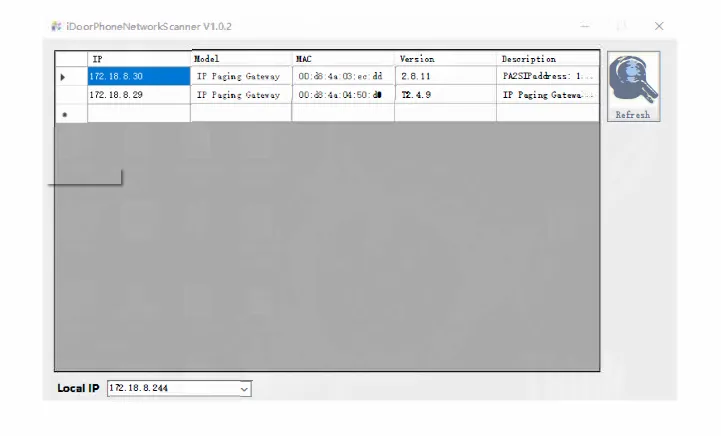
Make sure the PC and the PA2S or PA3 are on the same LAN. Download the IP scanning tool for the PC from the following link:
https://www.fanvil.com.cn/Uploads/Marketing/Tool/IPScanner_v1.2.1.zip
Open the scanning tool and click Refresh to detect the device IP address.