
English guide to checking the IP address and setting a static IP on Becke indoor stations, including i51W, i52W, i53W, and i56A, with device-side and web-based configuration methods.
Before commissioning or maintaining an indoor station, users often need to confirm the current IP address or change the network mode to a static IP. This guide explains the practical methods for checking the IP address and configuring a static IPv4 address on Becke indoor stations. The procedures below are based on the interface logic shown in the original HTML content and are written in a clearer English support style for installers, technicians, and project teams.
This guide applies to the following indoor station models: i51W, i52W, i53W, and i56A.
This document is intended for users, installers, and support personnel who need to identify the device IP address or switch the terminal from DHCP to a static IP deployment.
Method 1: Check the IP address on the device screen
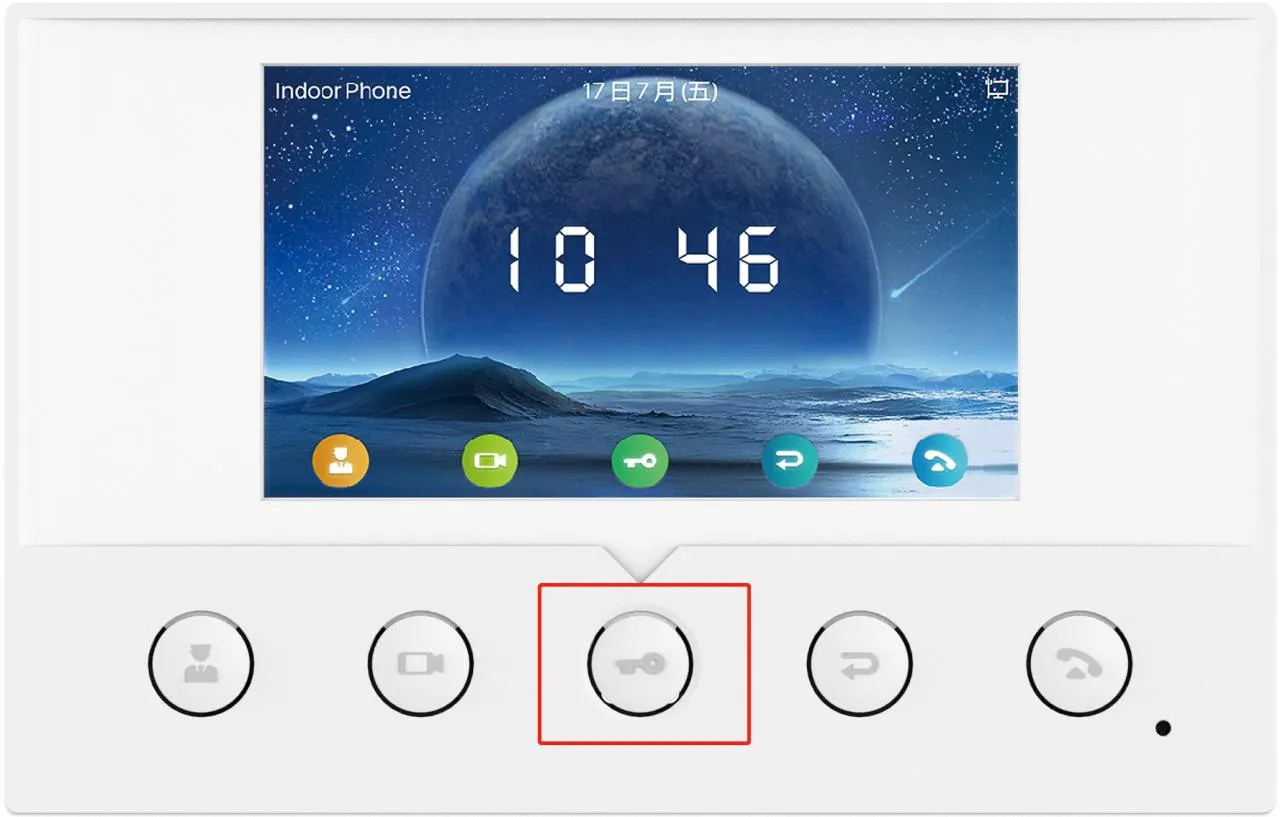
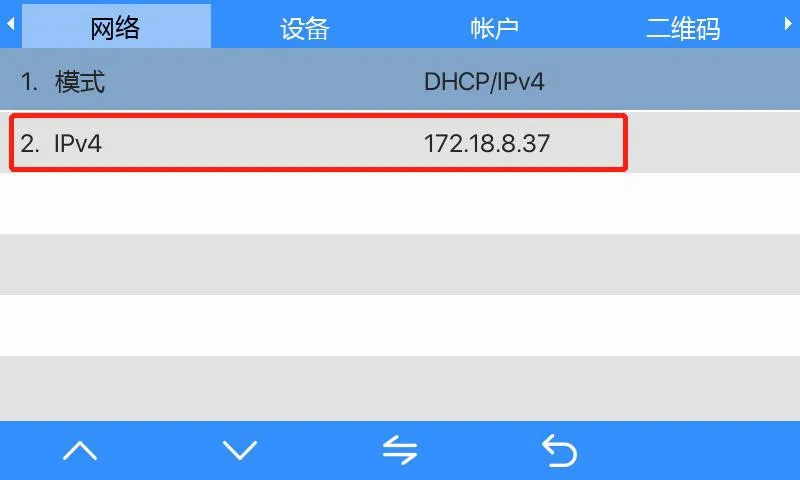
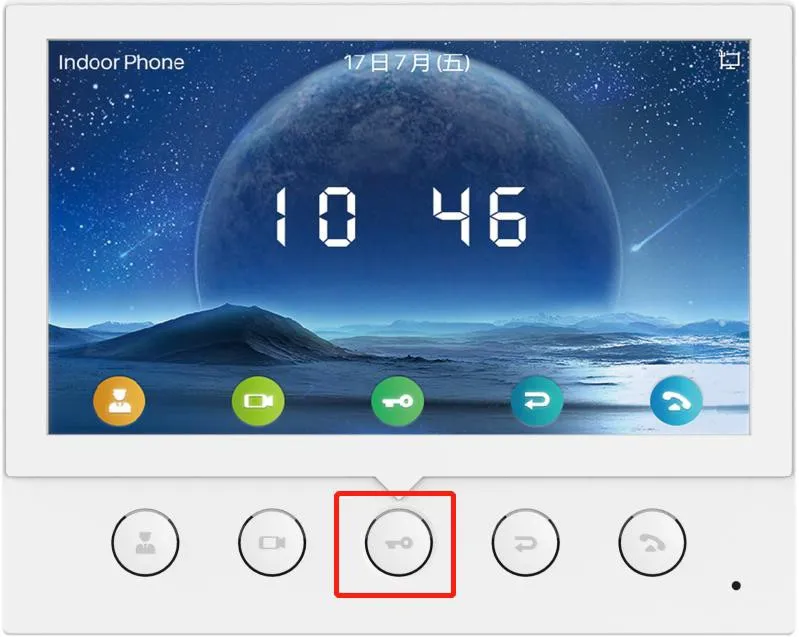
Press and hold the key shown below for about 3 seconds to enter the device menu on the i51W or i52W. After entering the menu, go to System Information → Network → IPv4. The current device IP address will then be displayed on the screen.

Method 2: Use the IP scanning tool
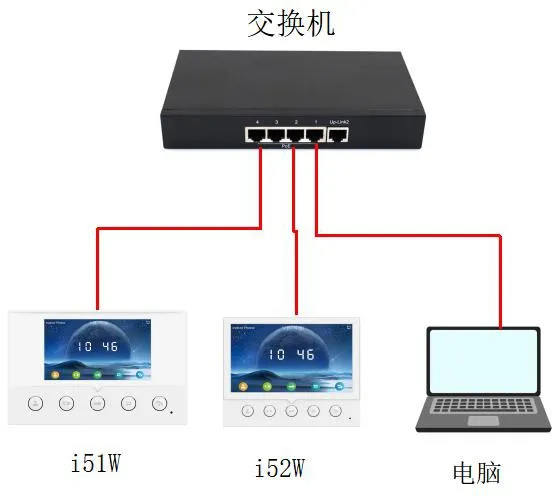
Connect the device and the PC to the same local network.
Download and install the IP scanning tool from the official download page: https://www.fanvil.com.cn/Support/download/cid/30.html.
Set the PC IP address so it is in the same subnet as the device.
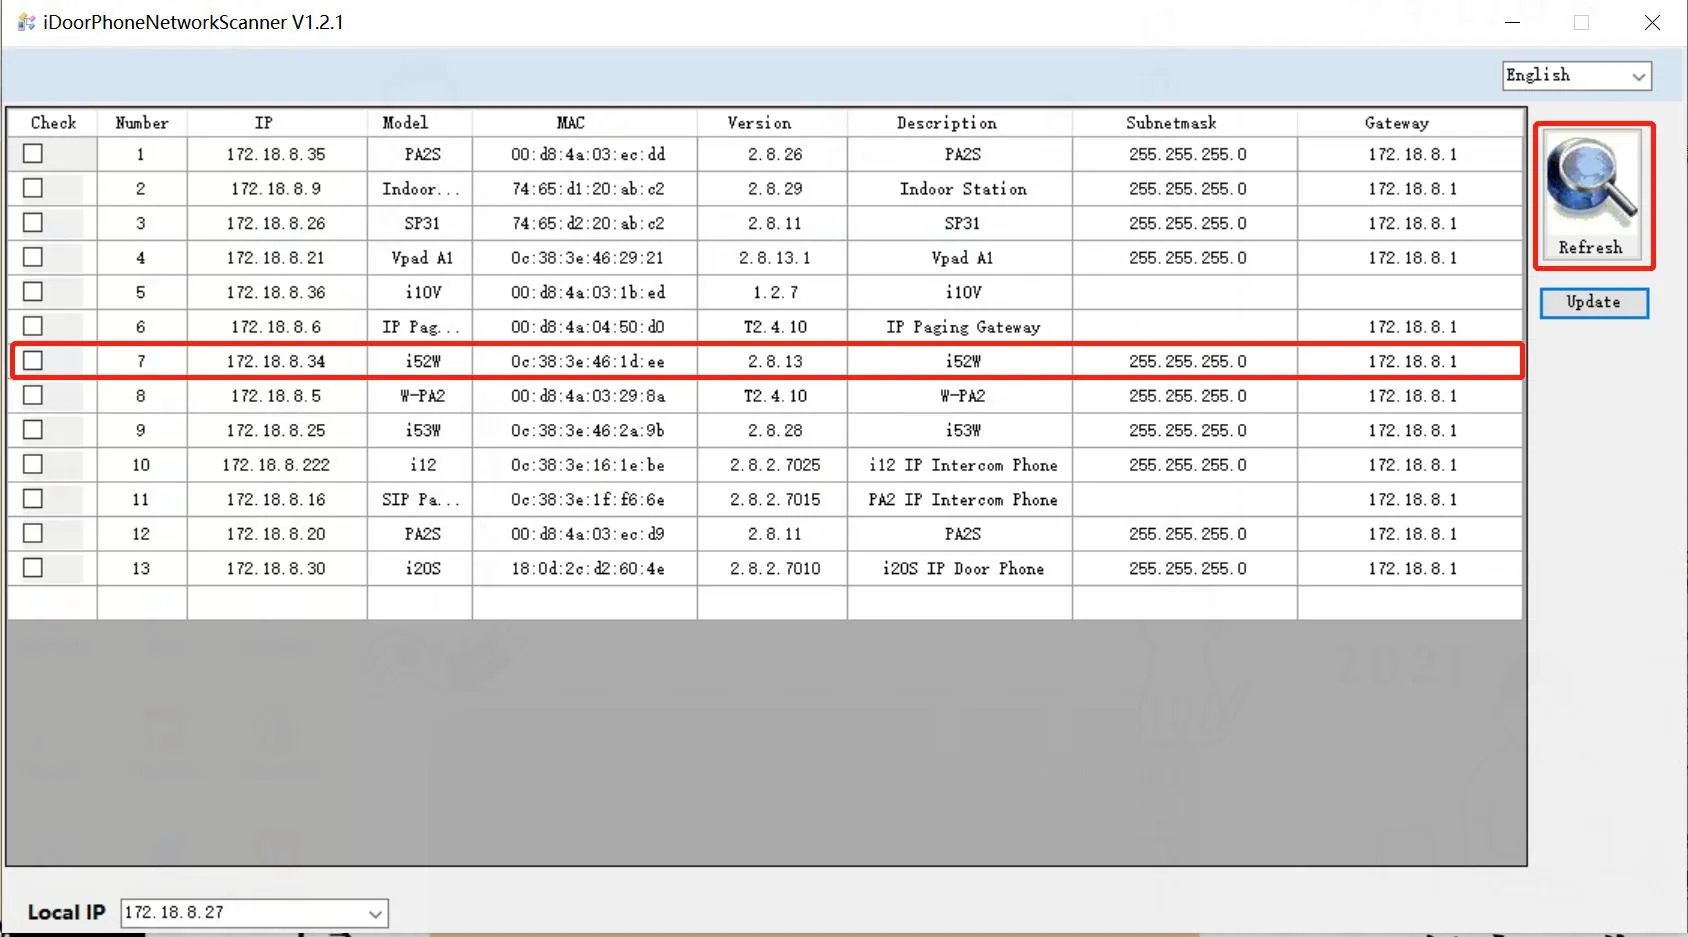
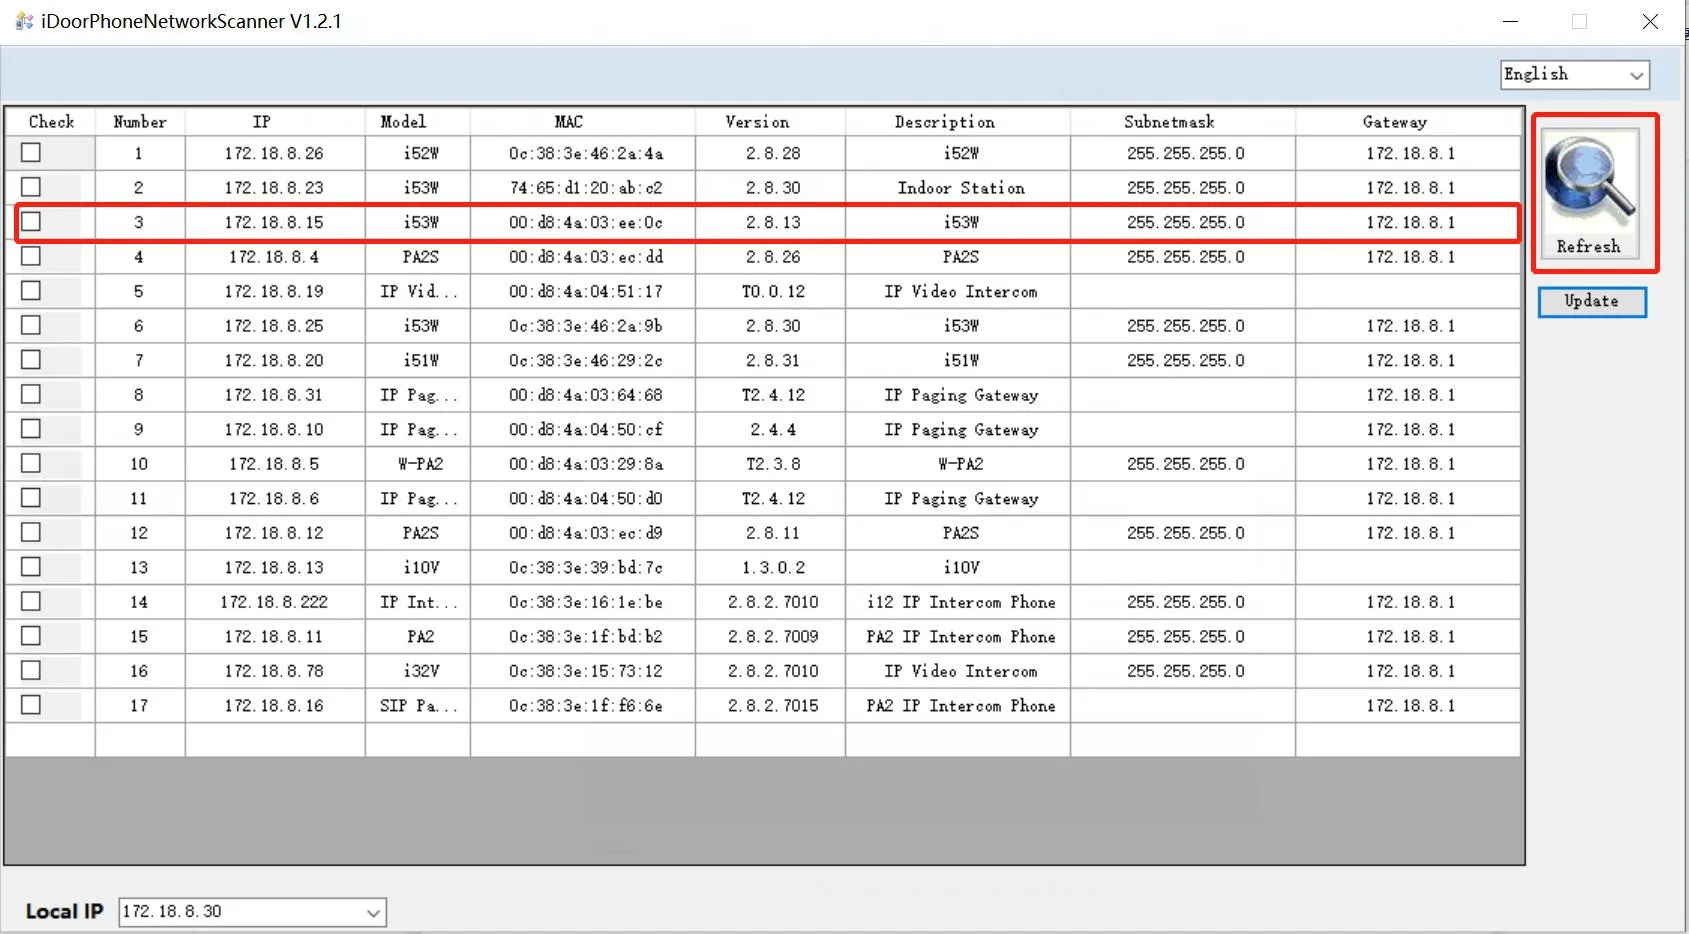
Click Refresh in the scanning tool to detect compatible devices on the LAN and display the detected model and IP address.

Method 1: Check on the device screen
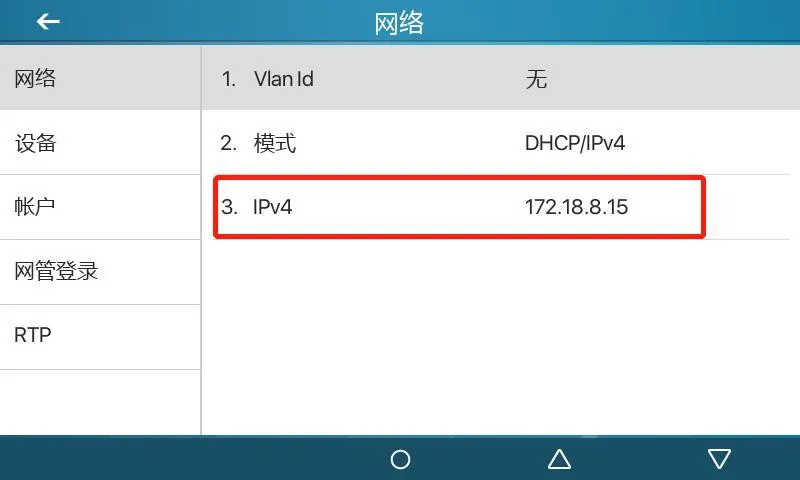
Tap Menu, then go to Status → Network. The current IP address of the i53W will be displayed on the screen.
Method 2: Use the IP scanning tool
Connect the i53W and the PC to the same network.
Download and install the IP scanning tool from the official download page.
Make sure the PC is on the same subnet as the device.
Click Refresh to scan the LAN and display the detected device IP address.
Method 1: Pull down the quick panel
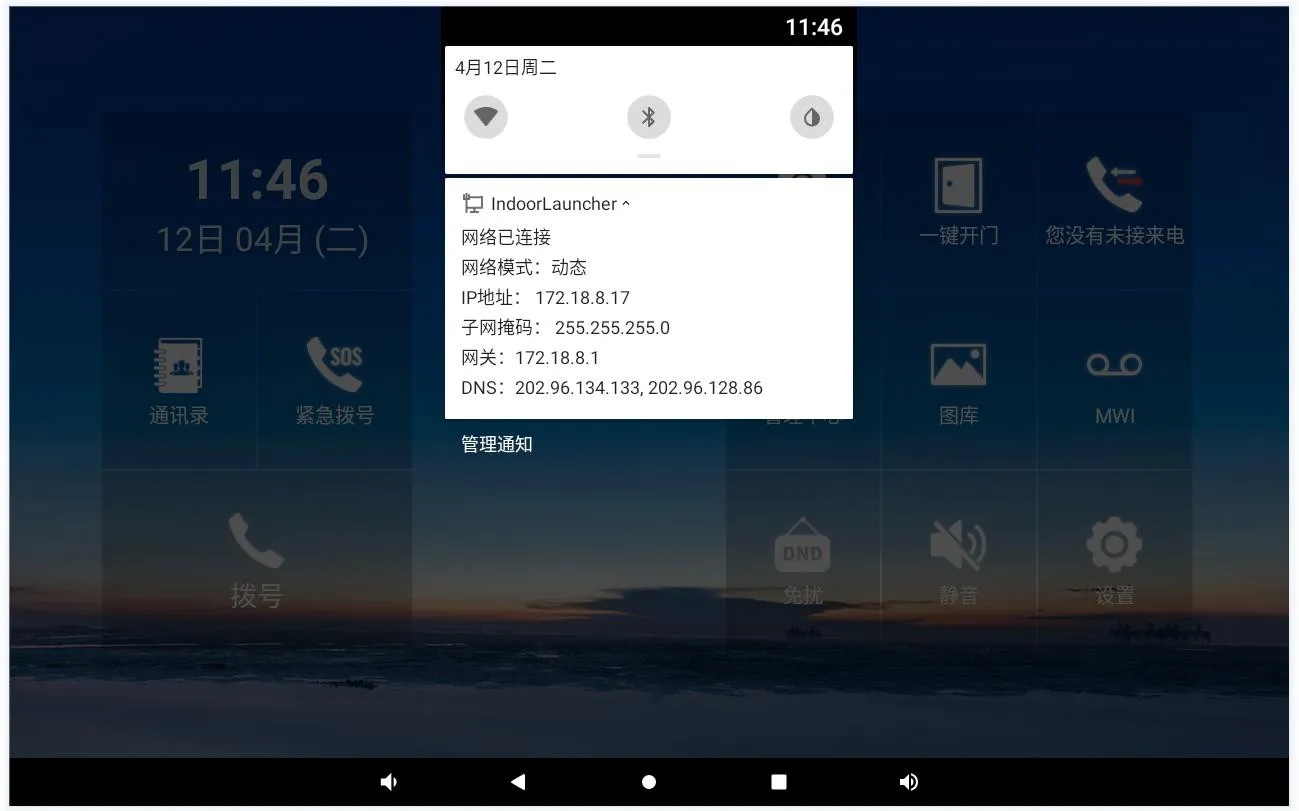
On the i56A, swipe down from the top of the screen to open the quick settings area. The current IP address can be viewed directly from this panel.
Method 2: Check from the device status page
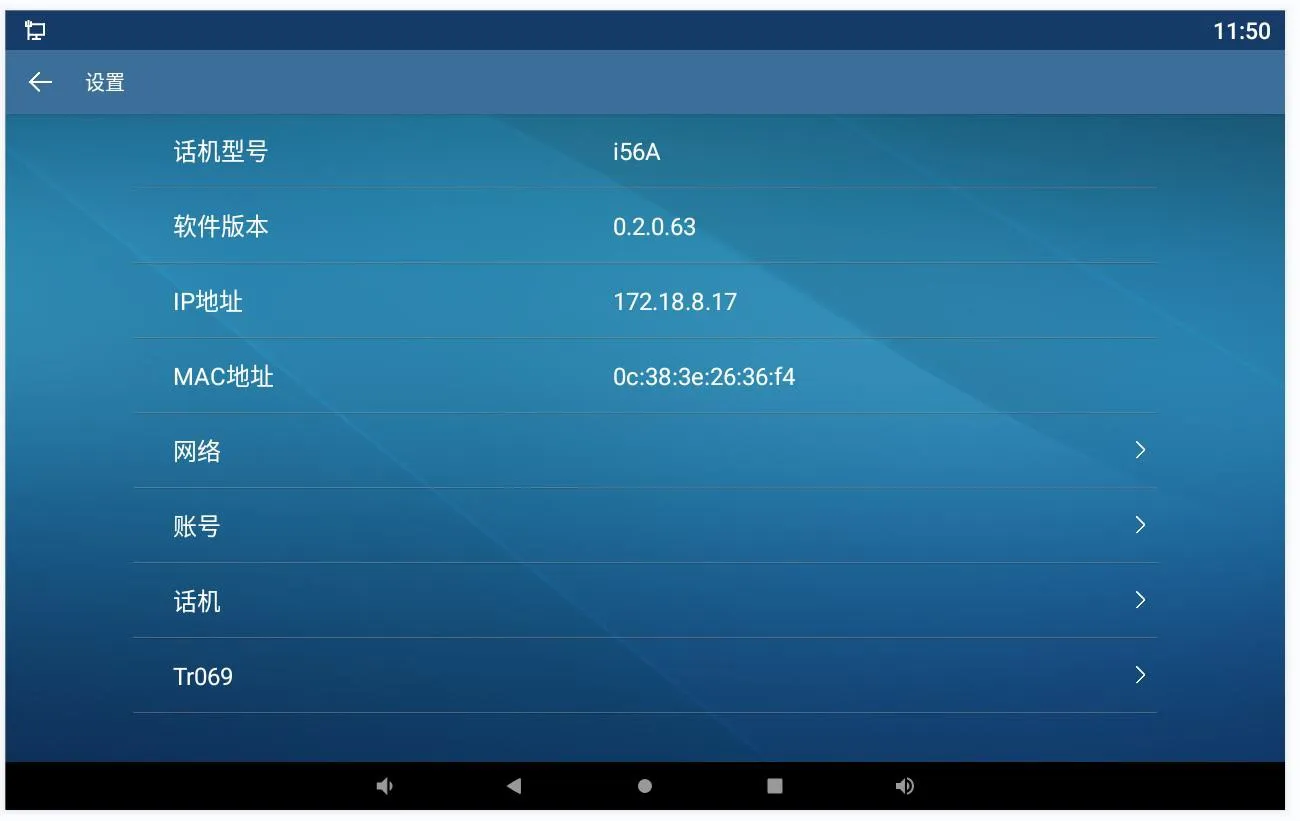
Open Settings → General on the screen and view the current network information to confirm the IP address.
Press and hold the corresponding key for about 3 seconds to enter the menu screen on the i51W or i52W. Then go to Network Settings → Wired Network Settings → IPv4 → Static IP.

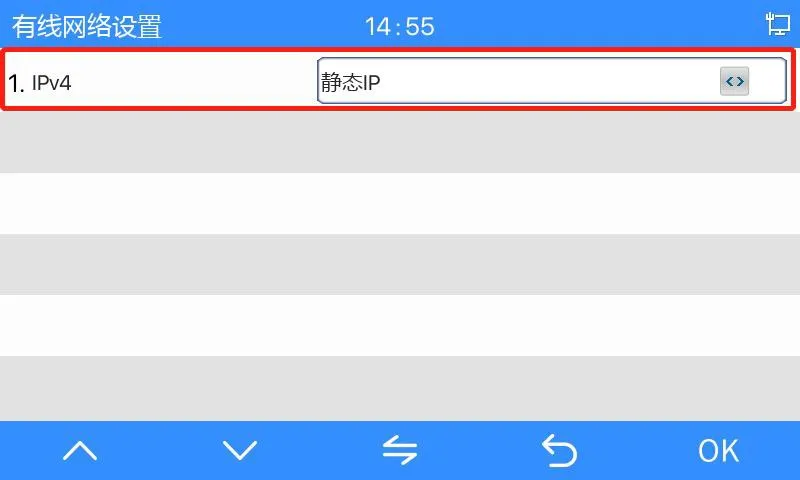
Important note: On the i51W and i52W, the device-side menu can switch the network mode to static IP, but it does not allow full editing of the static IPv4 address on the local screen. After the mode is changed, the default static IP becomes 192.168.1.178. If you need to modify the address itself, use the web interface instead.
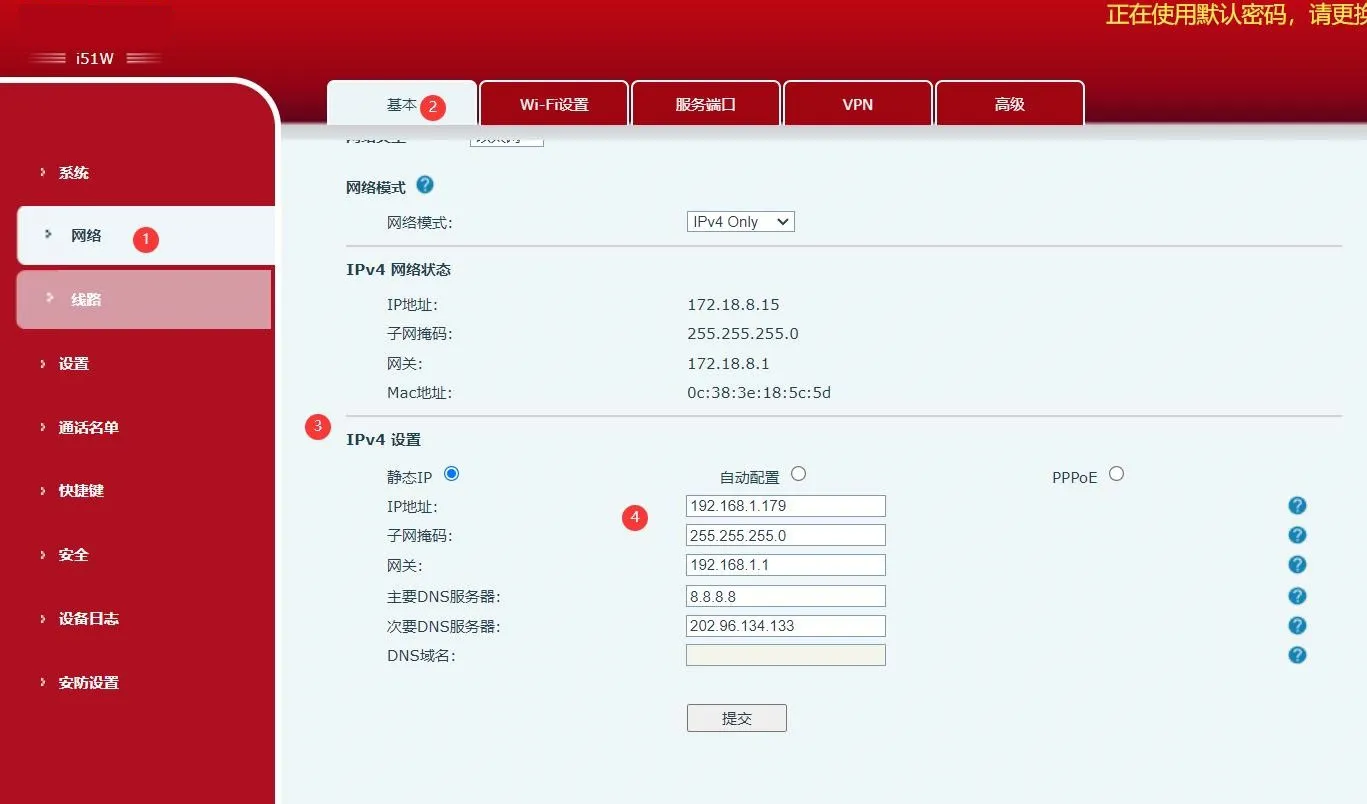
Web configuration method
Enter the current DHCP address, or the default static IP address after switching modes, into a web browser.
Log in to the web interface using the default account credentials: admin / admin.
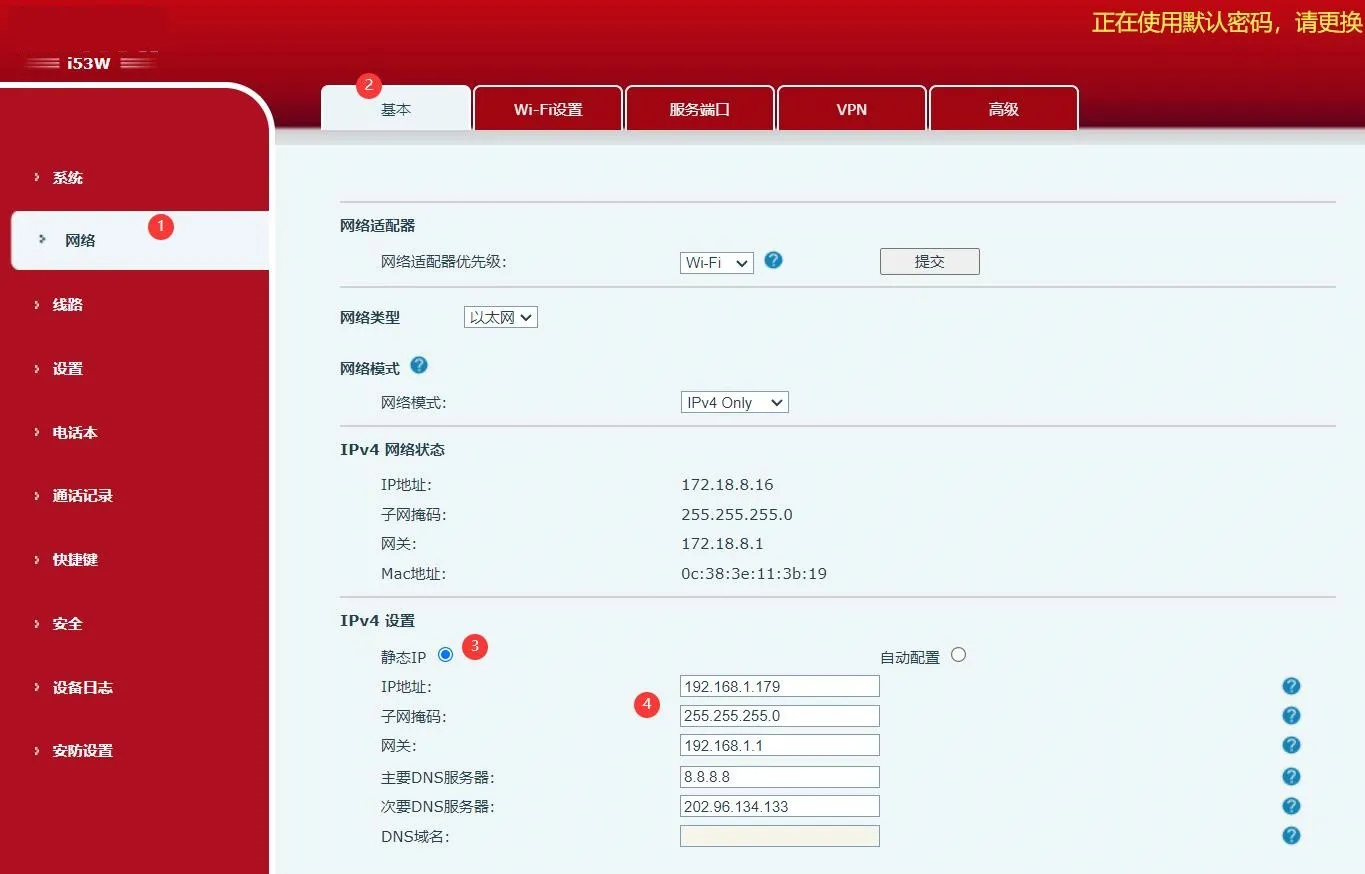
Go to Network → Basic → IPv4 Settings.
Edit the required static IP address information and save the changes.
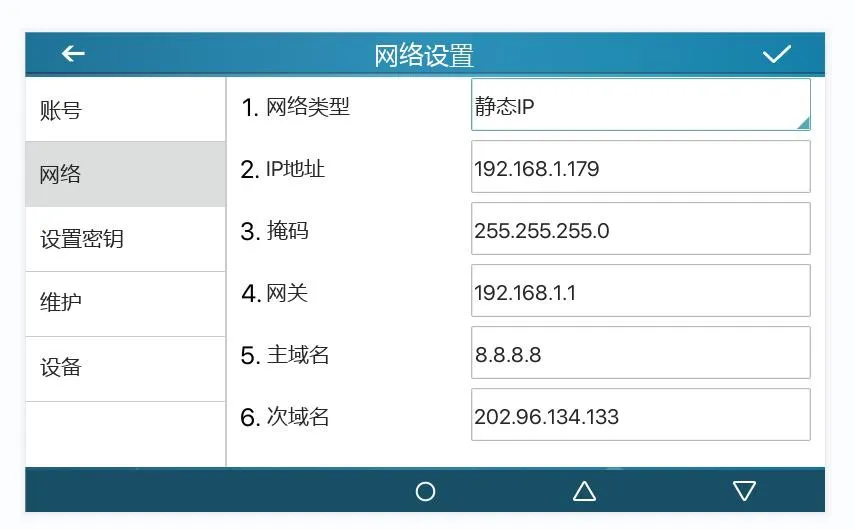
Method 1: Configure from the device screen
Tap Menu → Advanced Settings and enter the default password 123.
Go to Network → Network Settings → IPv4.
Change the network type to Static IP.
Edit the required IP address parameters and save the configuration.
Method 2: Configure from the web page
Enter the device IP address in a browser and open the web interface.
Log in with the default account credentials: admin / admin.
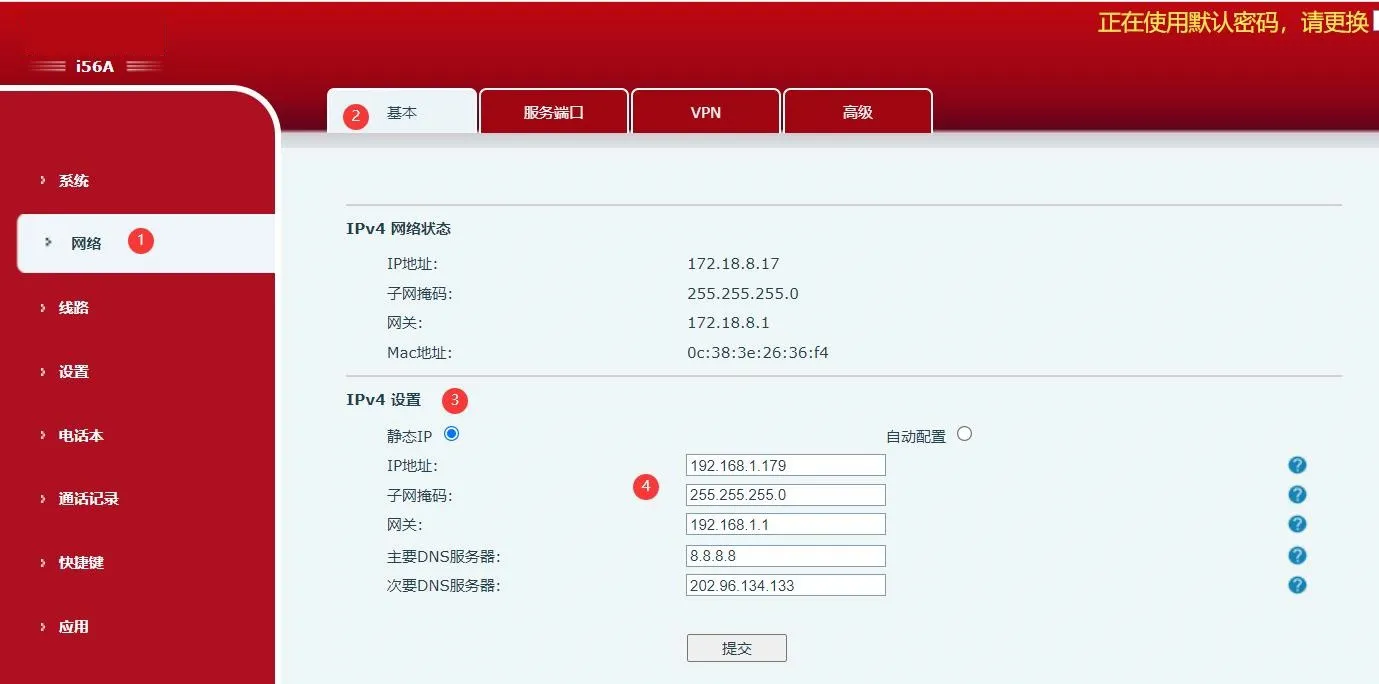
Go to Network → Basic → IPv4 Settings.
Modify the network mode and IPv4 address information as required.
Method 1: Configure from the device screen
From standby mode, open Settings → Advanced and enter the default password admin.
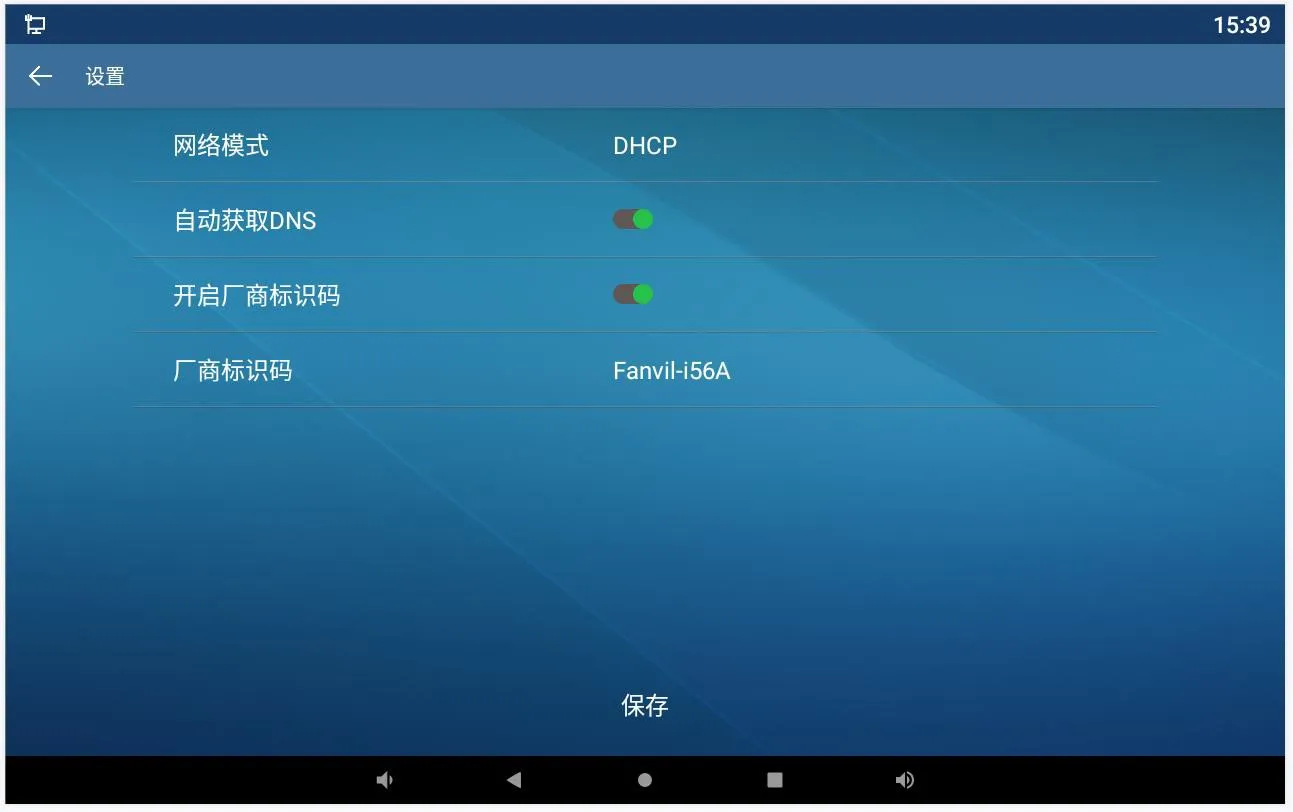
Go to Network → Ethernet.
Change the network mode to Static.
Enter the desired static IP address details and save the settings.
Method 2: Configure from the web interface
Enter the current IP address in a browser to access the web interface.
Log in with the appropriate credentials.
Go to Network → Basic → IPv4 Settings.
Update the IPv4 configuration and save the changes.
When checking or changing the IP address, make sure the device and the PC are on the same reachable network segment. If the device has been switched from DHCP to static IP, confirm the new address before attempting to log in through the browser. During commissioning, it is also recommended to document the final IP address, subnet mask, gateway, and VLAN information for each endpoint to simplify later maintenance.
For large deployments, using a consistent IP addressing plan and verifying each terminal after configuration can help reduce troubleshooting time and improve installation efficiency.
Yes. All models covered in this guide provide a local method to view the IP address from the screen or quick settings interface.
You can switch the network mode to static IP on the device itself, but full editing of the static address is completed through the web interface.
In most cases, the PC is not in the same subnet, the device is not powered correctly, or the network connection between the PC and the endpoint is not available.